How to Make a DIY Garden Fence with a Door to Keep Rabbits Out (Under $100)
I planted bell pepper seedlings and woke up the next morning to find them half-eaten. Mr. Rabbit had found my garden.
I had been growing tomatoes successfully for weeks, so I was not about to let one hungry bunny shut down the whole operation. The problem was my garden has an awkward curved edge along one side, so I could not just buy a pre-made fence panel and call it done. I had to build one.
This tutorial shows you exactly how I did it. It works even if your garden has a weird shape, a tight corner, or sits right up against your house. No special tools, no experience needed.
Table of contents
- What You Will Build
- How to Build the Garden Fence
- Step 2: Hammer each stake 6 to 8 inches into the ground.
- Step 3: Measure 1.5 feet between each stake.
- Step 4: Plan your door location before you continue.
- Step 5: Place the door frame in the ground, then continue with the remaining stakes.
- Step 6: Staple the black netting to each stake.
- How to Build the Garden Door
- More DIY Home and Garden Projects
What You Will Build
A custom-fit garden fence using black plastic netting and wooden stakes. It follows any shape, costs almost nothing, and keeps rabbits and dogs out without a single power tool. Total cost: under $120. Total time: one afternoon.
Supplies You Will Need
Affiliate disclosure: This post contains affiliate links. If you buy through my link, I may earn a small commission at no extra cost to you. I only recommend products I have personally used or would use.
For the fence:
- 2 rolls of 36″ x 15ft black plastic garden netting — ($29 each)
- 1 pack of 24 Wood sticks 36″ tall — one every 1.5 feet along your perimeter ($24.90)
- Staple gun (we already had one) ($14.99)
- Hammer (to secure staples and drive stakes) ($6.29)
- Leveler (to keep stakes straight) ($3.88)
For the door:
- 2 pieces of wood cut to 24″ x 1″
- 2 pieces of wood cut to 30″ x 1″
- 2 hinges — ($5.99)
- 8 screws, 1 to 1.5″ long ($6.99)
- 1 small door lock (we used a zip tie for now) ($8.99)
If you only buy one upgrade: Spend the $5.99 on proper hinges. A door that flops open defeats the whole purpose of building the fence.
How to Build the Garden Fence
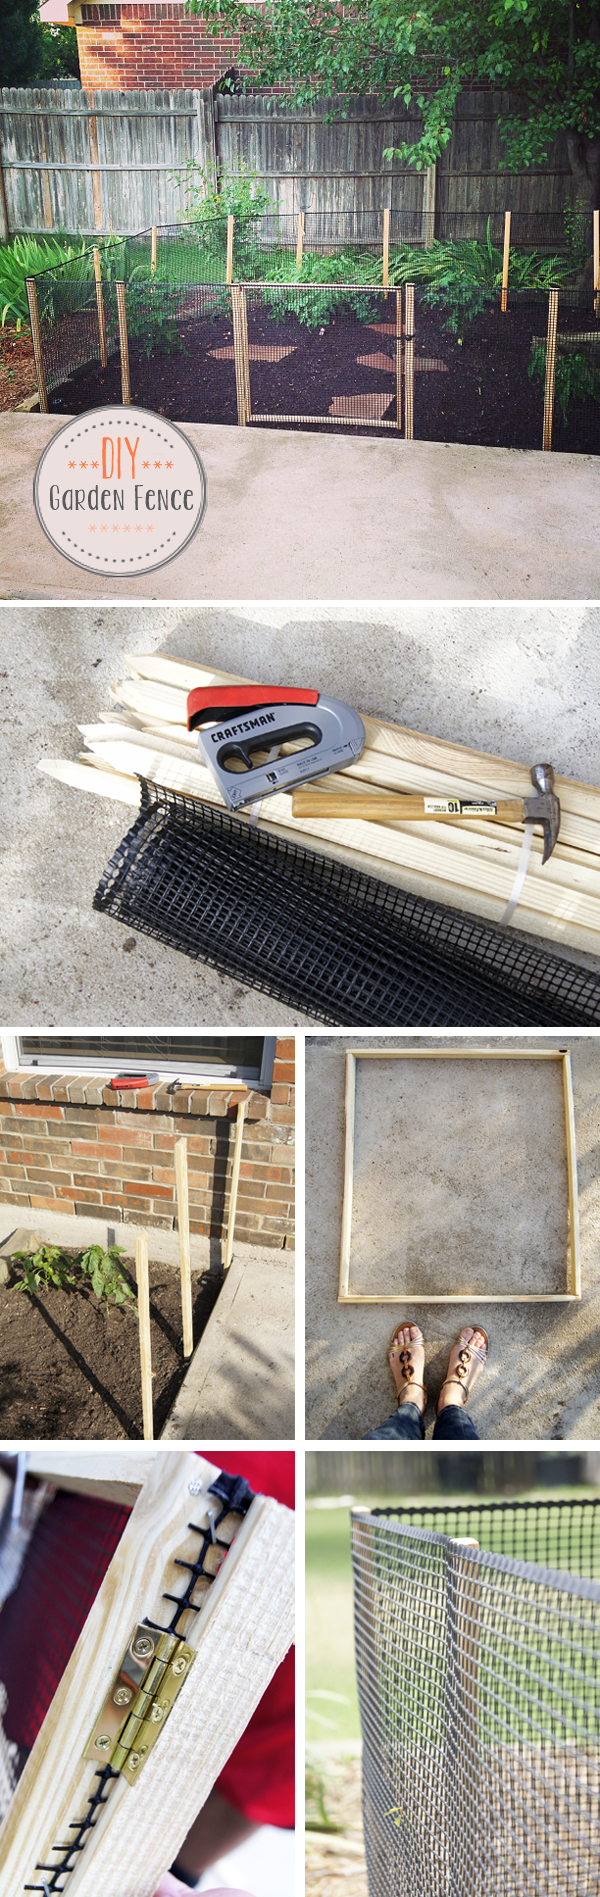
Step 1: Place Your First Stake at the Corner
You can mark the depth on the stake first so you stay consistent. Our ground was sloping in spots, so we adjusted as we went and used a leveler to keep everything straight.
Step 2: Hammer each stake 6 to 8 inches into the ground.
Continue placing stakes around the full perimeter, spacing them 1.5 feet apart. This closer spacing is what makes the plastic netting work well. It keeps the net from sagging and leaves no gaps for animals to push through.
This spacing is especially helpful for curved sections. The more stakes you use, the better the netting follows the shape of your garden.
Step 3: Measure 1.5 feet between each stake.
This spacing is what keeps the netting tight. Go wider, and the net starts to sag and bow out.
Step 4: Plan your door location before you continue.
Leave a gap where you want the door to go. After the third stake, we placed our door frame in the ground. More on how to build that below.
Step 5: Place the door frame in the ground, then continue with the remaining stakes.
Work your way around the full perimeter until all stakes are in place.
Step 6: Staple the black netting to each stake.
This step is much easier with two people. One person stretches the net taut, the other staples it on. Use a hammer to fully drive the staples in after. Work your way around the full fence line.
How to Build the Garden Door
The door is the part that makes this fence actually practical. Without it, you are climbing over or dismantling a section every time you need to get in. It is simple to build and only adds a few dollars to the project.
- Align your wood pieces. You need 2 pieces at 24″ x 1″ and 2 pieces at 30″ x 1″. I used the remaining wood pieces from our wooden pack, and my husband cut them to size.
- Nail the pieces together into a rectangle with screws, then staple the black netting onto the outside. Cut the netting to fit the frame and pull it taut before stapling.
- Attach 2 hinges to the door frame. Place each hinge about 1 to 1.5 inches from the end of the frame on the same side.
- Screw the other half of each hinge onto a dedicated wooden stake. Place that stake into the ground in your door gap, leaving enough room for the door to open and close freely. That stake becomes your door post.
Tips That Make This Fence Actually Work
- Use a leveler on every stake. Uneven stakes make the netting bunch up and look sloppy.
- Two people makes the stapling step so much faster. One stretches, one staples.
- Plan your door location before you start hammering stakes. It is much harder to adjust after.
- The 1.5-foot stake spacing is non-negotiable with plastic netting. It needs the support to stay taut.
- Black netting blends into the garden much better than metal wire. From a few feet away you barely notice it.
- Check stakes and netting after heavy rain. The ground can shift and loosen things up.
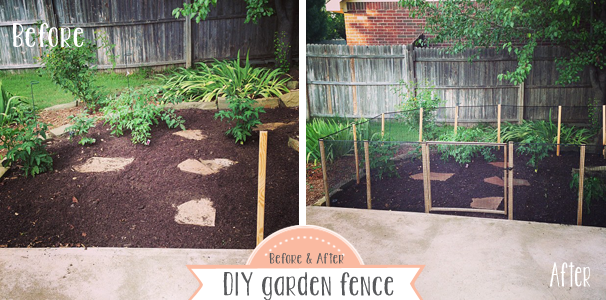
Did It Work?
Yes. Mr. Rabbit has not been back. My bell peppers survived, and I went on to plant the rest of my vegetable garden without losing a single thing.
The fence is simple and it is not the most beautiful structure in the yard. But it does exactly what we needed. And having the door means I can actually get in to water, weed, and harvest without any fuss.
Total spend: Around $55 for the netting plus $5.99 for the hinges. Everything else we already had. Even buying stakes and screws new, you are comfortably under $100.
More DIY Home and Garden Projects
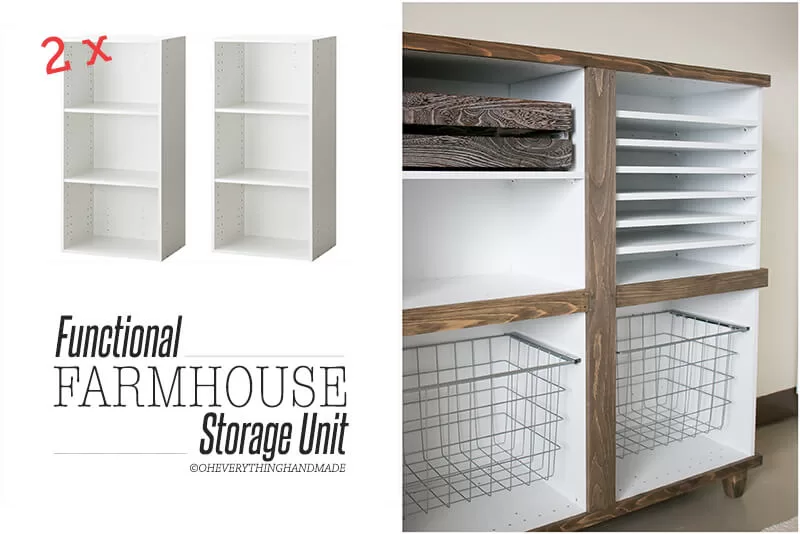
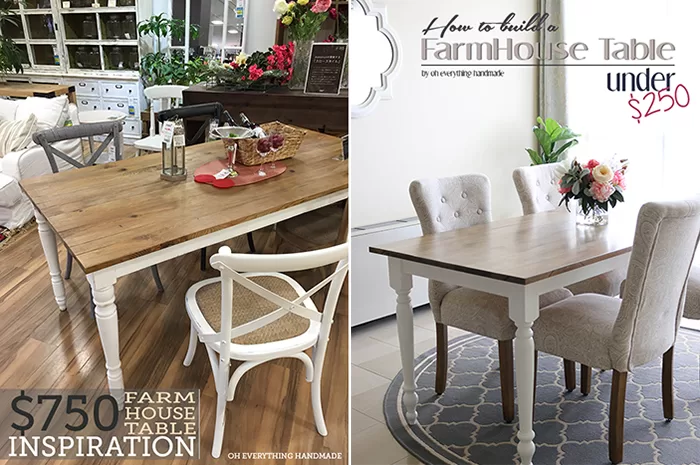
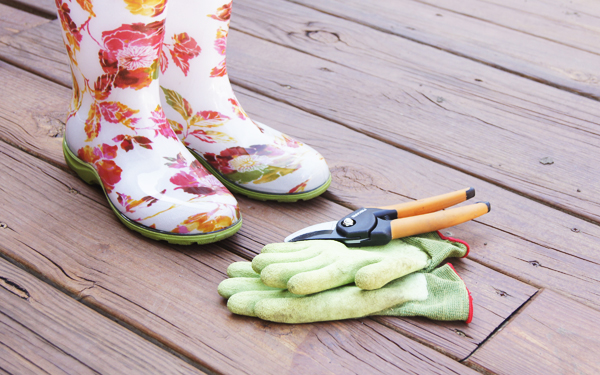
Functional Farmhouse Storage Unit | Farmhouse Table with Apron & Corner Brackets | Working in the garden!
-
Functional Farmhouse Storage Unit
If you are on my Instagram then you may have seen a glimpse of my new Functional Farmhouse Storage Unit. So…
-
FarmHouse Table with Apron & Corner Brackets
Hope you all had a great 4th of July weekend! And because its Monday – I wanted to finally share “How…
-
Working in the garden!
It has been quite some time since I had a garden, I love gardening and growing my own produce! Last…