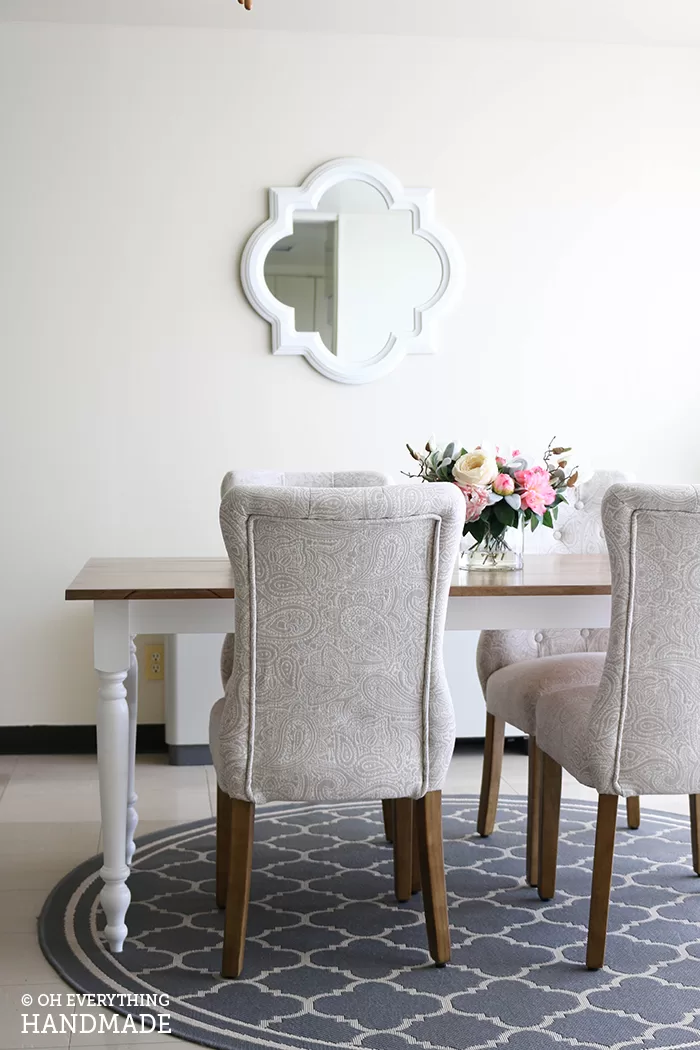
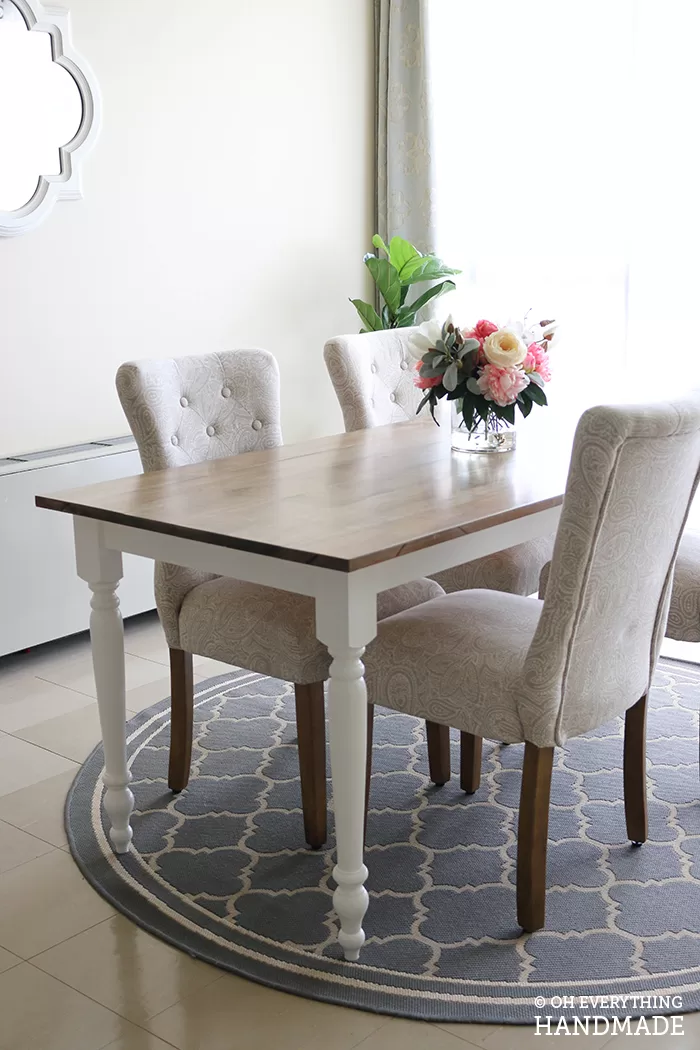
FarmHouse Table with Apron & Corner Brackets

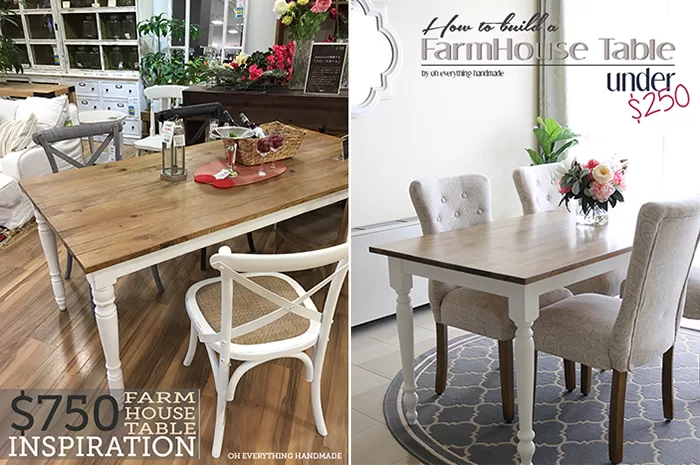
Hope you all had a great 4th of July weekend! And because its Monday – I wanted to finally share “How I build a FarmHouse Table under $250”. A FarmHouse Table with Apron & Corner Brackets was always something I wanted to build or own. I had previously build a dining table, but the new house owners requested to add the table to the contract.
So, we left the states without a table… the first week after we moved into our Japan housing, we ate from the kitchen counters (of course from our plates), while sitting on the floor or we went to restaurants. I got tired of it really fast, but I didn’t want to have government furniture — that’s when we went to a furniture store to look for some chairs and a table.
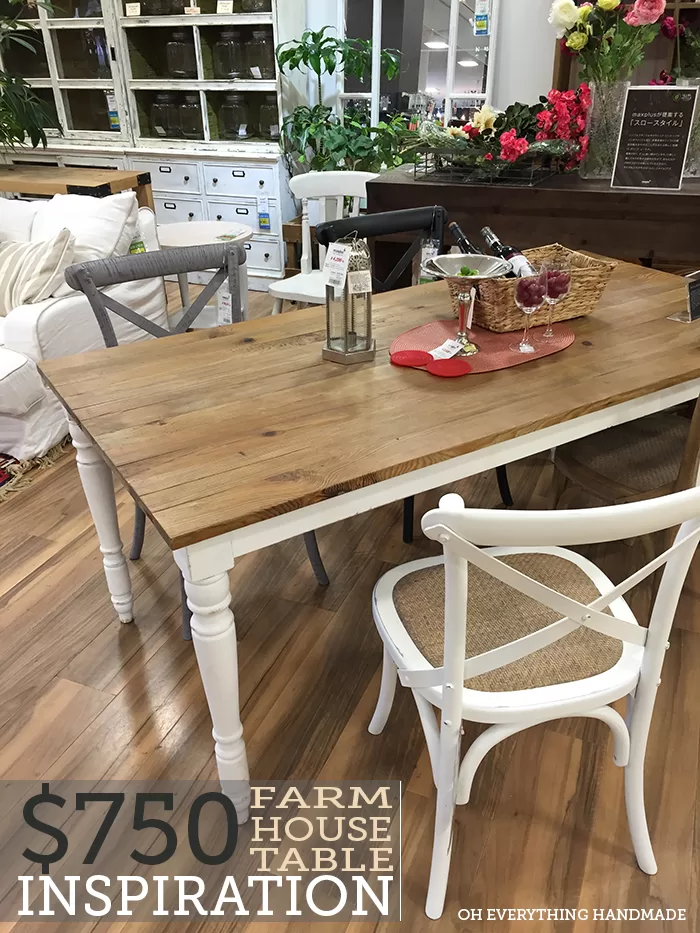
Little I knew that Japanese furniture can come with a hefty price tag, this FarmHouse Table was beautiful but the price tag literally made me choke. $750+ tax, and that did not even include the chairs. I almost bought the table, but something told me not to. The next day, I had the brilliant idea to pay the woodshop facility a visit. Next thing I knew, I was picking out wood for the table.
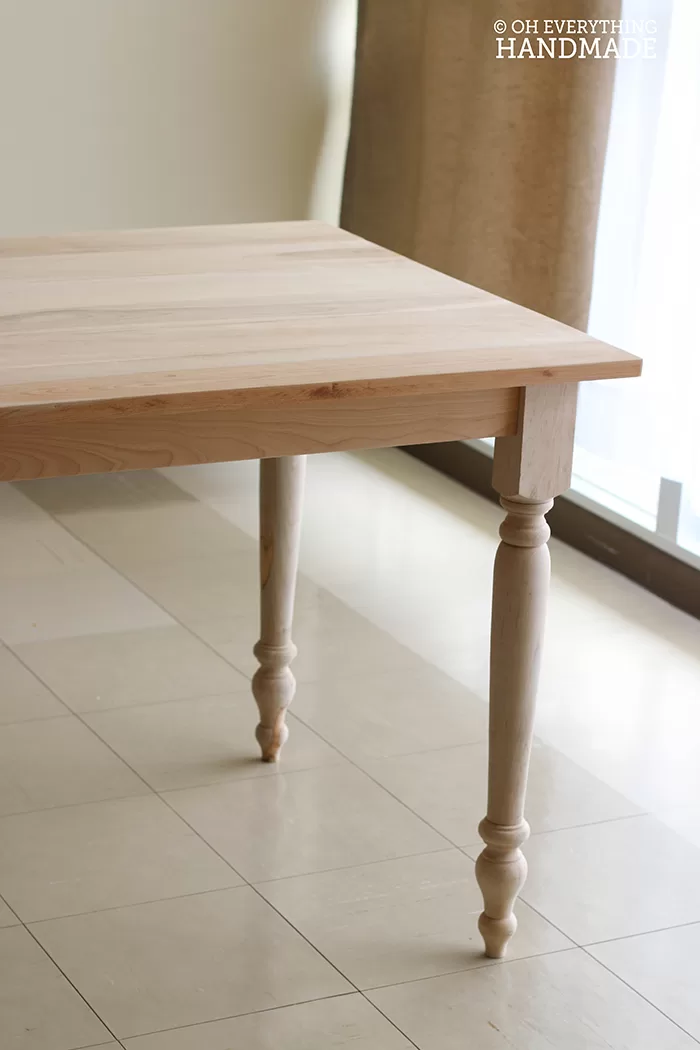
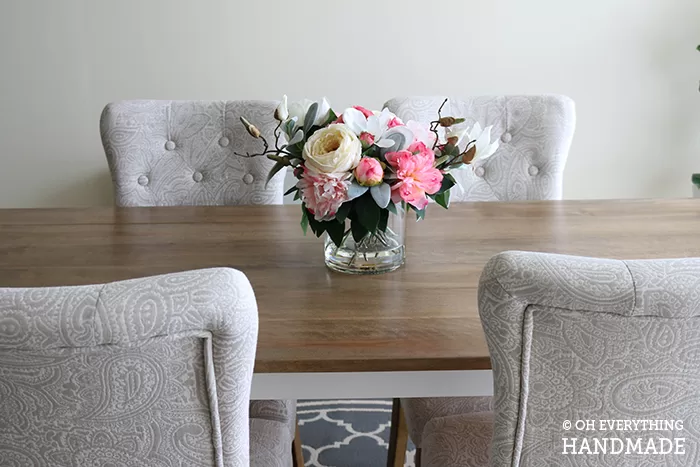
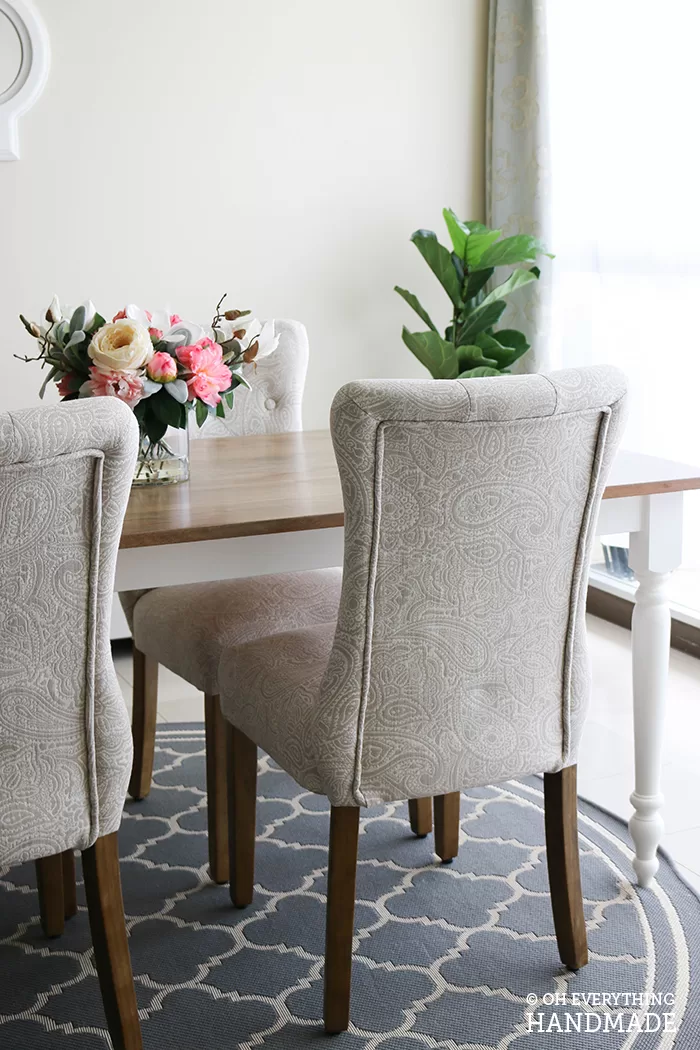
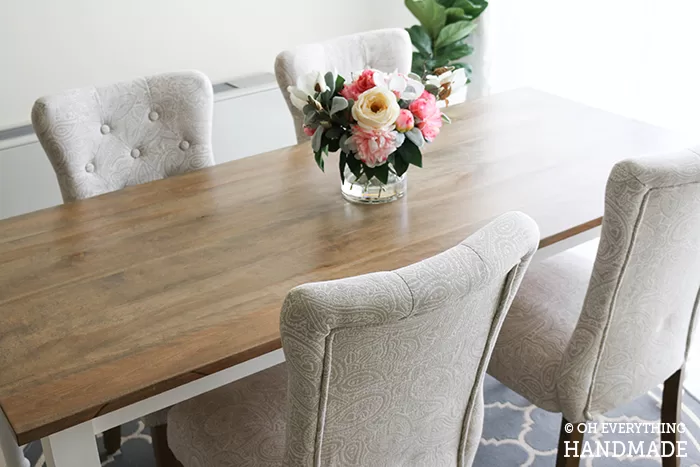
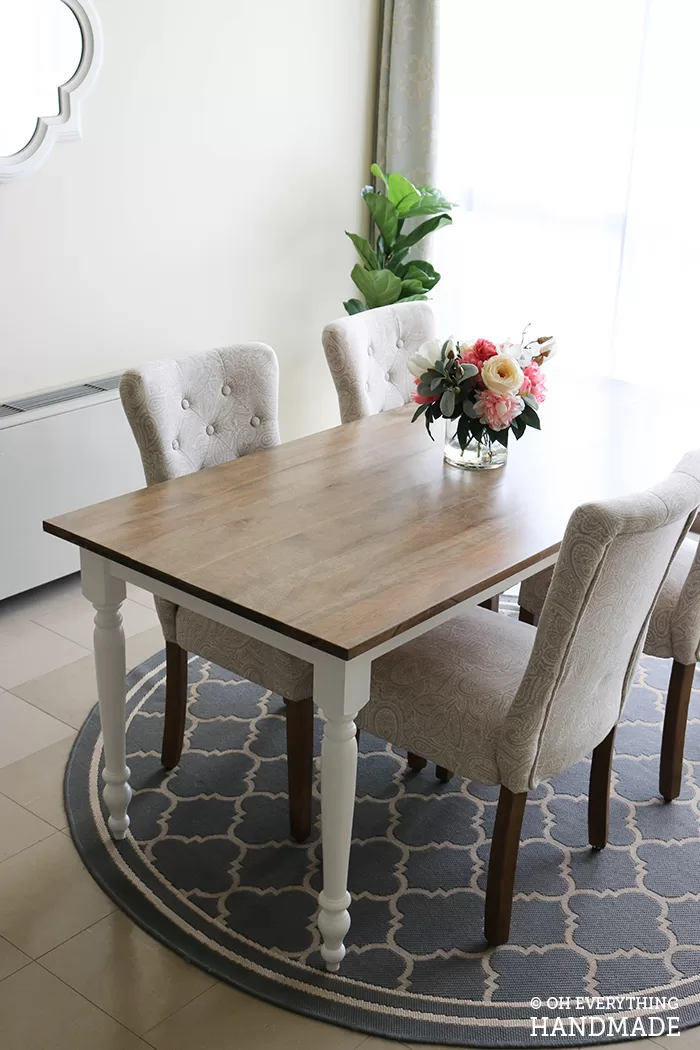
I decided to make a smaller table this time, it ended up measuring 72″x32 with 29″ table legs.
Material you need:
- 6 – 72″x 5.33″ (that’s the size they had at the woodshop, but you can go with any width as long as you reach 32″ at the end)
- 6 – 8 Clamps is recommended
- Apron boards: 2 – 3″x63″ and 2- 3″x23″
- 4- 29″x 3″diameter Table legs
- Corner Brackets: 4 – 3″x4.5″ on the inside
- Miter saw
- Screws
- 8 – 8mm Threaded rods
- 8 – 8mm Threaded Inserts
- Kreg jig
- Wood glue
- Sander, Sandpaper
- Measurement tape
- Pencil
- Stain, Sealer and MilkPaint
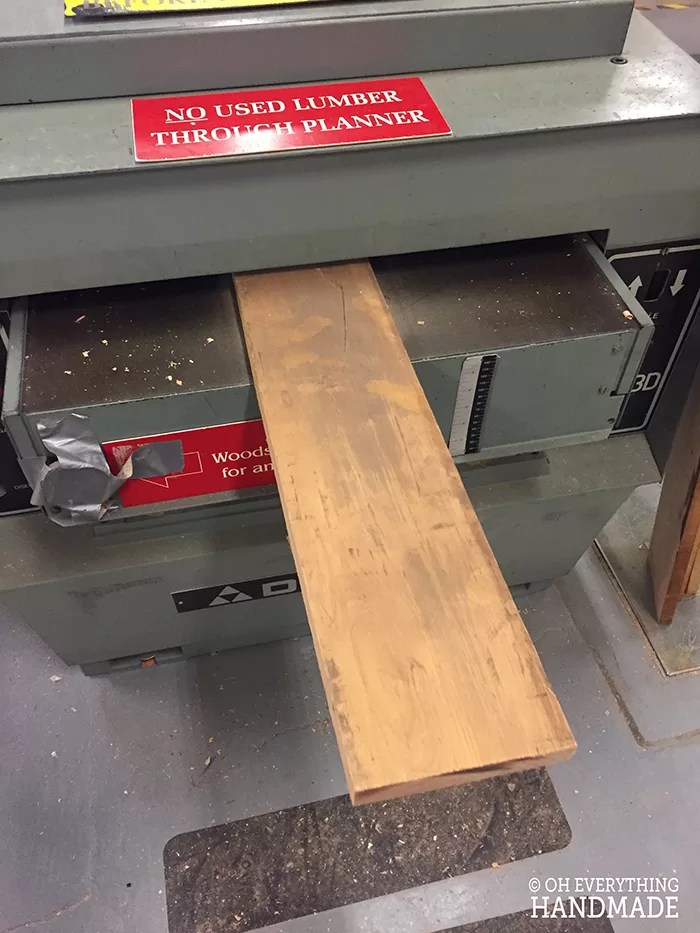
Since the woodshop had only enough birch left for me to make a table with, that’s what I went with! My first day at the shop was super fun, and I got to work on so many new machines, like this planner.
After all boards went trough the planner I laid them out on a glue station, and rearranged the boards until I liked the look.
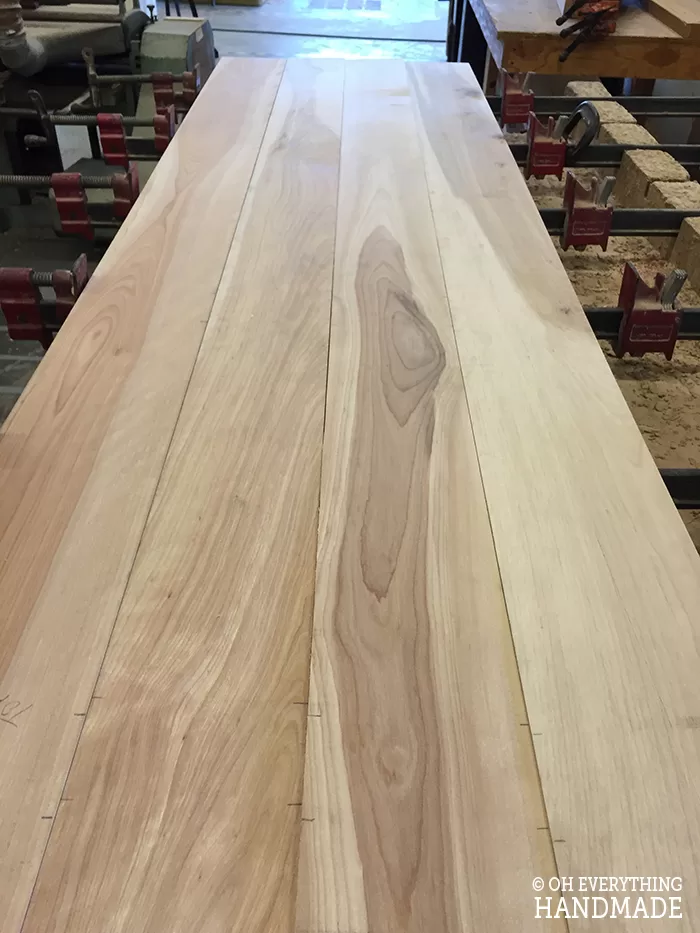
If you look closely, you can see some pencil marks. They are there because I was going to use chips to connect each board. But the woodshop workers told me it would be better not to do that. Because each board will slightly buckle even after it goes through a planner, the chances are slim to get them aligned 100%.
Instead we glued each side, and laid the boards next to each other on the glue station. Clamps are a must for this project! I was told that if I start clamping in the middle first, I can adjust the boards clamp by clamp.
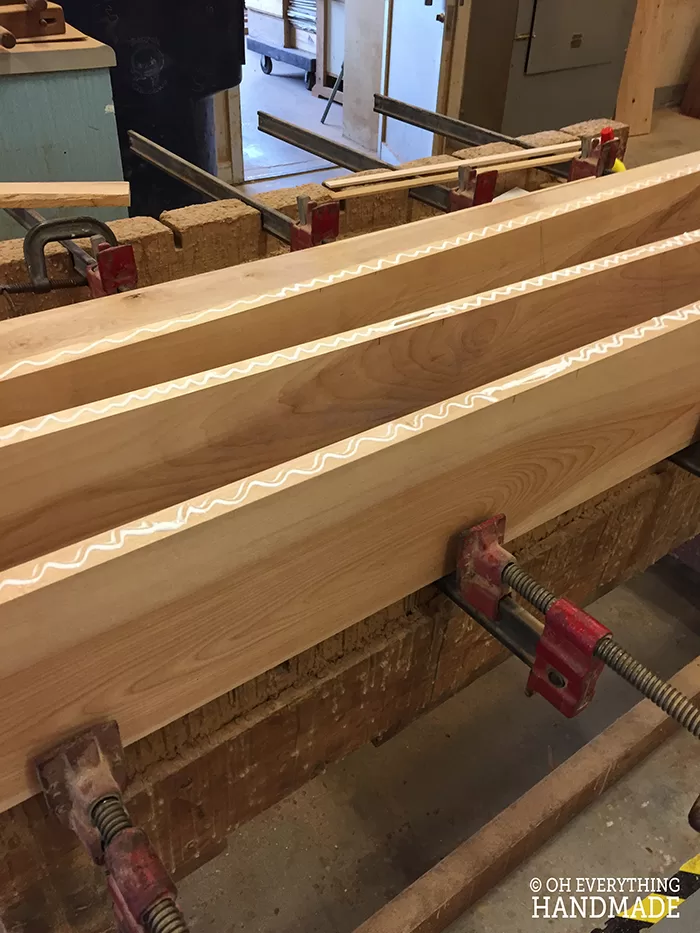

I used 10 clamps in total, 3 along the top so the table won’t buckle, 5 along the bottom, and 2 on the side since I had some boards bend down on the outside.
Once the table is glued, you need to let it dry for at least 24 h before you sand the top!
My next step was to cut the apron boards (see measurements above), and the corner brackets. They measured 4.5″ in length on the inside and were 3″ tall. I also used a kreg jig on them.
I used a miter saw to cut each bracket at a 45 degree angle.
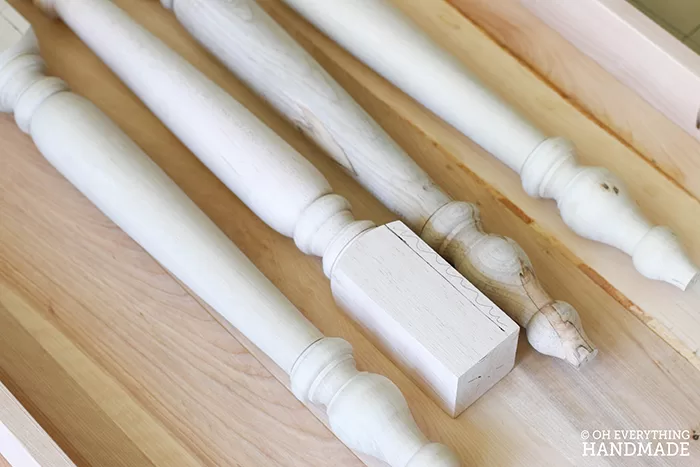
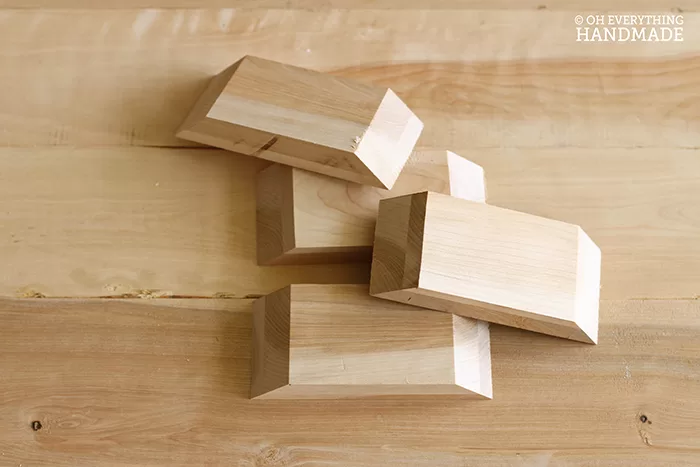
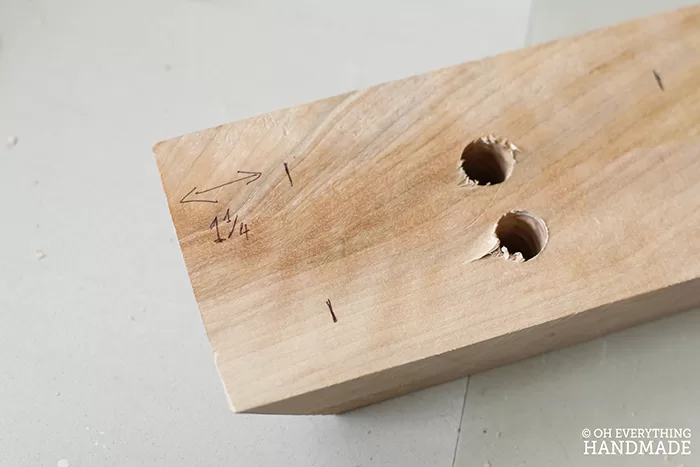
Table legs are next, since I wanted to use threaded inserts for the leg attachment, I had to shave the corner off that was pointing to the inside.
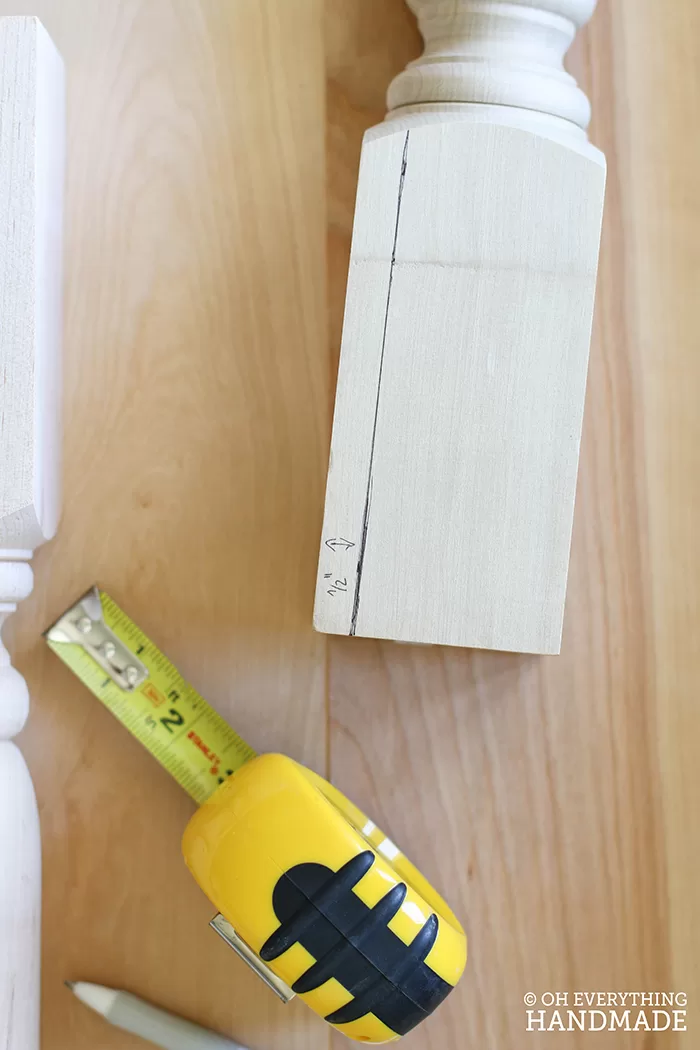
1/2″ was cut off with a table saw, which I set to a 45 degree angle.
I measured 3″ from the bottom up and divided the line in 3 (do not worry about the last line), I only needed the two marks which are marked at 1″ and 2″.
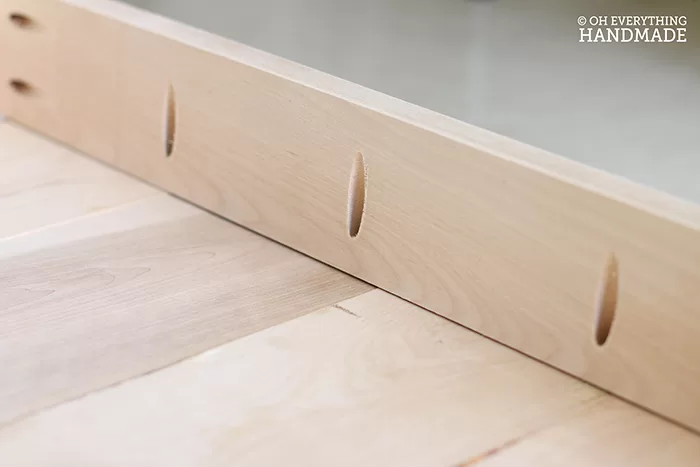
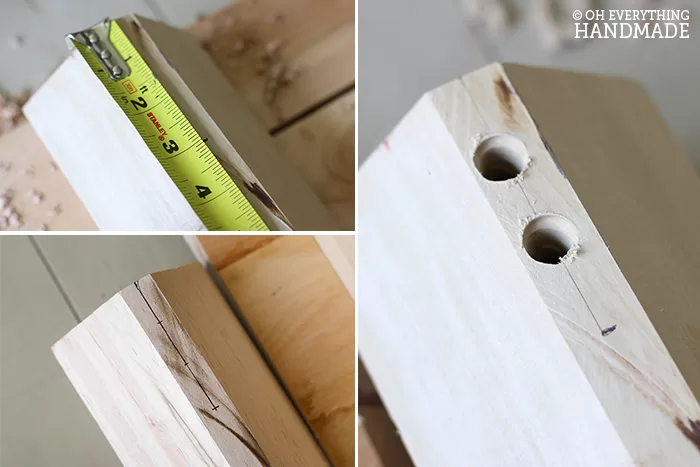
After the legs were ready, I measured out the alignments and placed the apron boards down for attachment. To sew the boards in I clamped the boards down with a clamp before drilling in the screw.
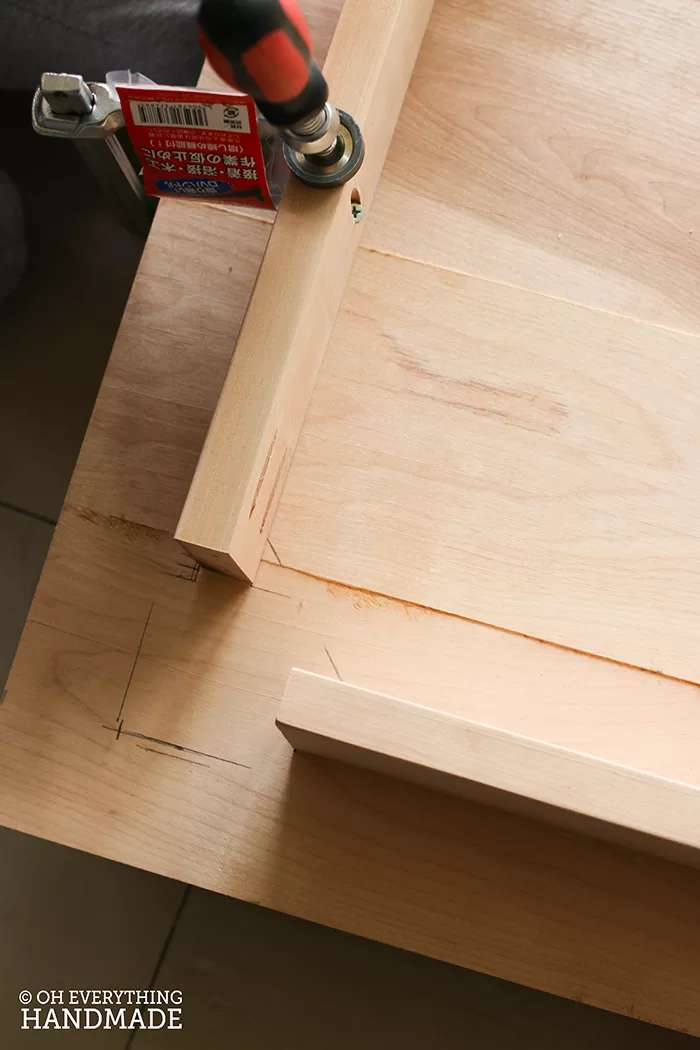

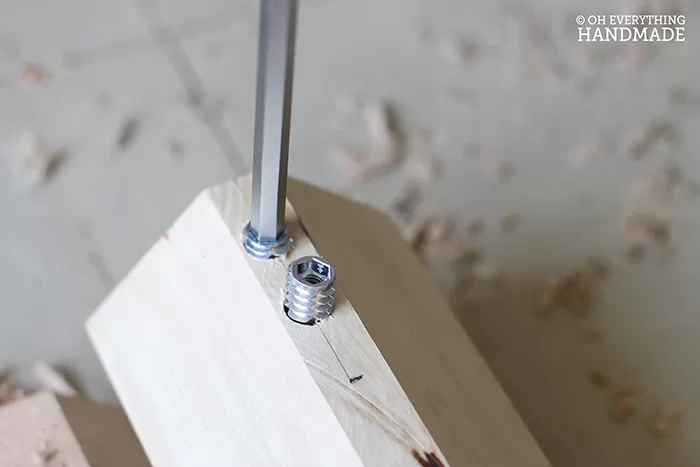
This next step was to drill in holes for the threaded rods and the side screws. Make sure you always pre-drill your wood, otherwise it may crack and you have to make another piece.
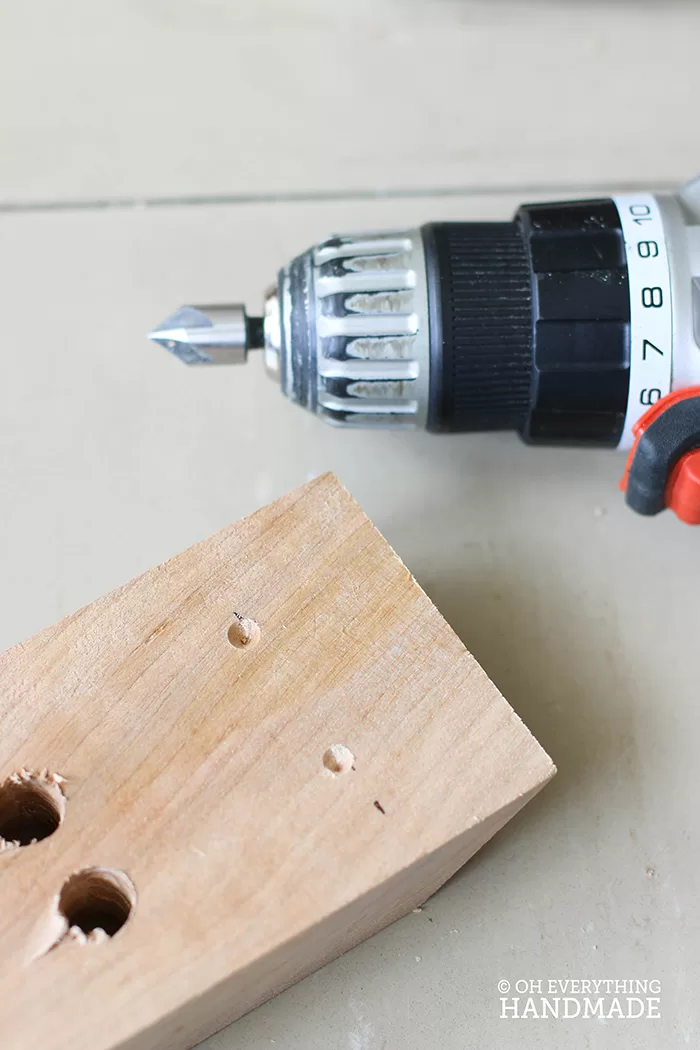
In order for me to be able to drill in at a 45 degree angle I had to pre-drill a small hole so my drill bit was staying in place. I used the Kreg jig drill bit, which made the perfect holes for my screws (do not drill all the way through, only about half way).


The holes may not fit exactly for your rods, but if you use a bigger drill bit you will have a bit more space to wiggle them through.
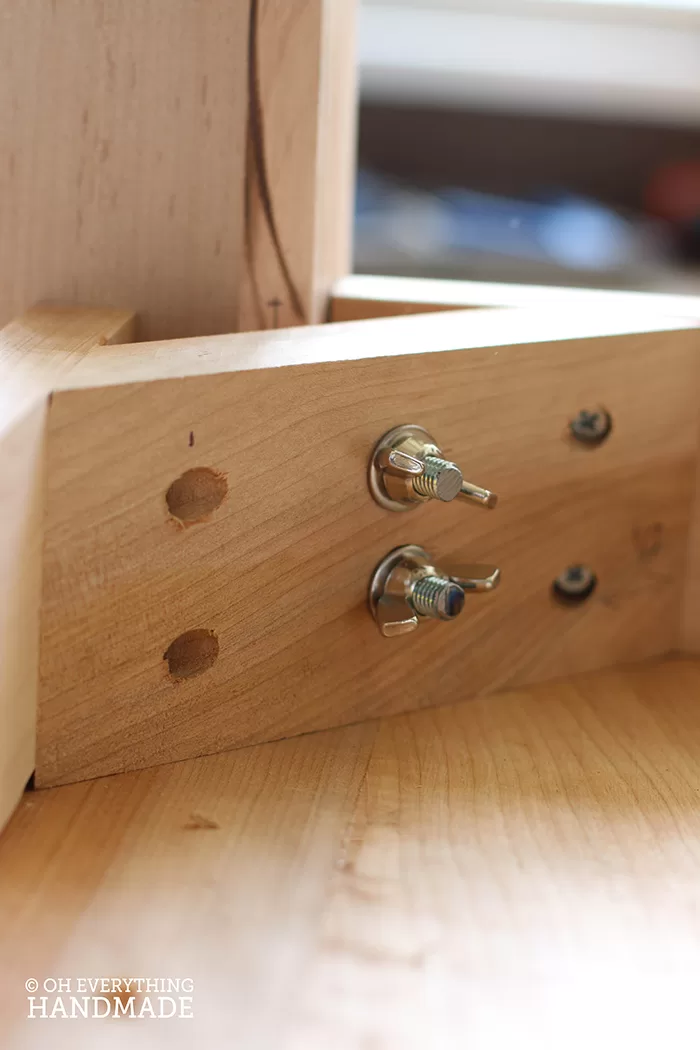
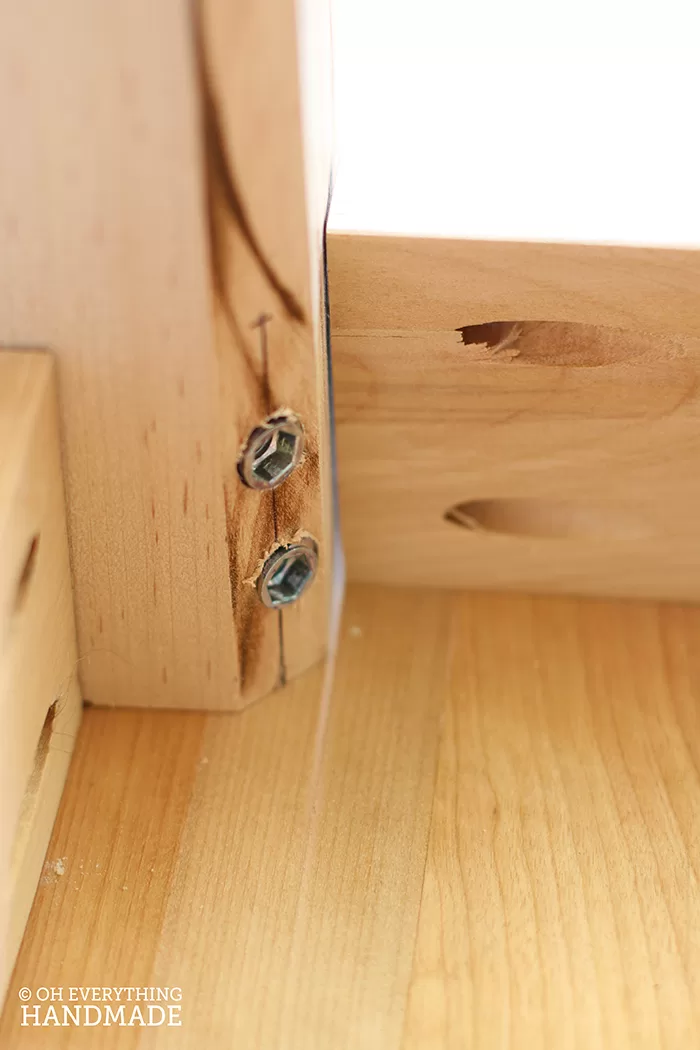
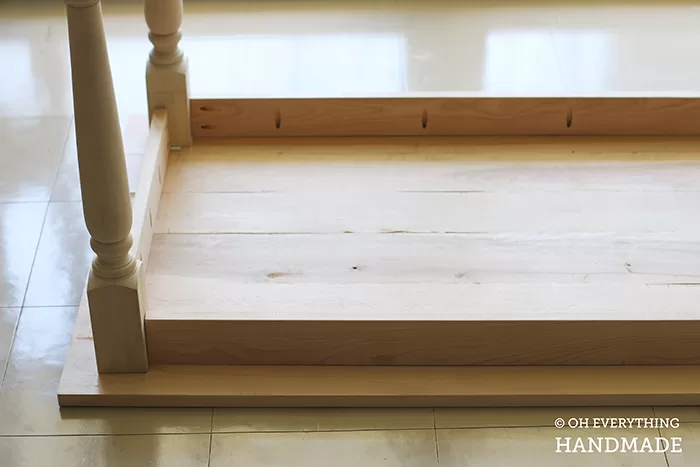
Once attached this is what it looks like! I used butterfly knots because they are easier to handle.
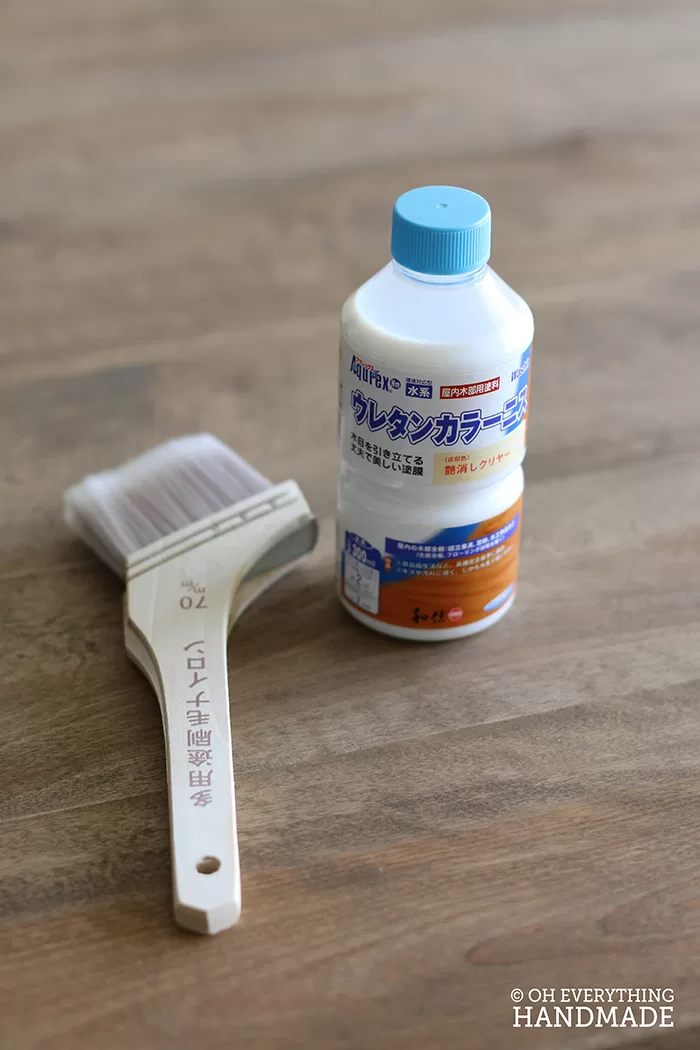
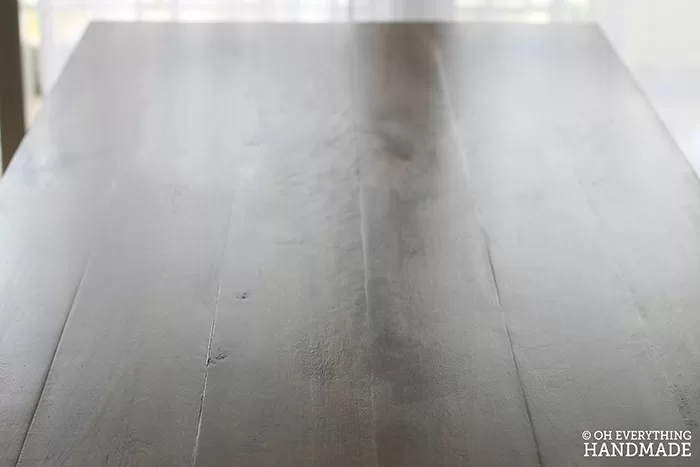
Then we turned the table right side up, and I started applying the stain to the top and white Milk paint to the Apron and the legs.
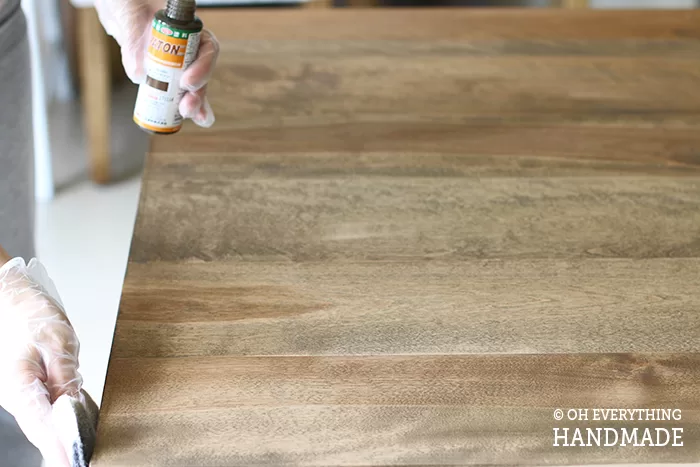
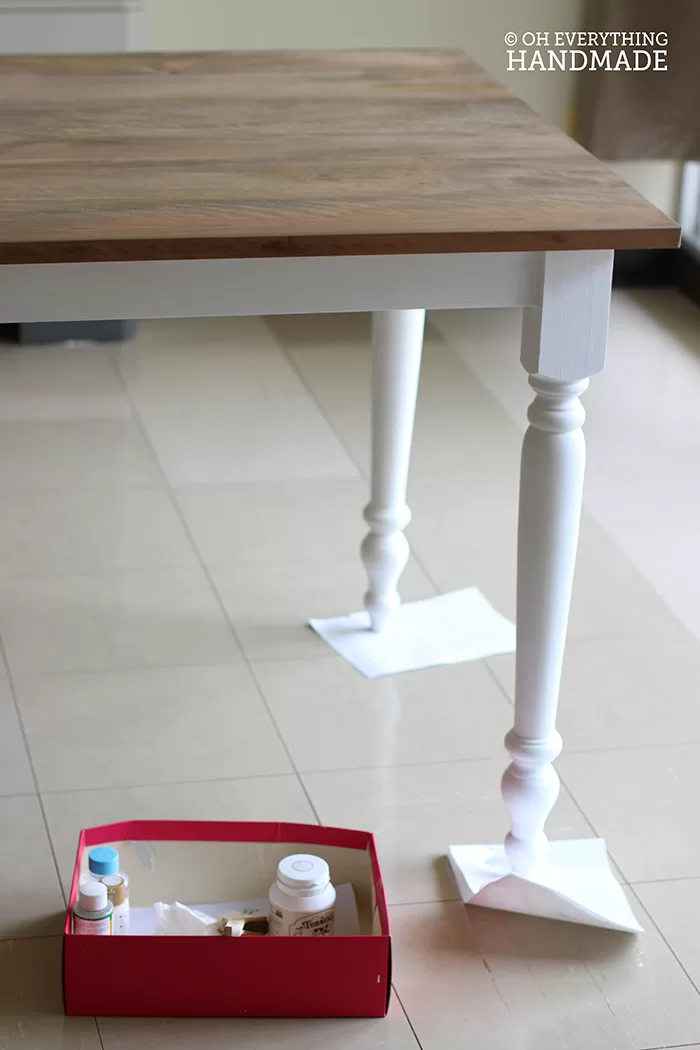
After about 2-3hours of dry time, I applied the sealer which was a Japanese brand (matte, water based). So was the stain, which was great because the house didn’t smell at all.
FarmHouse Table with Apron & Corner Brackets Finished Project

Wow, if you are still here, thank you for staying until the end. This was longer then I anticipated, but I wanted leave a detailed tutorial. Hope you enjoyed the post, and please share this tutorial on pinterest and facebook.
Have a wonderful Monday.