Functional Farmhouse Storage Unit
If you are on my Instagram then you may have seen a glimpse of my new Functional Farmhouse Storage Unit. So today I’ll be showing you exactly how I made the unit.
I haven’t been working in my office for at least a month or two. It was so cluttered and unorganized, I just didn’t feel like being in my office at all. Until last week when I drew a vision of a storage solution on paper that my husband loved.
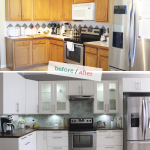
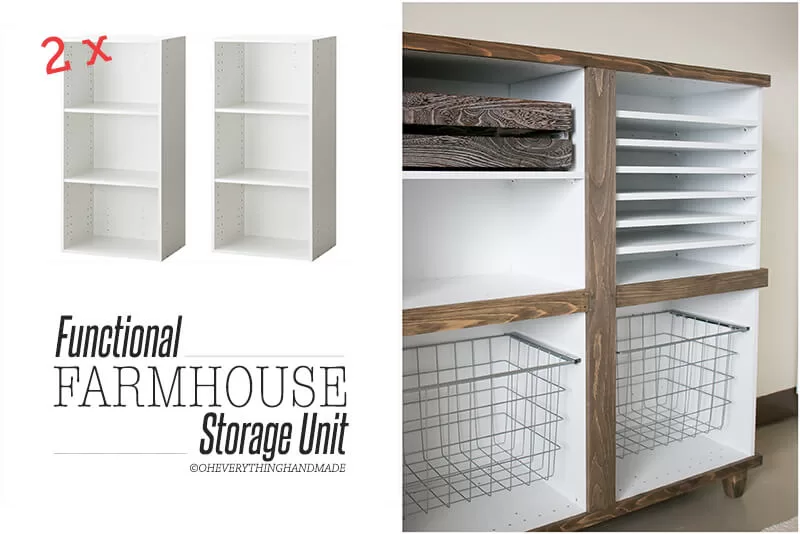
Building the unit wasn’t hard at all, I used manufactured cabinets and simply framed them to achieve the custom farmhouse look I was going for.
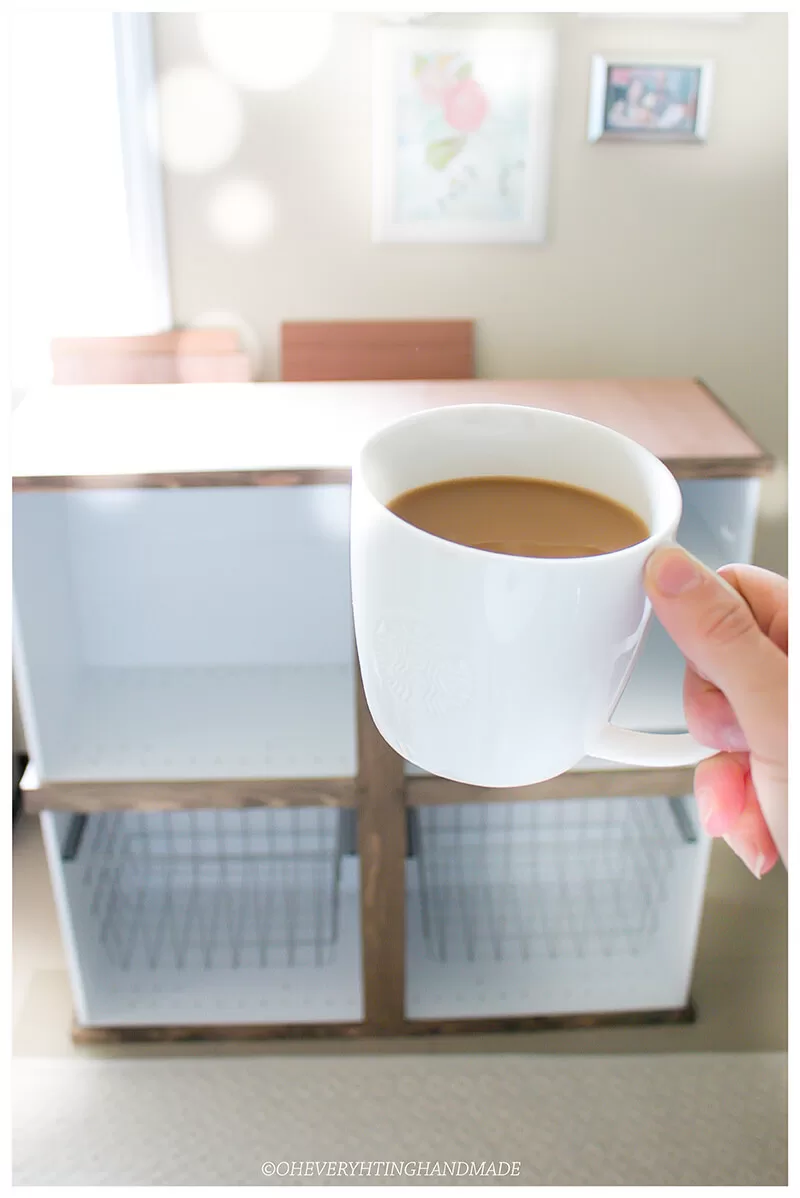
My Saturday morning
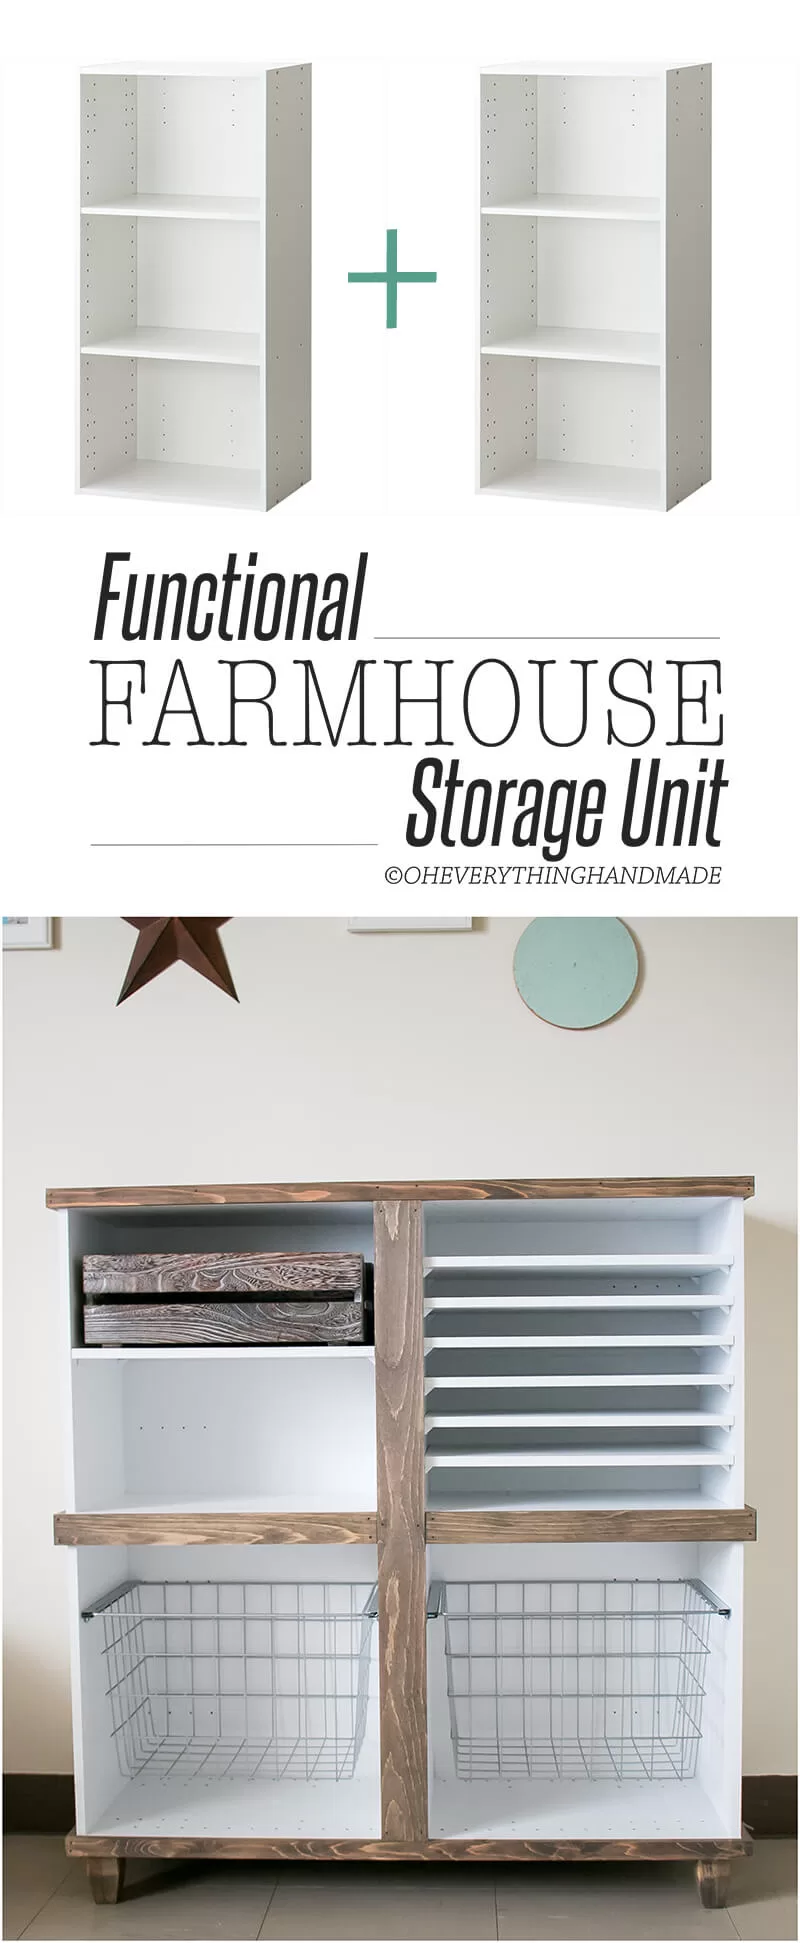
After looking at all my options here on the island (Okinawa, Japan that is!), I went to one of my favorite store called Nitori, they had super affordable storage units in the size I needed for only $10 each.
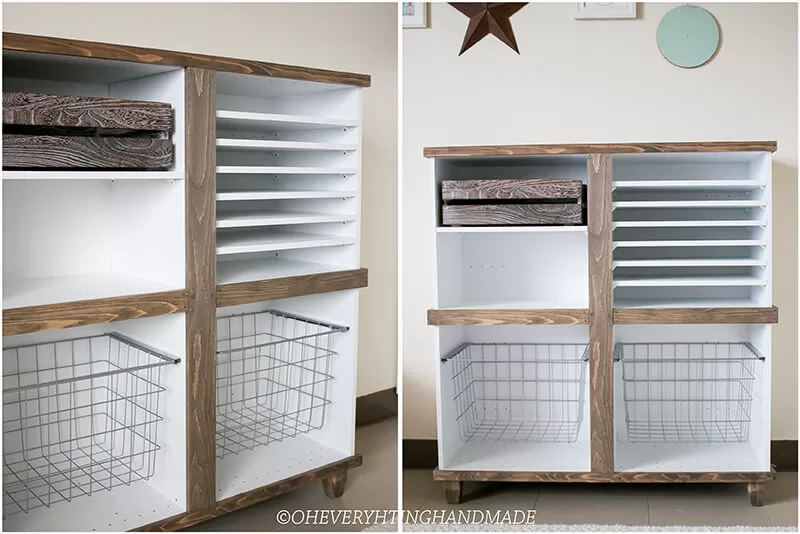
These units can be displayed horizontally or vertically, I went for the vertical display because I planned to frame the units and also display them lower as if they were standing upright.
Material
|
|
Instructions
Step 1.
- Assemble the units
- Add as many shelves to the units as desired
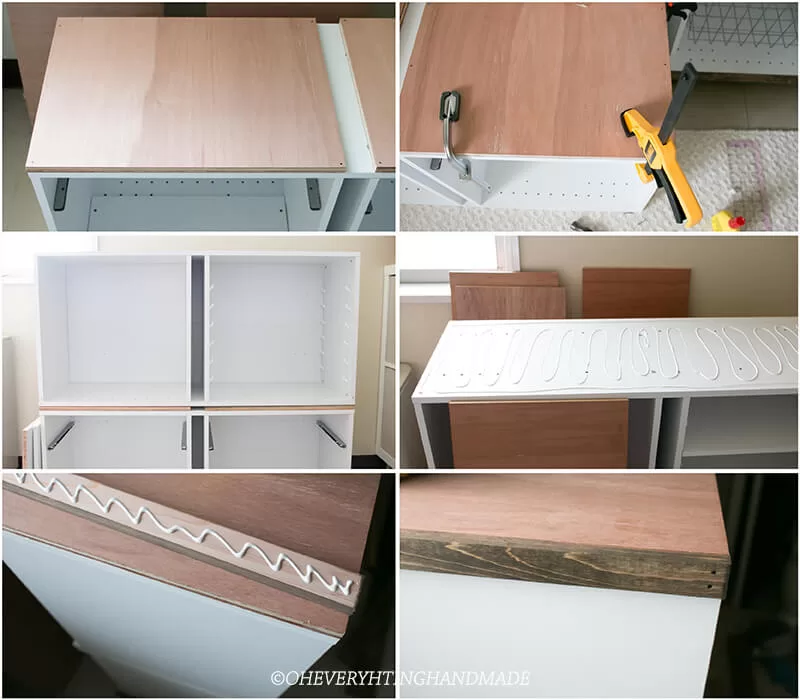
Note: Although my cabinets had flathead screws that came with the cabinets, I had to countersink them so the plywood was sitting flush on top of the surface.
Step 2.
- I started with the middle section, which was the top of the bottom cabinet. I measured and cut the plywood to the same size as the cabinets length.
- Apply a generous amount of glue to the cabinet and place the sheet(s) of plywood on top. To keep it from moving around clamp the plywood to the cabinet and attach the plywood with nails.
- Repeat these steps to apply the plywood to the bottom and the top of your cabinets.
Step 3.
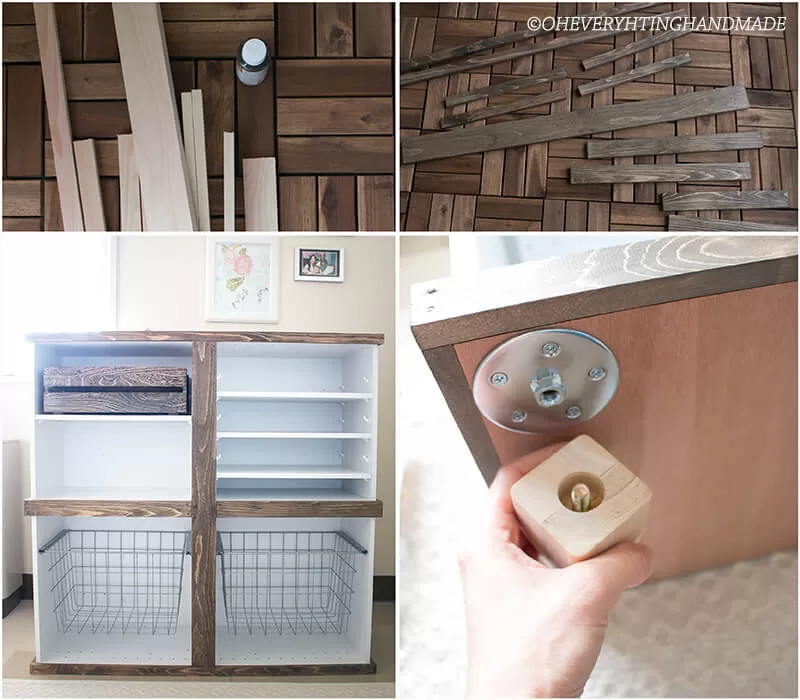
- While everything is drying, cut, sand and stain the frame boards.
- Glue and attach the stained boards with nails to the outside of your cabinets, along the edges of your plywood and cabinets.
- Finish staining the cabinets plywood top, and seal once dry.
- I also attached 3.5″ tapered legs to the bottom of my storage unit, for the perfect height.
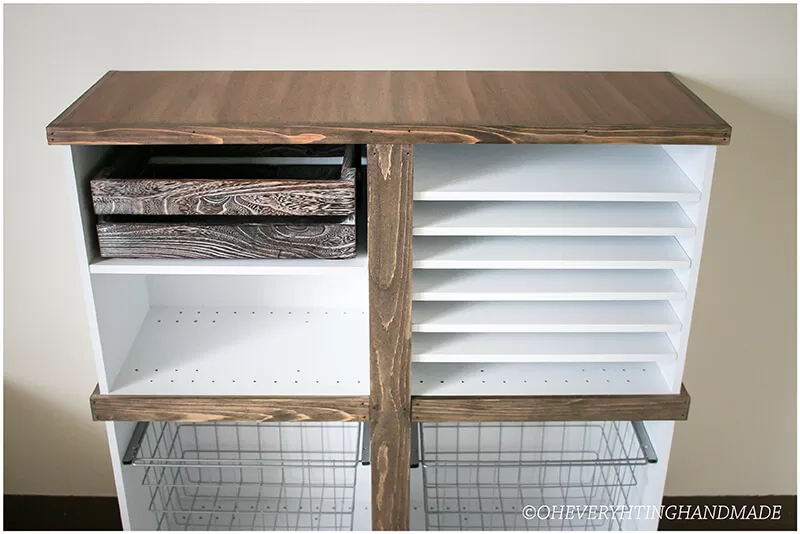
Due to the crazy amounts of papers I have on hand for calligraphy, brush lettering and watercolor projects, I added 6 shelves on one side just for that.
The wire baskets will be filled with my beautiful fabrics, and also silk flowers from Afloral.com for upcoming projects.
// PIN ME //