How to Build a Kitchen Nook Bench (Step-by-Step for Beginners)
Our kitchen had no real seating. Just a small table pushed against the wall with chairs that never quite fit the space. I kept thinking there had to be a better way to use that corner.
That’s when I decided to build a kitchen nook bench from scratch. No carpentry experience required. Just a plan, some 2x4s, and a Kreg jig.
Spoiler: it became one of the best projects I’ve done. We sold the house a few months after finishing it, and the nook was one of the selling points. Buyers loved it.
In this post, I’ll walk you through exactly how we built it, from the frame to the finished painted bench.
What You Need
Before you start, grab your supplies. Most of these are available at your local home improvement store or on Amazon.
Lumber
- 12 pieces of 2×4 lumber (adjust based on your bench dimensions)
- 1 sheet of 3/4-inch plywood (for the front, sides, and seat top)
- Scrap wood or extra trim for filling gaps around the baseboard
- Wood trim for a finished look
Tools and Hardware
- Kreg Pocket-Hole Jig 520PRO (affiliate link) – this is the tool that makes everything easier
- Circular saw or table saw
- Power drill and drill bits
- Level
- Measuring tape
- Clamps
- Sandpaper (120 and 220 grit)
Finishing Supplies
- Gorilla All Purpose Wood Filler (6 oz) (affiliate link) – fills screw holes perfectly
- Primer
- Paint (we used 3 to 4 coats)
- Minwax Polycrylic Protective Finish – Satin (affiliate link) – 1 to 2 coats for durability
- Paintbrush and small foam roller
- Screw hooks (to secure the bench to the wall)
How to Build a Kitchen Nook Bench: Step by Step
Step 1: Measure Your Space
Start by measuring the area where your bench will go. Our bench ended up being 12 feet long and 6 feet wide. Measure twice. Cut once. That rule exists for a reason.
Also decide on your bench height. Standard bench height is around 17 to 19 inches. Make sure it works with your table.
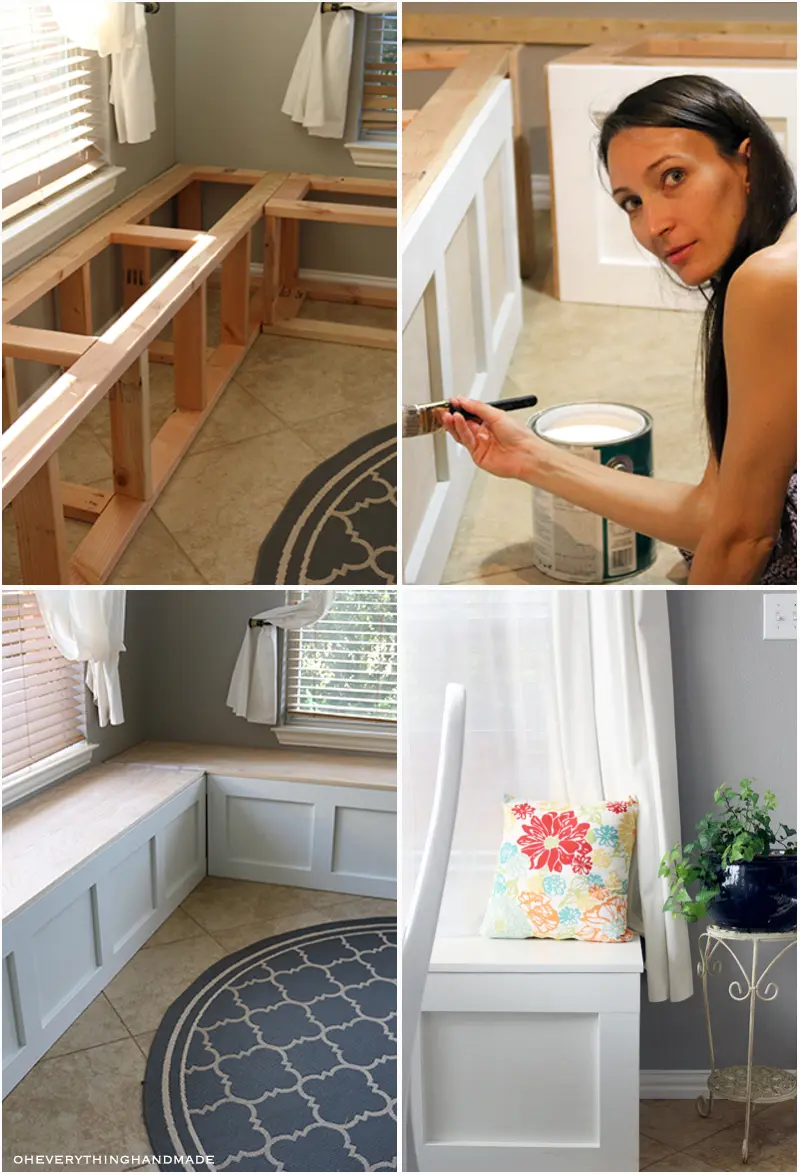
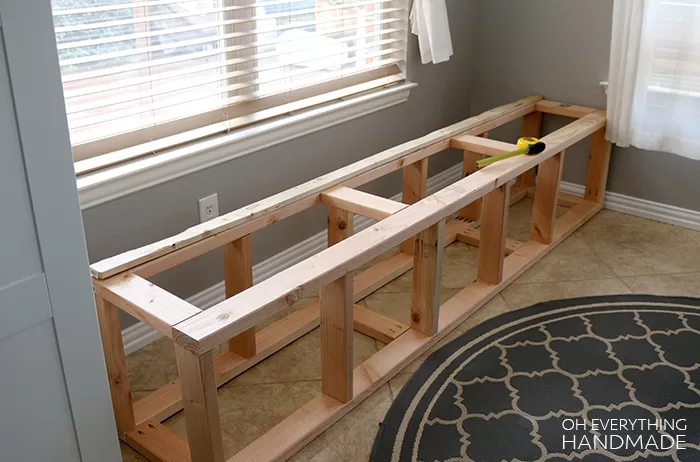
Step 2: Build the Frame
Use your 2x4s to build a rectangular frame. We used 12 boards total for our 12×6 foot bench.
- Cut your 2x4s to length using a circular saw or ask your home improvement store to cut them for you.
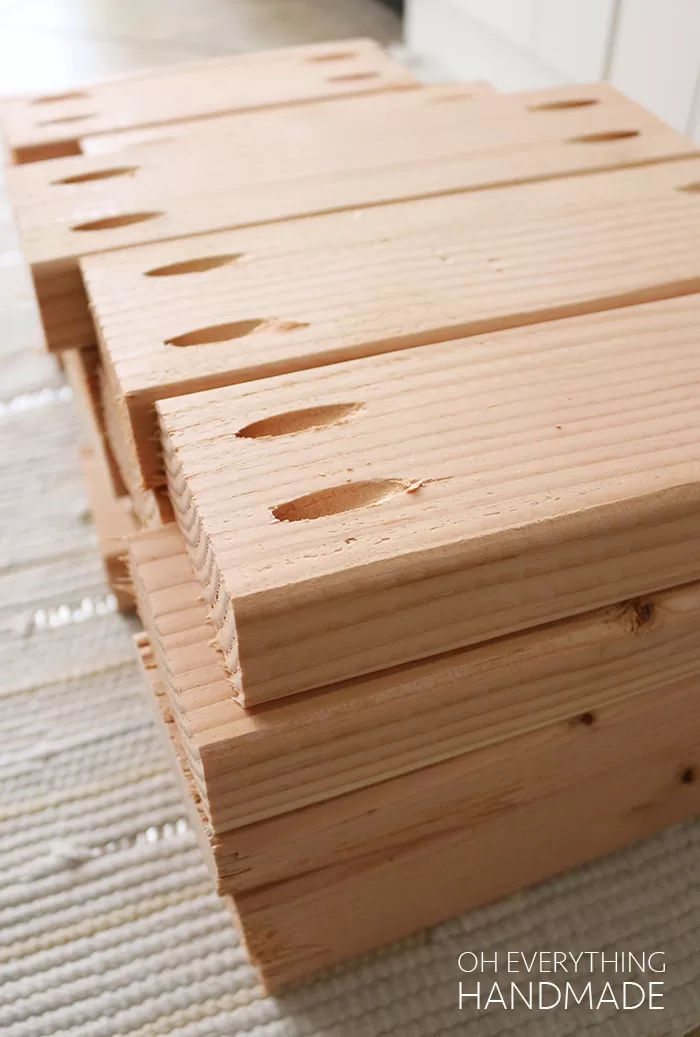
- Use the Kreg Pocket-Hole Jig to drill angled pocket holes at the ends of each board.
- Drive screws through the pocket holes to connect the frame pieces together.
- Check with a level. Adjust as needed before securing fully.
Pro tip: The Kreg Jig makes this beginner-friendly. It guides the drill bit at the perfect angle every time. No measuring the angle yourself.
Step 3: Work Around Your Baseboard
This was actually my favorite part of the problem-solving process. We had a baseboard along the wall, and I decided to keep it instead of removing it.
Here is what we did:
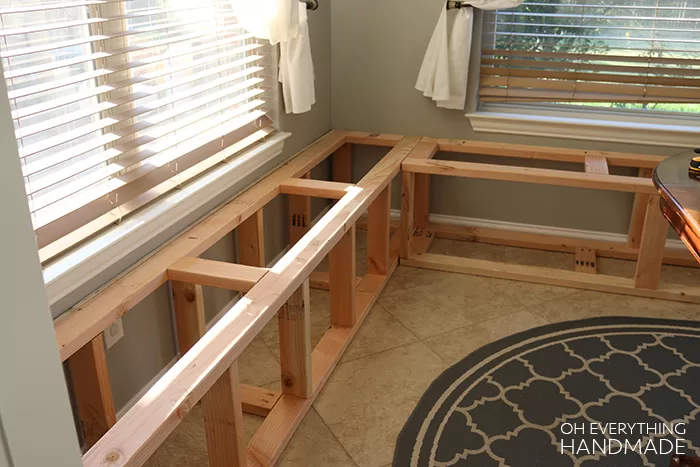
- Attached a 3/4-inch thick board flat against the wall to close the gap between the frame and wall.
- That same board anchored the bench to the wall for stability.
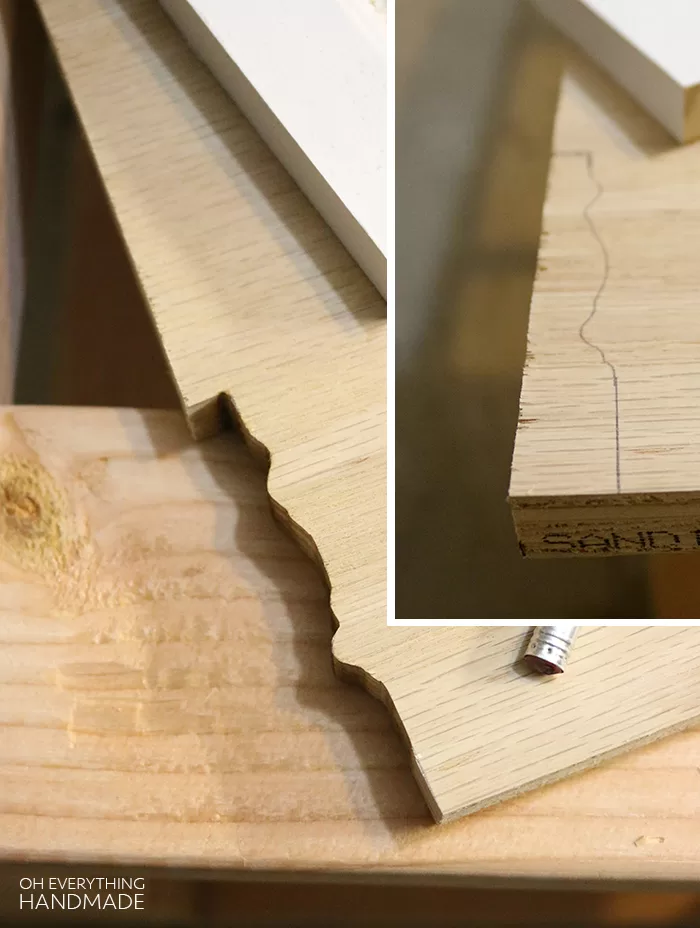
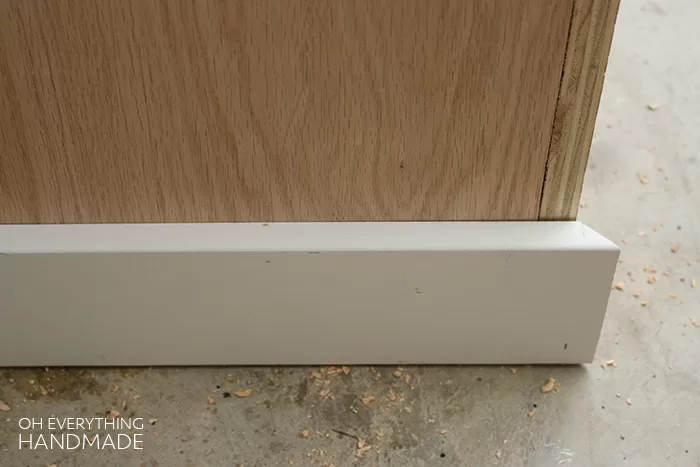
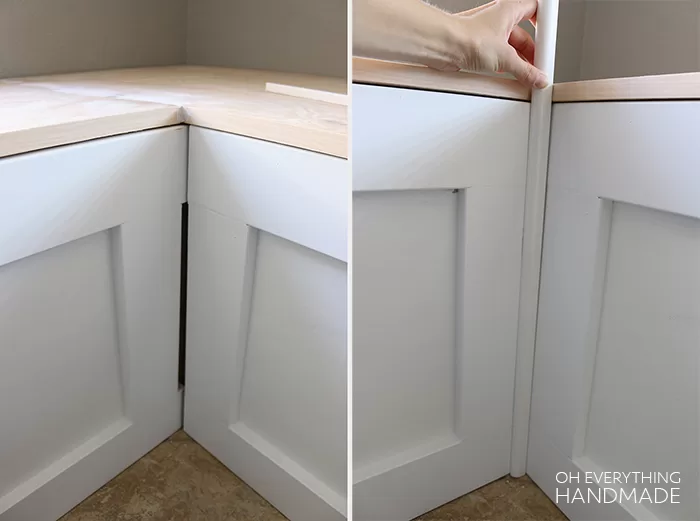
- If your baseboard sticks out, cut its profile shape into your side plywood using a table saw. A scrap piece of matching baseboard is perfect for tracing the shape (see image below).
If you don’t have a baseboard or decide to remove it, simply secure the frame directly to the wall with screw hooks.
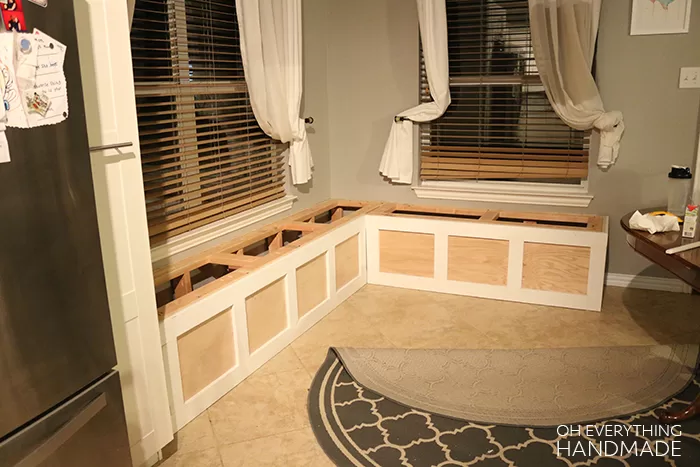
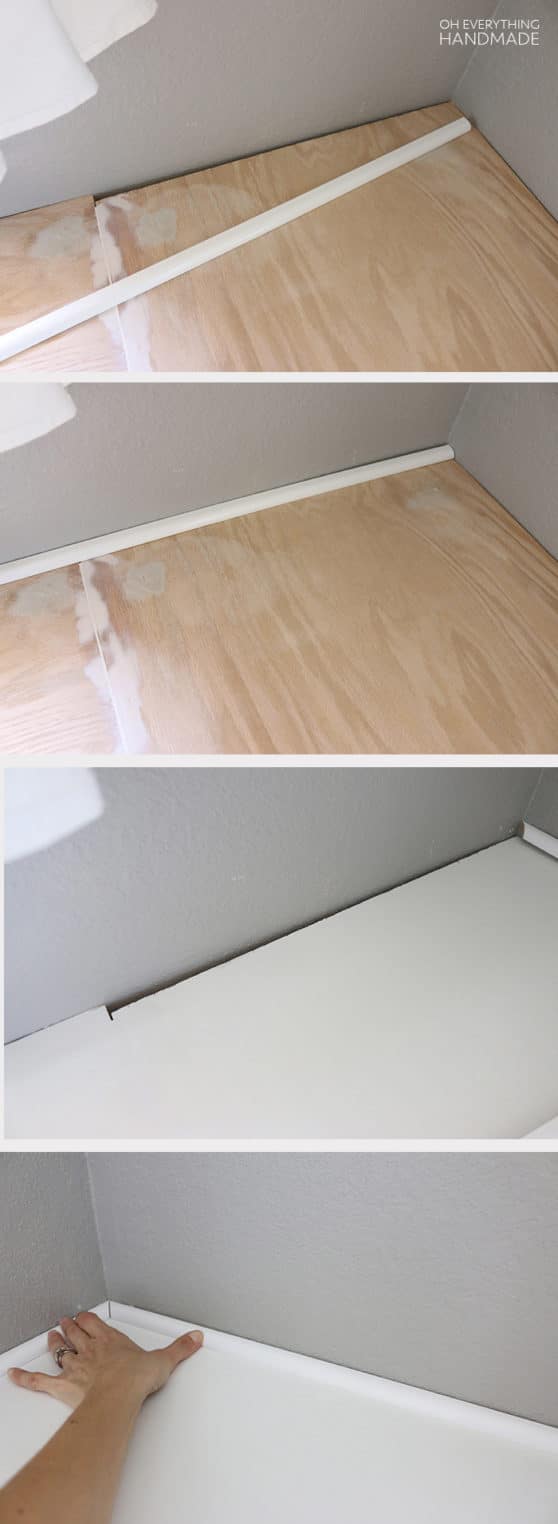
Before-and-after images of attaching the bench frame to the wall. However, don’t secure the frame to the wall just yet. You will need to paint the bench, and it’s easier if you can pull it out.

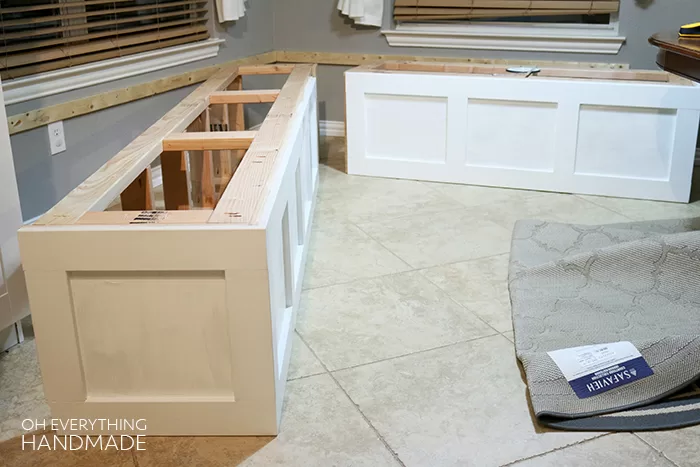
Step 4: Attach the Plywood Panels
- Measure and cut 3/4-inch plywood for the front and sides of your bench.
- Your home improvement store will cut large sheets for you if you don’t have a table saw.
- Attach the plywood to the frame with screws.
- Add trim pieces along the edges for a finished, furniture-quality look.
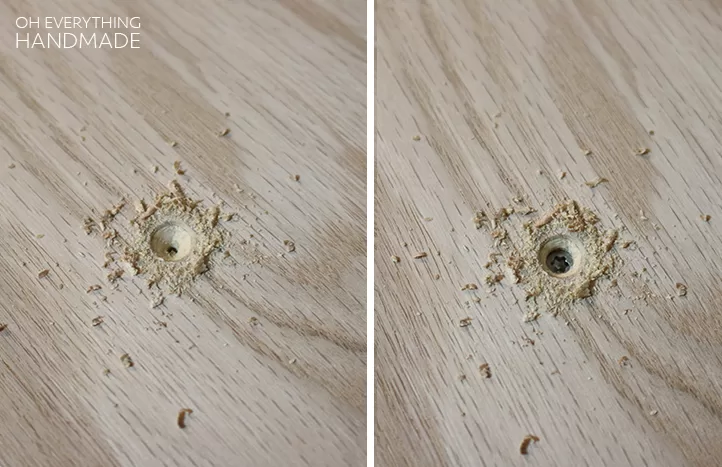
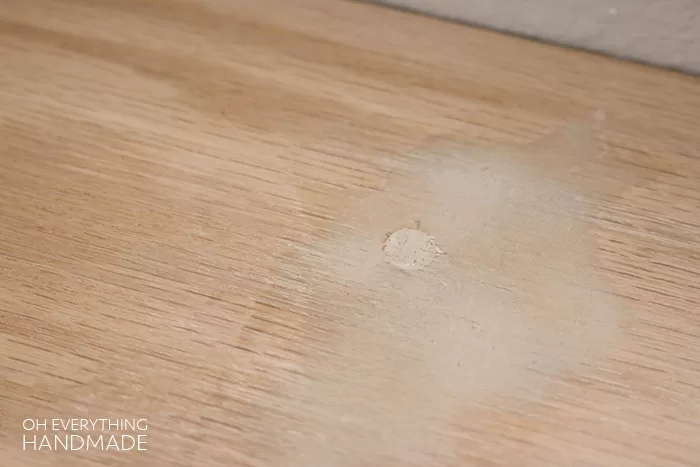
Fill all screw holes with wood filler.
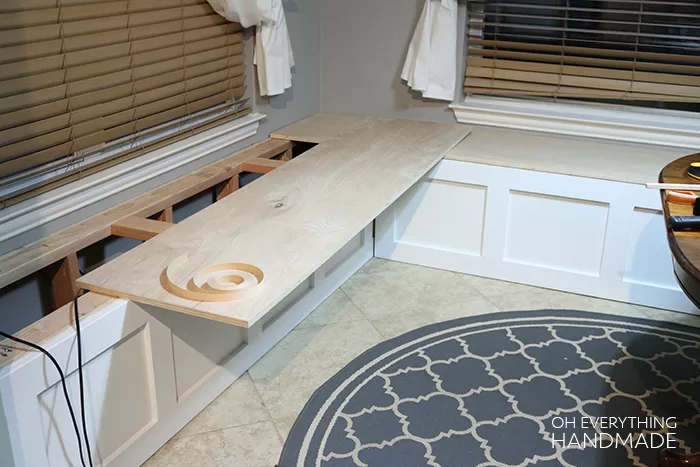
Step 5: Measure and Cut the Seat Top
Once the frame is fully attached to the wall, measure the top again. Walls are rarely perfectly straight, so your final measurements may shift slightly.
Cut the seat top from 3/4-inch plywood. This is the piece that takes the most wear, so make sure it is solid and well-supported by the frame underneath.
Step 6: Sand, Prime, and Paint
- Sand the entire bench starting with 120 grit, then finish with 220 grit.
- Wipe away all dust with a damp cloth.
- Apply primer. Let it dry fully.
- Paint with 3 to 4 coats. Let each coat dry before adding the next.
Finish with 1 to 2 coats of Minwax Polycrylic for a durable, scrubbable surface.
This step is everything. The sealer is what turns a DIY bench into something that holds up to daily family life.
Step 7: Secure the Bench to the Wall
Once the paint and sealer are fully dry, attach the bench to the wall. Use screw hooks or long wood screws driven into wall studs through that back board we mentioned in Step 3.
This keeps everything stable and safe, especially if kids will be climbing on it.
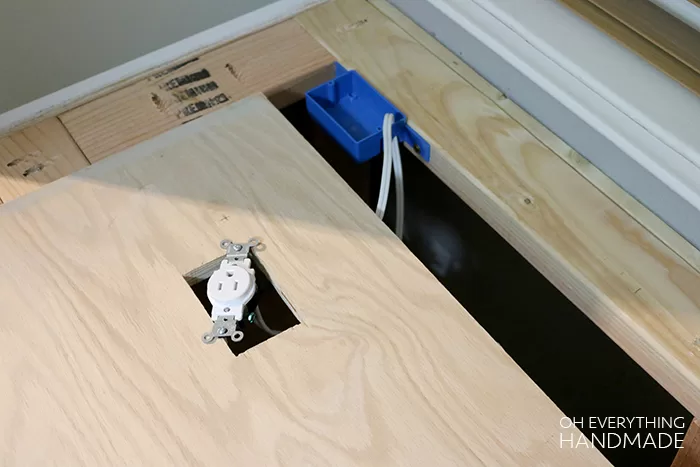
Optional: Add an Outlet
We added an outlet to our bench because I planned to work at that table. If you want to do this, mount the outlet box on the side of the bench, not the top. A top-mounted outlet gets bumped and knocked constantly.
We simply used an extension cord run from an existing outlet. No electrical work required.
An outlet box and an extension can be found at your local home improvement store. We just plugged the extension into the old existing outlet. And should you have HVAC vents, the Splendido Family can show you how to install those into a diy breakfast nook.
The Result
The bench turned into the heart of our kitchen. We ate every meal there. I worked there. The kids did homework there.
And like I said, it helped sell the house. Buyers walked in, saw the nook, and immediately pictured their family there.
That’s what a good DIY project does. It changes how a space feels.

Bench Breakfast Nook

Amazon Supply List (Affiliate Links)
Here are the exact products I recommend for this build:
- Kreg Pocket-Hole Jig 520PRO – the most important tool for beginner DIYers
- Minwax Polycrylic Protective Finish, Satin, Quart – the sealer that holds everything together
- Gorilla All-Purpose Wood Filler
- 3/4-inch Plywood – available at your local home improvement store
Want More DIY Projects Like This?
Download the Free Printable Checklist
Want the full supply list and step-by-step checklist for this build? I made a free printable you can download and check off as you go.
Grab the free Kitchen Nook Bench Checklist here.
Related Posts
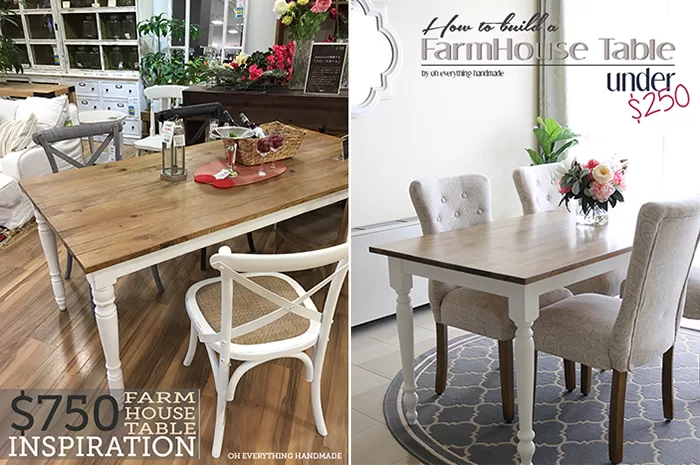
Find the farmhouse table under $250 here.