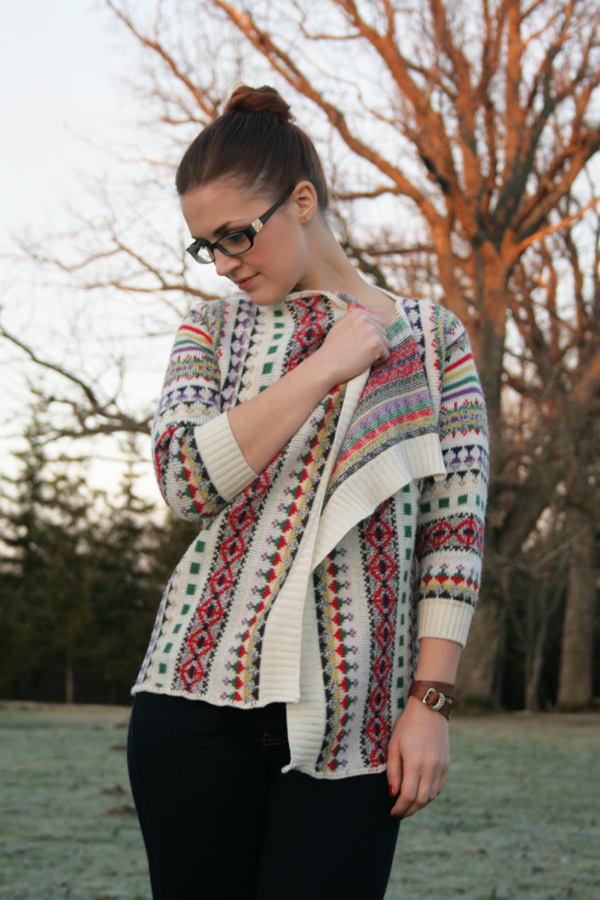
DIY // Trendy open front sweater
The weather is crisp and I’m craving sweaters. The kind that feels like a warm blanket and helps you keep warm. I’m loving these trendy big open front cardigan sweaters I’ve been seeing all over the blogosphere lately, so I just had to try and DIY one for myself. All it took was a big old patterned pullover sweater.
DIY // Trendy open front sweater
THIS IS WHAT YOU NEED:
- Big old pullover sweater
- Serger/Overlocker and/or crochet needle and yarn
- Scissors
- Pins
- Tape measure and ruler
INSTRUCTIONS:

This is what my sweater looked like before the refashion. The important thing to note when picking out a sweater for this project is that it needs to be long and wide. The width will become your sweater length and the length before will become the width after the refashion. So keep that in mind!
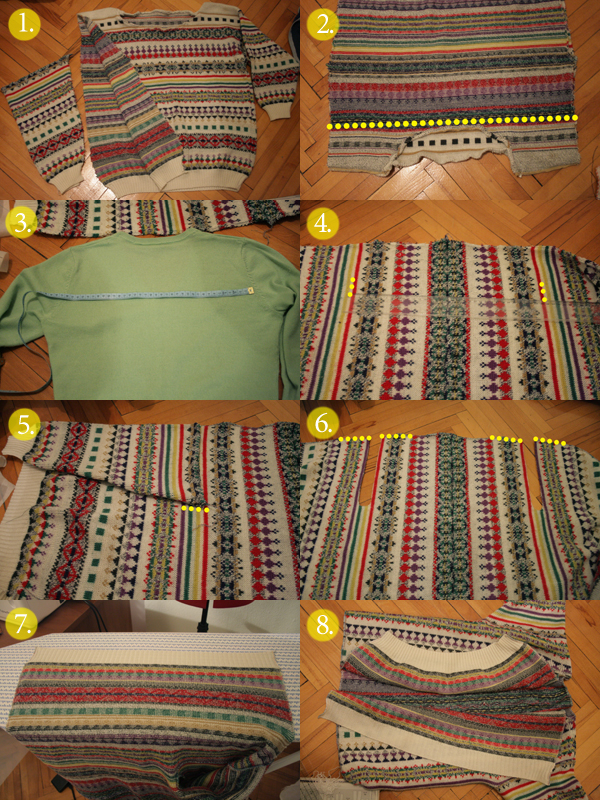
// 1.
First, dissect the sweater by unraveling the side and armhole seams.
// 2.
Turn the sweater inside out and sew the two sides together as close to the neck hole as possible. This will become the center back seam of the new sweater. The best option to use for this project is a serger/overlocker, but not all of us home seamstresses have that, so you could also use a regular sewing machine. Or, you could crochet all of the seams (this method is illustrated on the image collage below). If you use a regular sewing machine, you should probably stabilize the seam allowance with stay tape before sewing. When using a serger, you should also serge the top and bottom raw edge at this point.
// 3.
Next, take one of your sweaters and measure the back. Write that number down and divide it by 2.
// 4.
Use the result from the previous step to mark down the distance of the sleeves from the center back seam.
// 5.
Next, try on your sweater sleeves. If need be, turn inside out and make them narrower by pinning the new seam line, sewing, and cutting the excess knit. (don’t forget to zig-zag all the raw edges if you’re using a regular sewing machine). Then, lay the sleeve on the sweater next to the marking you made earlier (see nr. 5 above). Then mark the lower edge of the sleeve onto the sweater.
// 6.
Cut a narrow 3 cm wide U using your markings as guidelines. These will become the sleeve openings. Next, sew the shoulder seams. Just mark about 10 cm on both side of the U, fold right sides together and sew (see nr. 6 above). Your sweater should look like a vest at this point.
// 7.
The next step is to sew the sleeves onto the sweater. The sweater is almost complete! You’ll probably notice that the front ribbing is not sitting that well. To fix that, stretch the ribbing to match the length of the sweater and pin to the ironing board. Then steam through a moist cloth.

As I said earlier, this project can also be done using crochet to sew, and finish the seams. Just follow steps 1-8 from the above photo. After you’ve done all the seams and edges, stabilize the top and bottom edge by pulling a strand of yarn through the crochet edge (see nr. 9 above). And, all done!


![DIY // Beautiful Wrapped Peach Aventurine Ring [How to]](https://oheverythinghandmade.com/wp-content/uploads/2012/05/Wire739.jpg)