Kitchen // How to install drywall
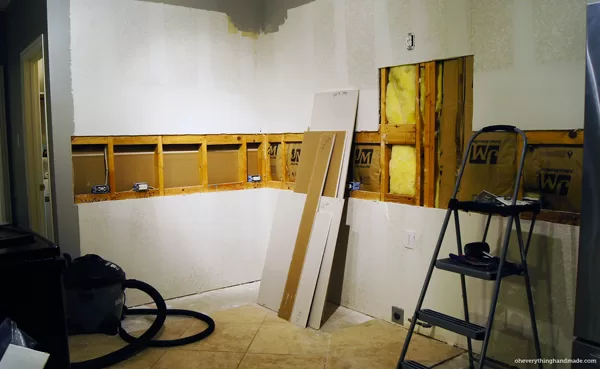
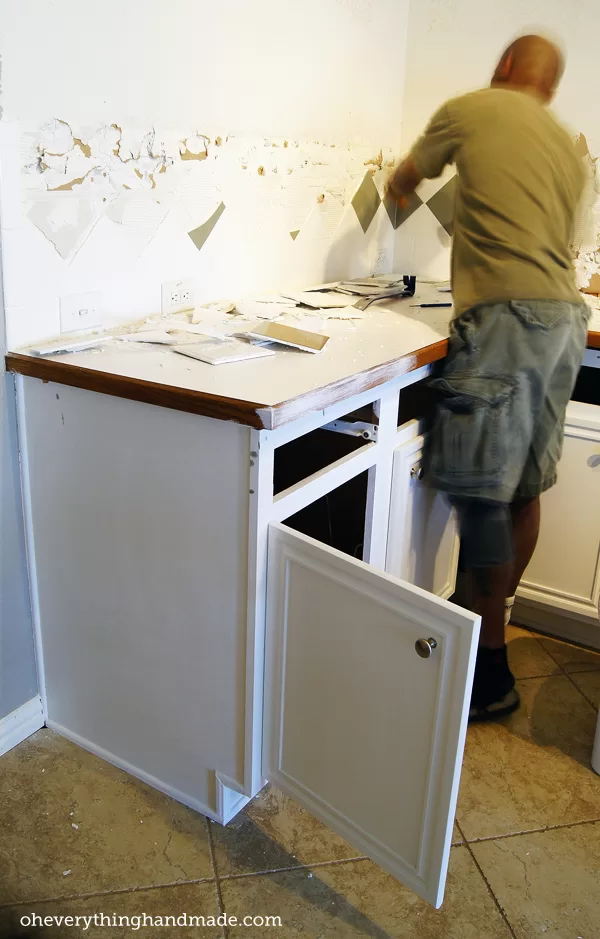
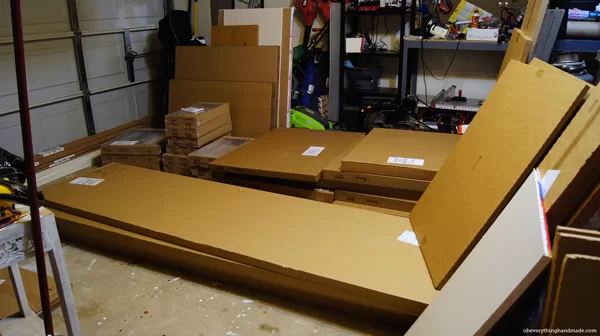
Remember this look, from my last kitchen update when we took the counter tops and the base cabinets out?
Today, I like to share how I installed new drywall in the kitchen. We had white and gray tile before, they came down very difficult and most of the drywall broke and left us with huge holes.
Anyway, after we cut the old drywall out, it was easy to measure. I made a little sketch on a piece of paper, including the measurements and went with hubby to home depot.
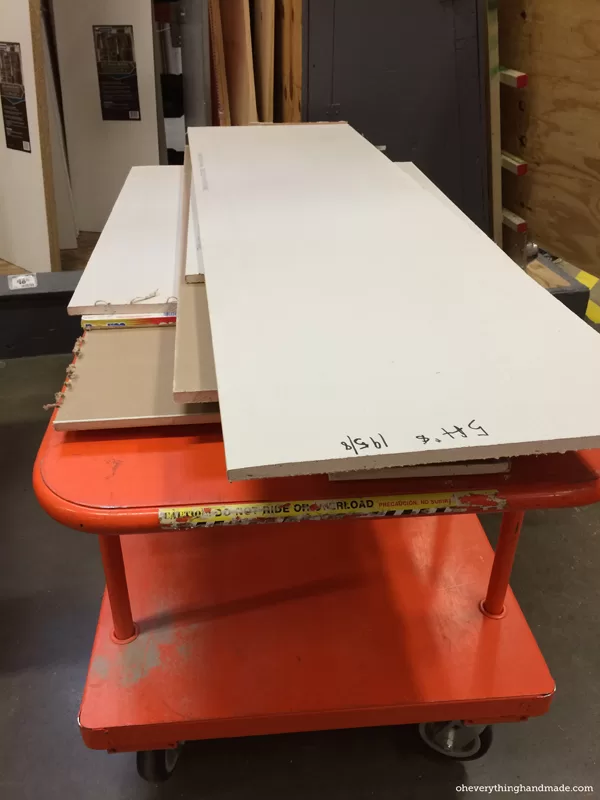
We only bought 2 sheets of sheetrock, which the guys at Home Depot cut to my measurements. I also told them to write the measurements right on the drywall that way I know exactly where it goes.
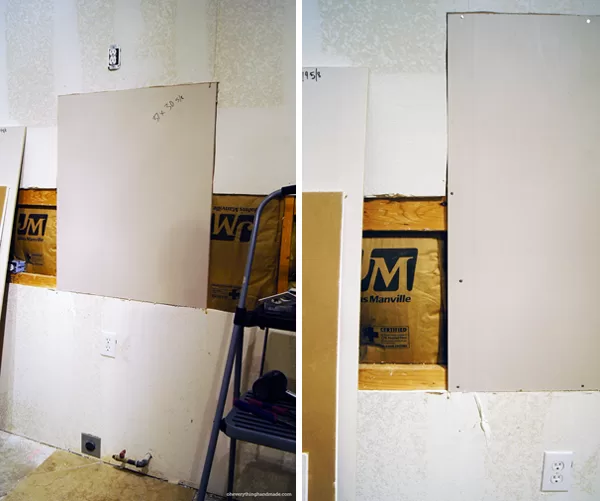
It didn’t take me long to install the piece that goes right behind the stove, Nakia helped me set it in place since it was kinda heavy. I started with that piece because it was the only one I didn’t have to cut an outlet out! I used simple drywall nails and marked where we had studs, easy as 1,2,3. Oh, and do you see how perfectly it fits into the cut out, all I can say is make sure you use a leveler and mark the area you need to cut out.
This part, was a little tricky and measuring the right way is very crucial, I am sure you don’t want to screw up a new drywall and spend more money!
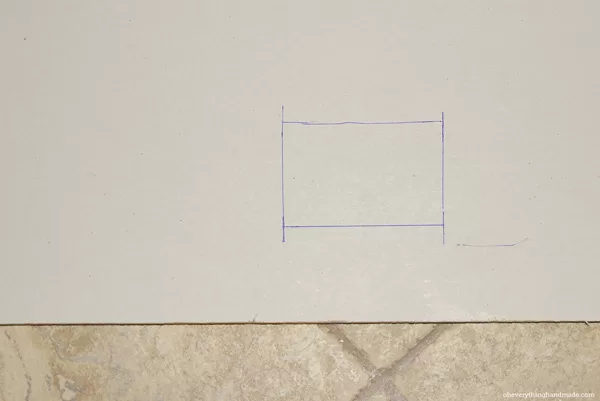
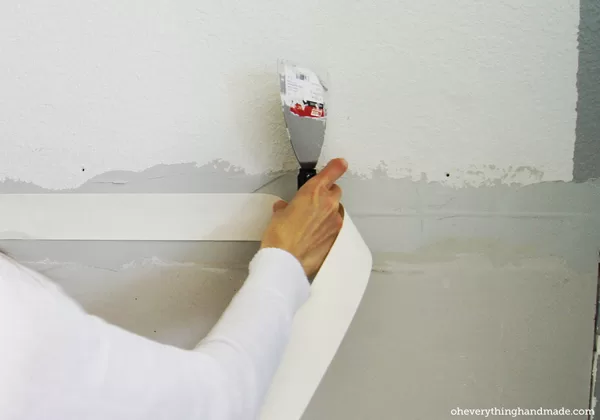
How to cut out drywall for an outlet:
- Make sure the drywall fits into the space you will install it to! We simply placed the drywall into the opening and checked for big gaps and tight spots, luckily none applied to my situation.
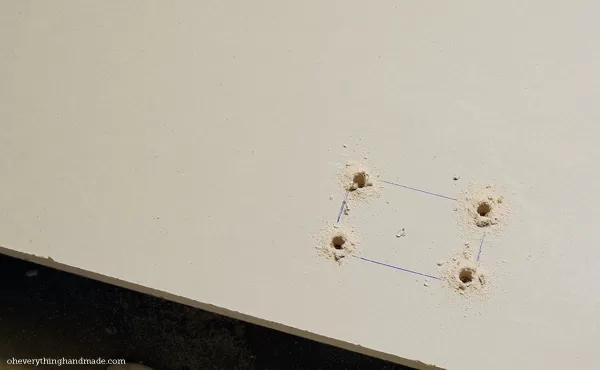
- Measure from the front of the opening to the beginning of your outlet, substract 1/2″ so it’s not too tight when the drywall gets put in. (Example: 23″ from the beginning to the outlet -0.5″ = 22.5″)
- Follow the same rules as on #2 for the top measurement.
You should have something like the picture above!
Next, would be to make some noise …and since I wasn’t able to do that in the house, I had to make me some room in our garage. I used Styrofoam blocks from my recently printer purchase as a base, what? It worked for me!!!
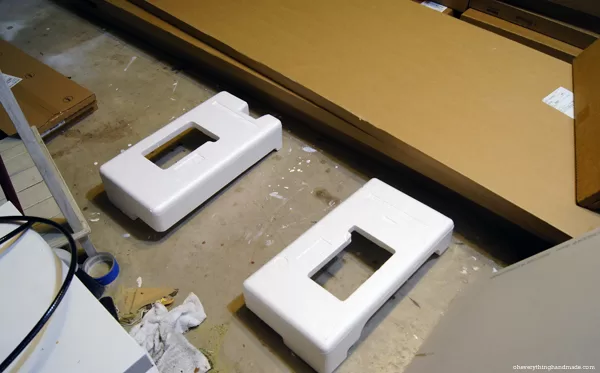
But seriously, you shouldn’t do this my way. I tend to get antsy and like to finish things quickly so I can move on, I didn’t have any room in the garage and the blocks were my only option, since it also rained outside!
Ok, let’s move on…
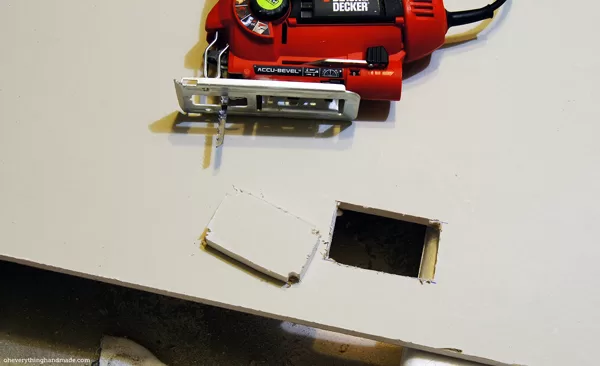
I had seen this done on DIY Network, so I kinda knew what would work best for cutting out the outlet. All you have to do is insert the jigsaw in one of the drilled holes and jig away!
After all the outlets were cut, we put the drywall up, and secured it with drywall nails to the studs. That was semi-loud, but our little ones are pretty good at night and normally don’t wake up from hammering.

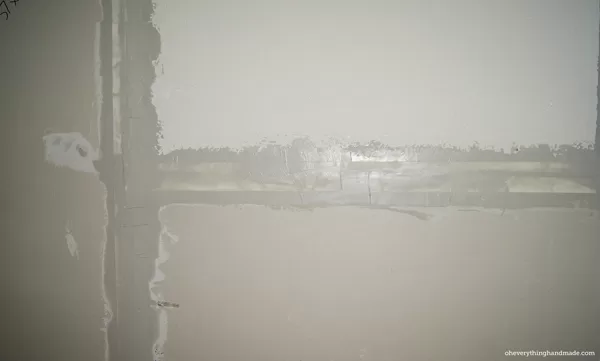
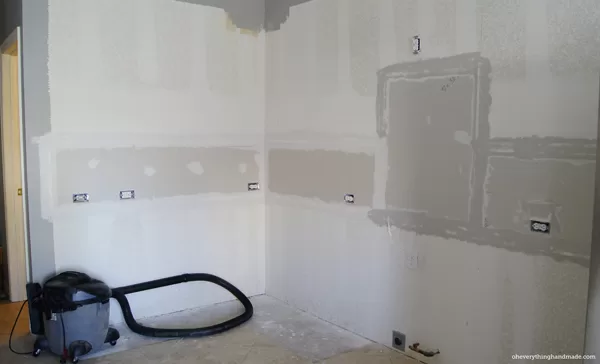
Last but not least, was to put a joint compound in between the panels, we used the sheetrock all-purpose joint compound and joint tape they had at home depot. Anyway, not sure if you knew? But the main reason you want your gaps to be minimal, is for an airtight, ant-free and fire resistant area, so make sure you cut everything after leveling and measure twice.
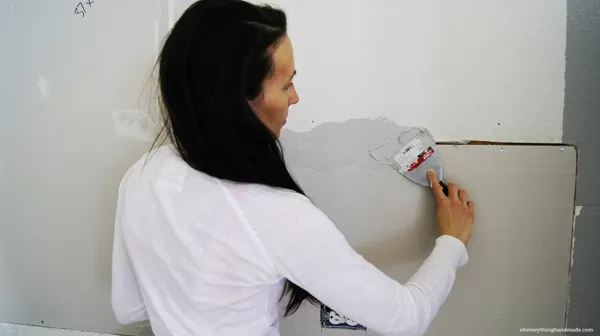
I started by applying some of the compound between the panels with a 4″ knife, this needs to be done so all the gaps are filled. The joint tape needs to be placed on top while the compound is still wet, I only applied 2 ft of compound, than I pressed the tape to the area and tightly embed with my knife. The excess compound was removed and re-applied over the tape.
You have to let it completely dry, the manufacture of this specific product recommends 24h before sanding and re-applying more coats. I didn’t apply any other coats since we will be tiling right over it.
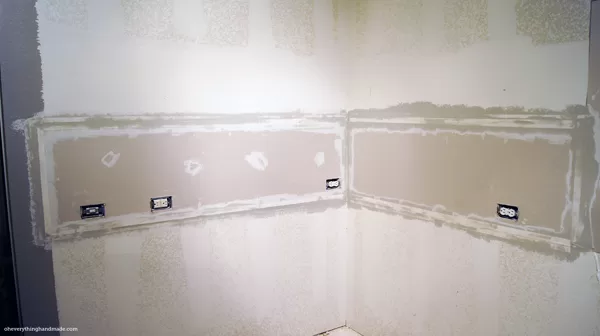
All done!!! Now we wait…
Next, will be the installation of our upper cabinets.
Previous on my kitchen makeover:
If you like to start reading about our kitchen takedown from the beginning, you may start here:
- My Kitchen design
- Where and how I designed our new kitchen
- How to remove upper kitchen cabinets
- How to remove countertops, base cabinets and backsplash/tile
I’m also sharing lots of sneak peeks on instagram, you can follow me at @oheverythinghandmade
Have a nice week!