DIY // Amethyst drop earring
The amethyst is the birthstone of February, and one of my favorite stones to work with. You can find a selection of jewelry with Amethysts incorporated, Here.
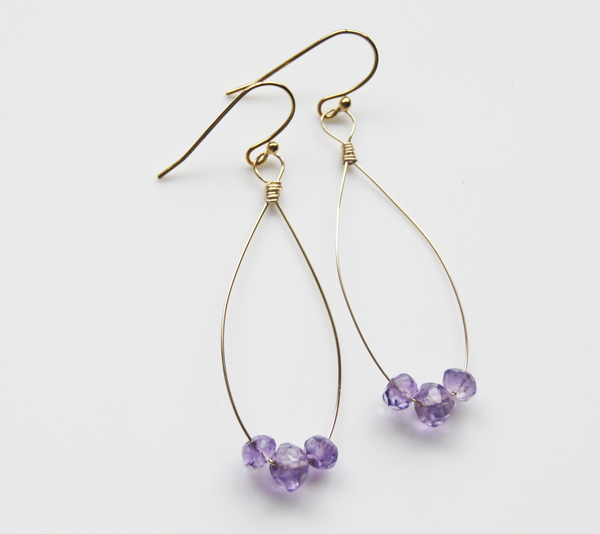
Today, I will show you how to make a gold drop amethyst earring. Simply follow the step by step instructions and at the end you’ll have a new hand-crafted pair of earrings.
The Tools you need:
(22 Gauge Wire can be found at Widget supply | 6mm Amethyst rondelles can be found on Etsy | Tools can be found at Cre8tvqn)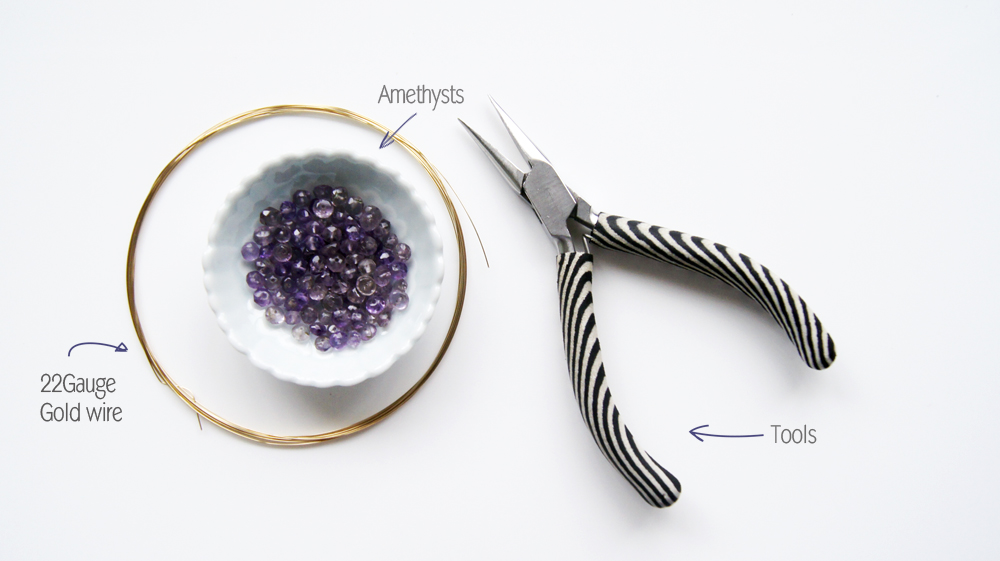
1. Start by cutting your wire into 2 x 4″ inch pieces, and use your point-finger to bend each wire in the center, as shown above.
2. Add the 3 amethysts onto your wire, and shape each end to your desire. Fold the left side over the ride side wire, this will help your wire to keep stable.
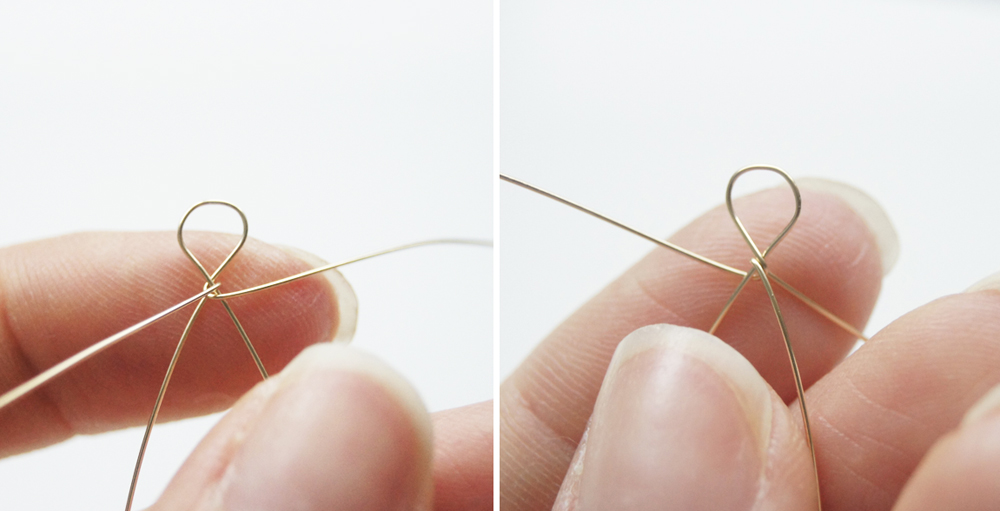
3. Use your round pliers to make a loop into your right side wire.
4. Now fold the right side wire underneath the left wire.
5. Wrap your right side wire around twice, and cut off the left-over piece.
6. At last, take your left wire and wrap it around; from the top going downwards, so your wire end is in between each wrap.
You are almost done, repeat step 1-6 to make the second earring. Add ear wires to complete your New gold drop amethyst earrings.
Please share your thoughts:
I would like to know if this DIY is still to hard to accomplish. Your input will help me in providing you easier DIY’s in the future.
Wish you a nice weekend and happy crafting.





Very pretty! And good tutorial! Thanks for sharing.
Thank you Nikki, if you aren’t subscribed to my blog already, make sure you do it today.
There will be a huge Giveaway for 4 of the latest DIY’s. You don’t want to miss it!!!
Hope to have you on the team!
Betty
Beautiful jewellery
Love love love these, they look so simple and elegant – the materials are great!
Wow, you make it look so easy. I never thought I was much of a crafter but I think I’m going to try this!
great project for beginners!!
sweet earrings, perfect for beginners
Looks like I could accomplish this if I invest in the right pliers. Thanks for sharing this project! I bet my
10 yr. old niece would enjoy helping me create these!
Looks so easy and beautiful! Affordable materials, and very easy!
I think even I could make these. Thanks for the great instructions
[email protected]
I just made them – pretty easy! Mine doesn’t look as polished as yours, though – I felt all thumbs and the wire is a bit crimpy. Is there any way to smooth it out?? Thanks! I also did your ribbon necklace – it’ll be a gift to my Mom!
Awesome!
It helps if you use a “half hard” Gauge instead of easy! But if it’s all wrinkled now, there is no way of smoothing it out after you are done.
You can also use a round object to bend it, that will keep it nice and wrinkle free.
Glad you made the ribbon necklace, do you mind sharing images on my Facebook?
http://Facebook.com/BettinaJohnsonJewelry
Looks so elegant and classy!
They are just beautiful!
These are so simple and yet so beautiful! I am going to make a pair for my niece. She’ll just love them. Thanks so much for the tutorial.
Glad you like the tutorial. Have fun crafting!
Lovely earrings!Thank you!
Simply Beautiful!!!
Thanks Lyn
I have not made these yet but definitely will. They are elegant but simple to make..