How to Create a Farmhouse Style Wingback Chair Makeover
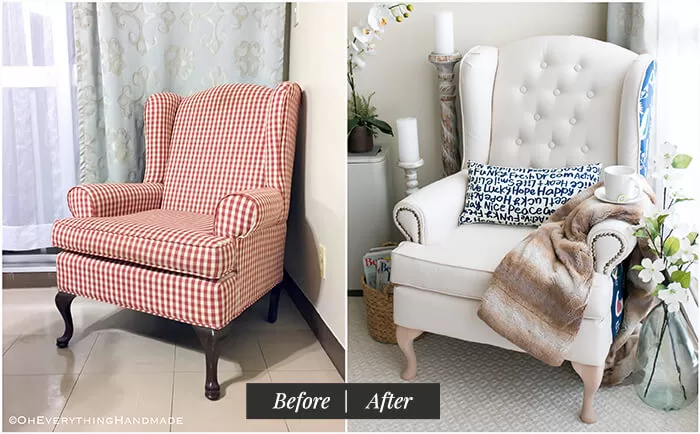
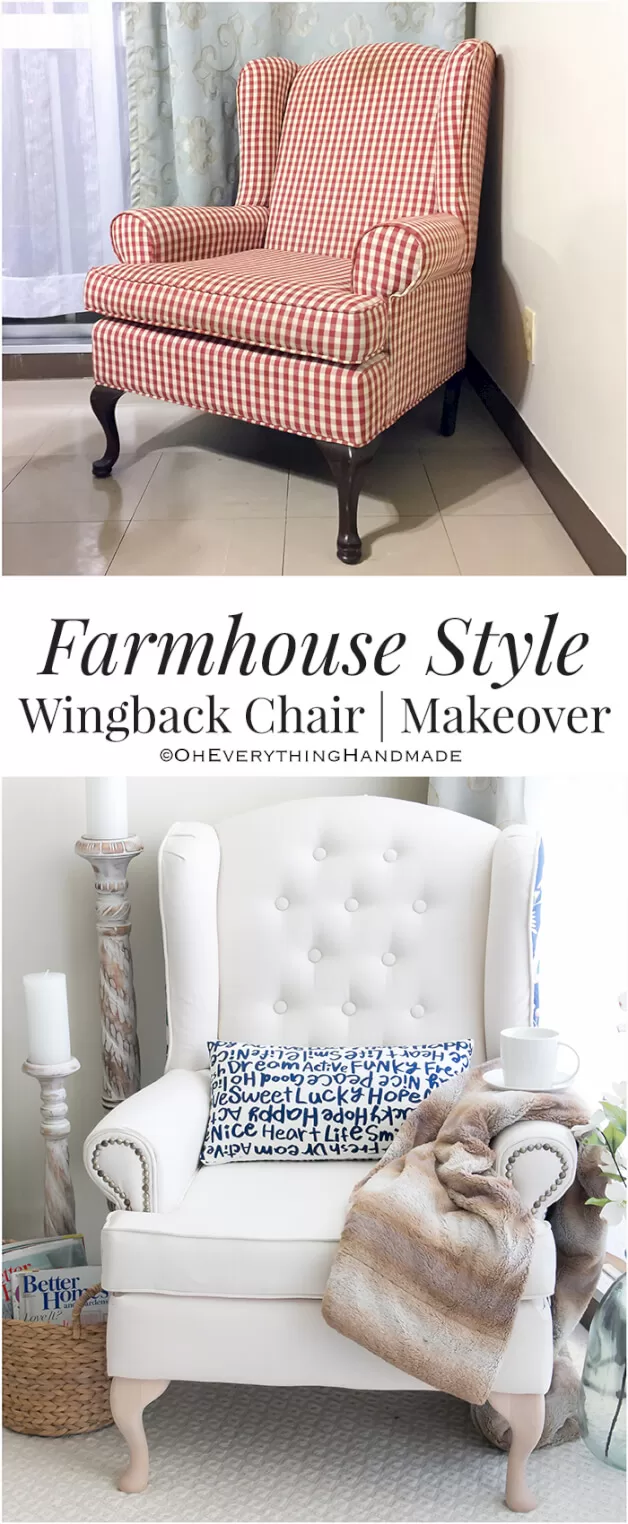
Have you ever had a project that intimidated and made you all squeezy? My today’s Farmhouse Style Wingback Chair Makeover project was one of those! When I bought the chair a few years ago, I had no vision of upholstering it, but I figured it would come together once I brainstormed and looked for inspiration.
Then, right before we moved overseas, I had to decide to let the chair go or take it with me and upholster the chair while stationed across the pacific. Crazy me, I couldn’t let the $40 dollar chair go, so I had to promise my husband that I would work on it.
This chair was gross and old. We only sat in it while it was covered in blankets. So, after almost one year overseas, I started looking for inspiration, fabric, and material that I could ship out here (not surprised that there aren’t many companies who ship foam to military installations).
You might also enjoy my How to tuft button an Ikea Sofa Cushion.
If you love seeing little sneak peeks of my projects, follow me on Instagram!
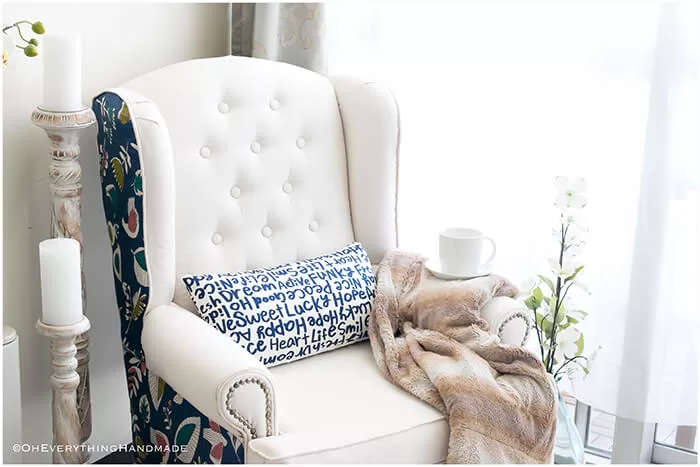
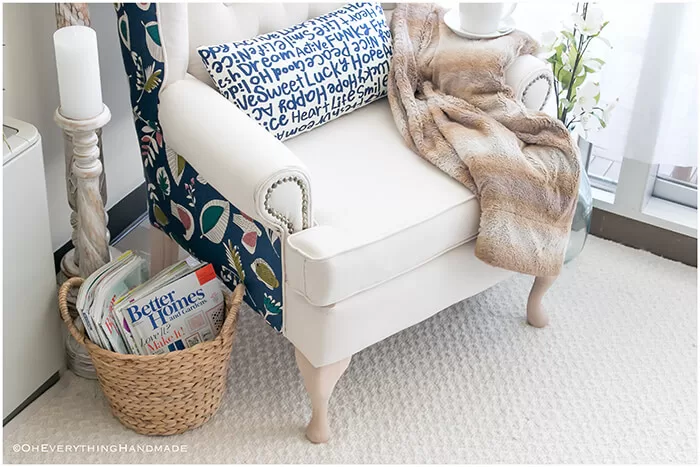
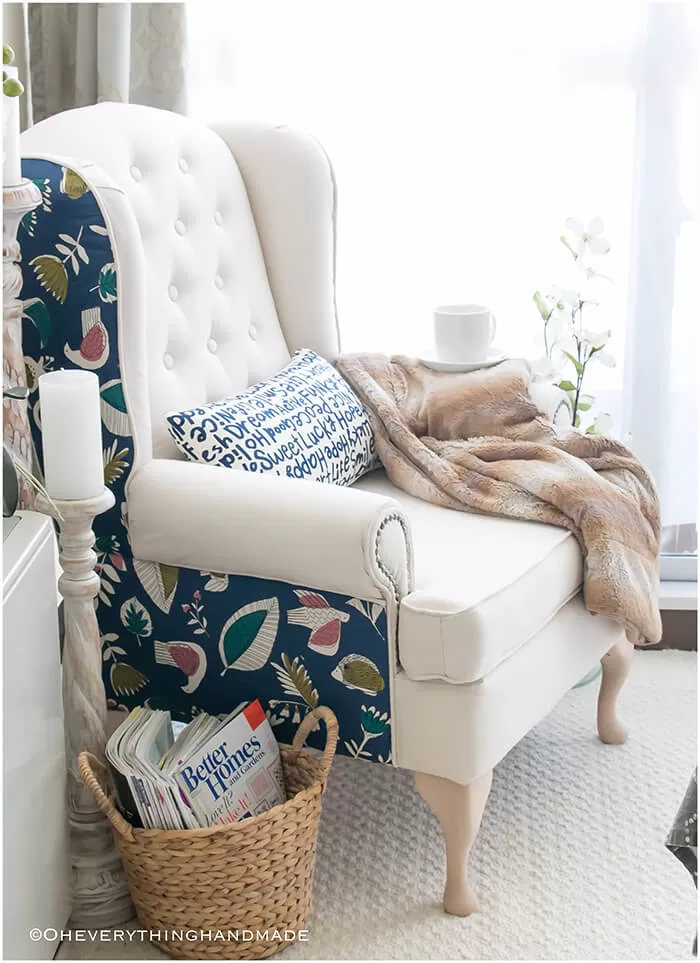
The Farmhouse Style Wingback Chair Makeover was inspired by a lot of different things, I wrote a previous post about that here. But the main reason I went with a neutral colored fabric was so I could incorporate the chair in any room. I choose a fabric with color that had a whimsical pattern on the side and the back so I can use the chair as an accent chair as well. I love simple, but I like to keep it interesting and bring a little bit of color into my designs.
So, let me start with the list of items I used to create this makeover and after that, I will show you the steps my friend and I did for this tutorial.
Material used
|
Tools used
|
[do_widget id=text-100]
Shop all materials and tools
Farmhouse Style Wingback Chair Makeover
Instructions
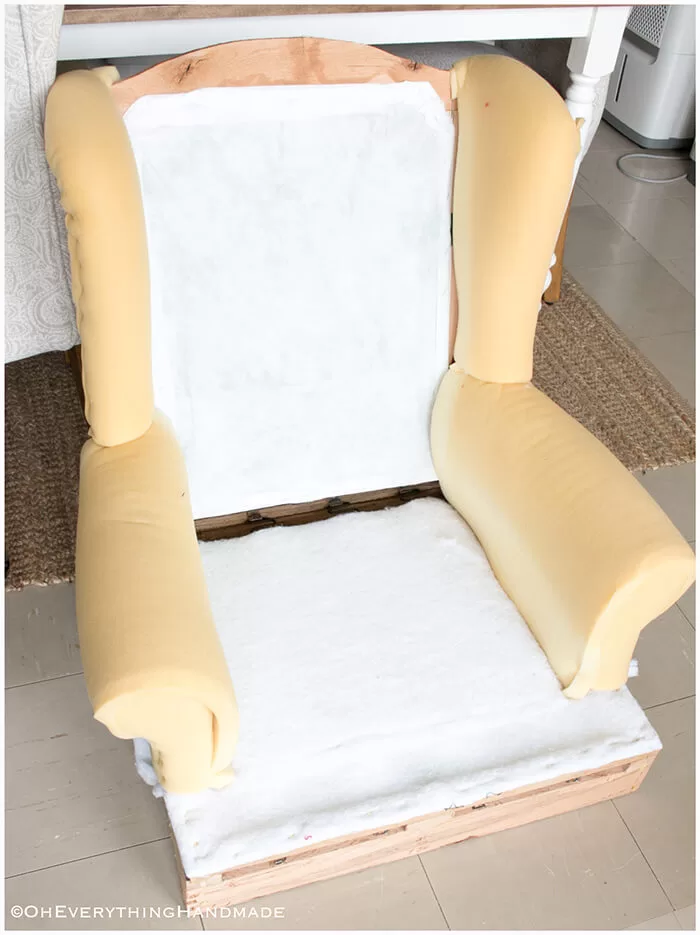
Remove all old fabric
Remove the old fabric, and try to keep the pieces in one piece as you take them off. They will serve you as templates for your new fabric.
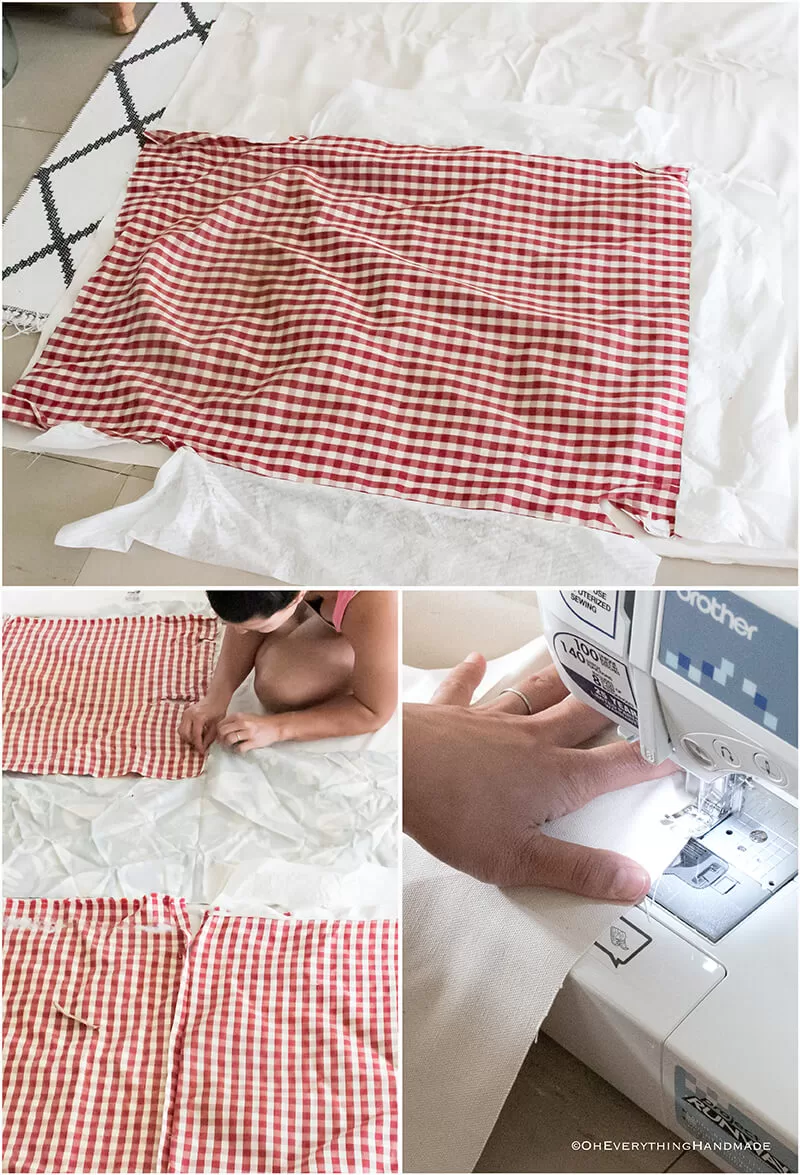
Cut the fabric to fit the chair
Lay all pieces out and use the old fabric as templates; when cutting the fabric, give yourself a little extra wiggle room. I added about 1″ extra to each cut!
We also sew along the edges to avoid fraying.
Attach the fabric to the chair’s seating area
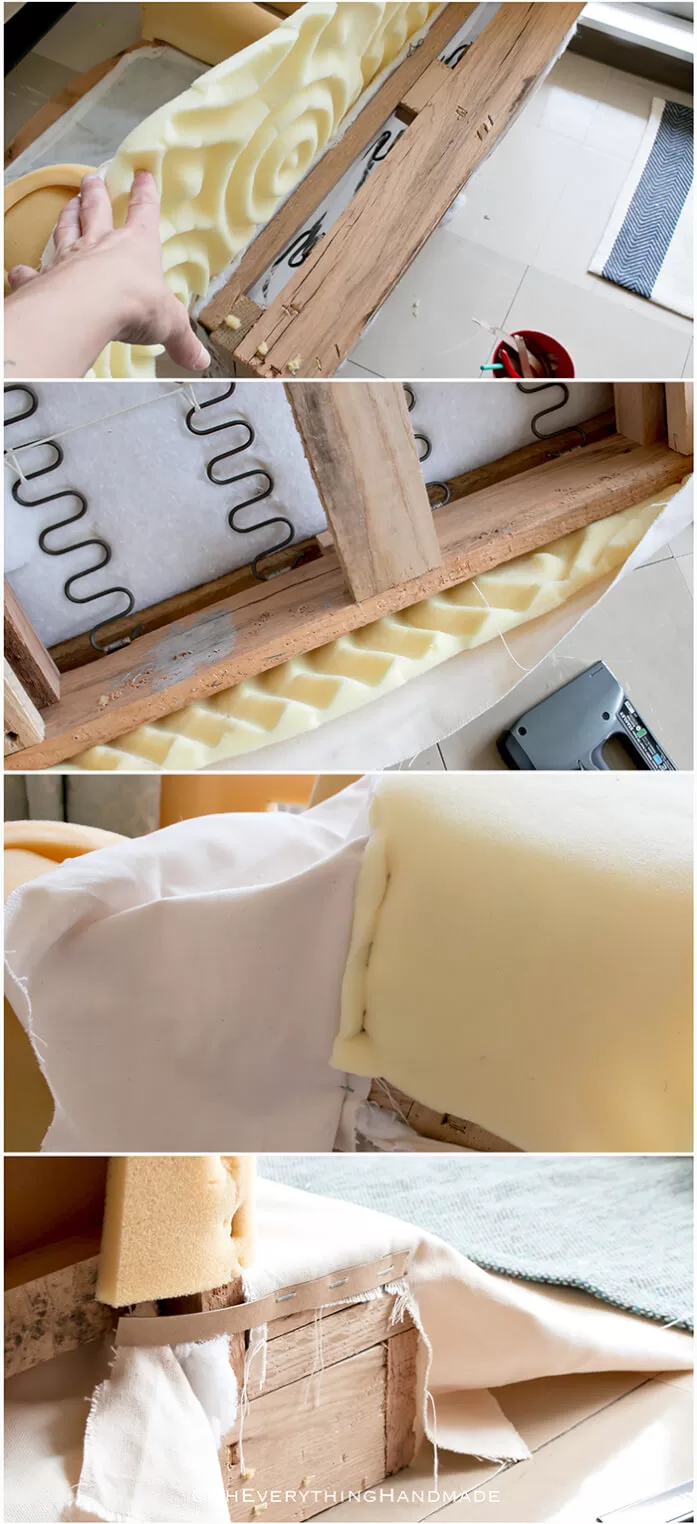
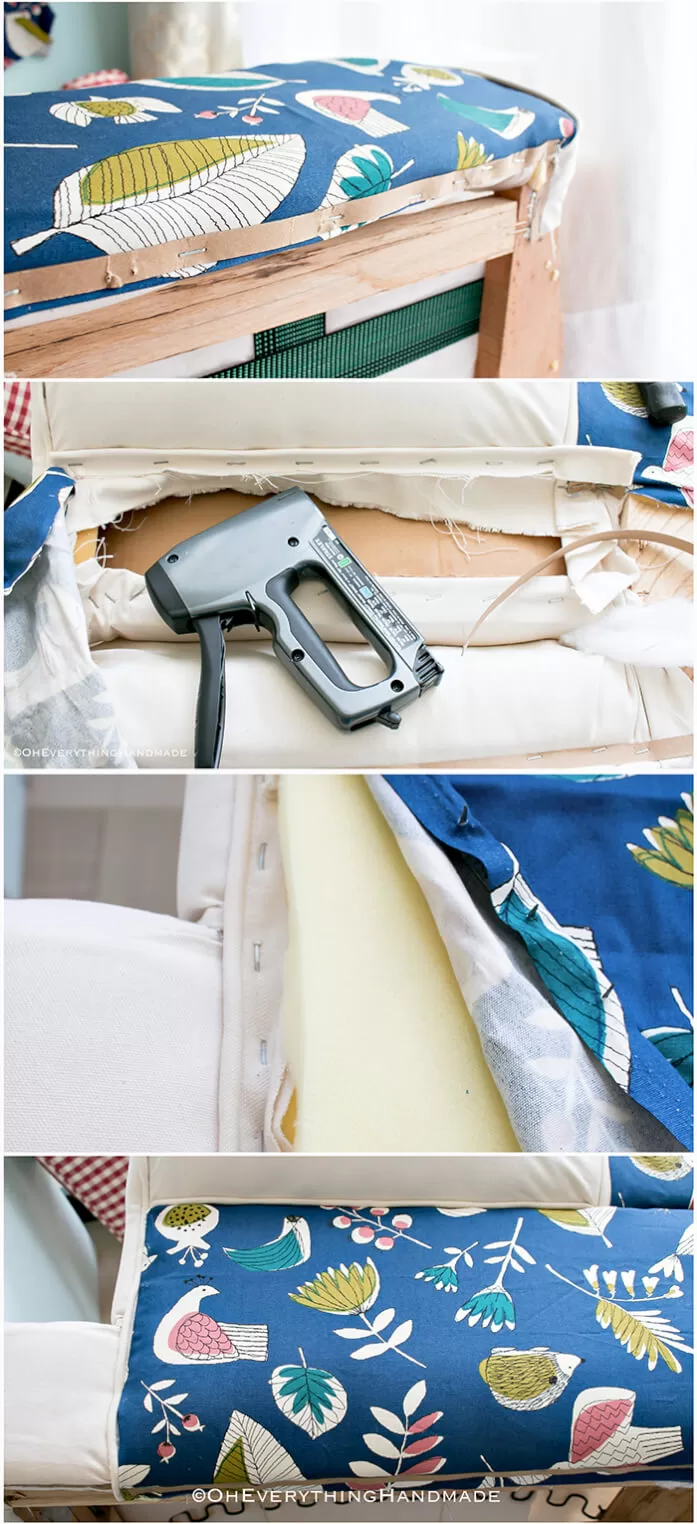
I left the batting that covered the metal Upholstery Back Springs as is and added a piece of foam to the front since the old piece was torn and looked nasty. A leftover piece of mattress foam topper from our Headboard Project was perfect for this!
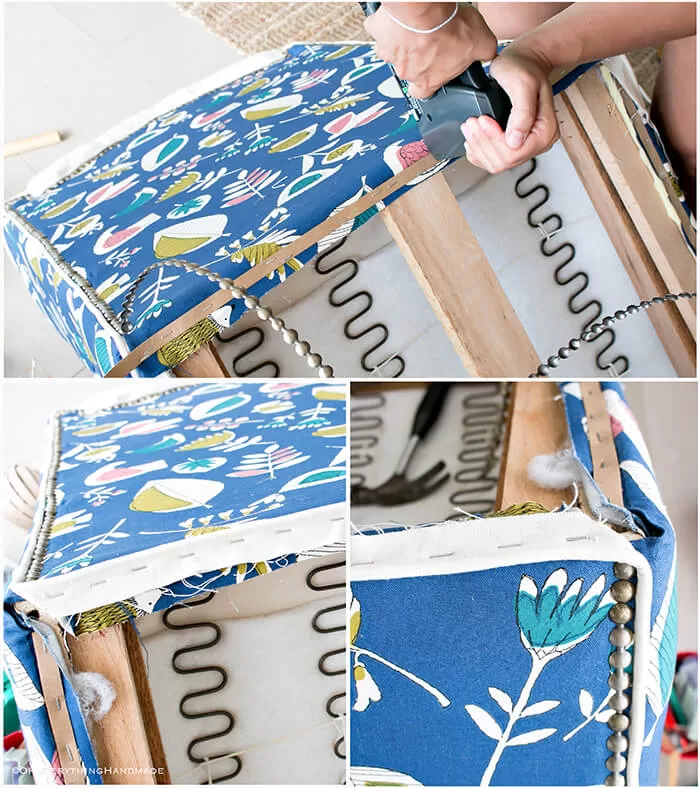
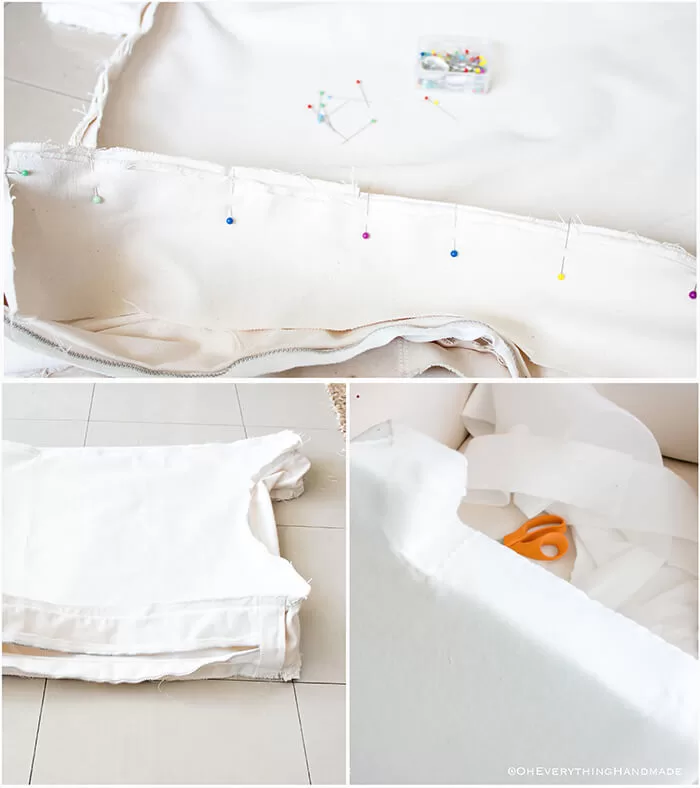
The crucial part was the side, there are numerous ways to attach the fabric and foam. I stapled the sides and added the foam after (see 3rd image, below).
In the last image you can see there is no foam, I wrapped the foam around the corner and stapled the foam along the top (while tucking the overlapping fabric in).
Cover the armrest in three easy steps!
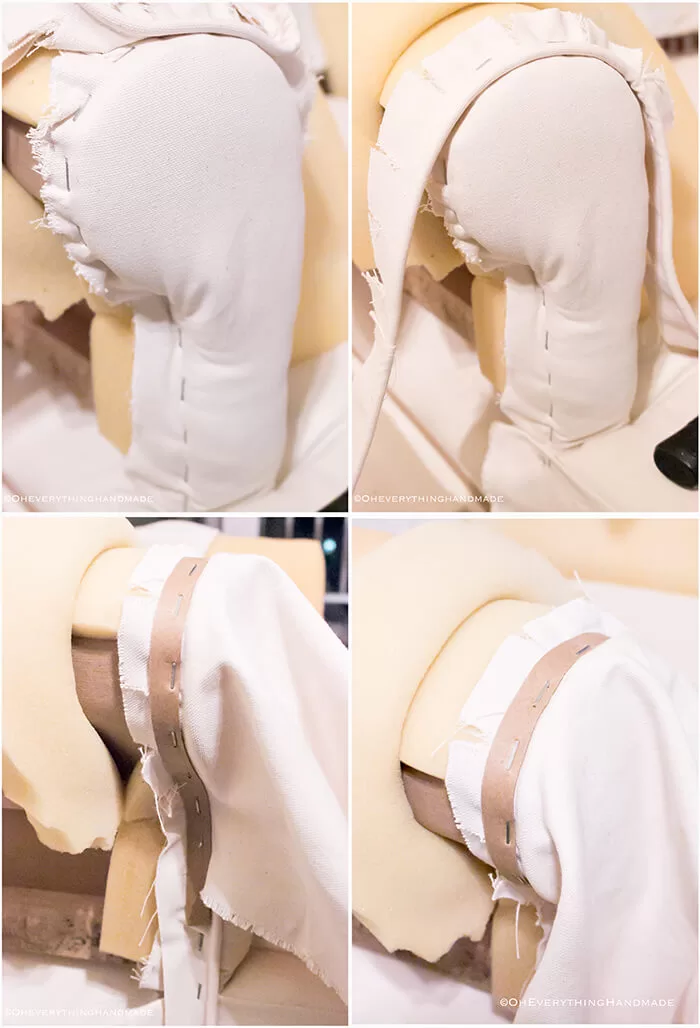
Next, make some cording/piping. Here is an excellent video on how to make piping or cording. I didn’t measure how much cording I used, but most of my scrap pieces were used to make it.
My First step on the armrest was to pull back the foam. Then I stapled each layer on. The cording needs to be cut so you can wrap it around.
Once the front and cording pieces are stapled on, the fabric piece for the armrest is laid upside down and stapled in place with cardboard tack strips (using these strips is very important to make the chair last and gives your project a pro-finished look).
To complete the armrest, fold the foam back over and pull back the fabric, staple everything in place at the bottom and the side (try to keep the fabric as tight as possible).
Make a slip-on headrest cover
Sewing the headrest wasn’t as hard as I thought it would be, I used once again the old fabric as my template which helped tremendously.
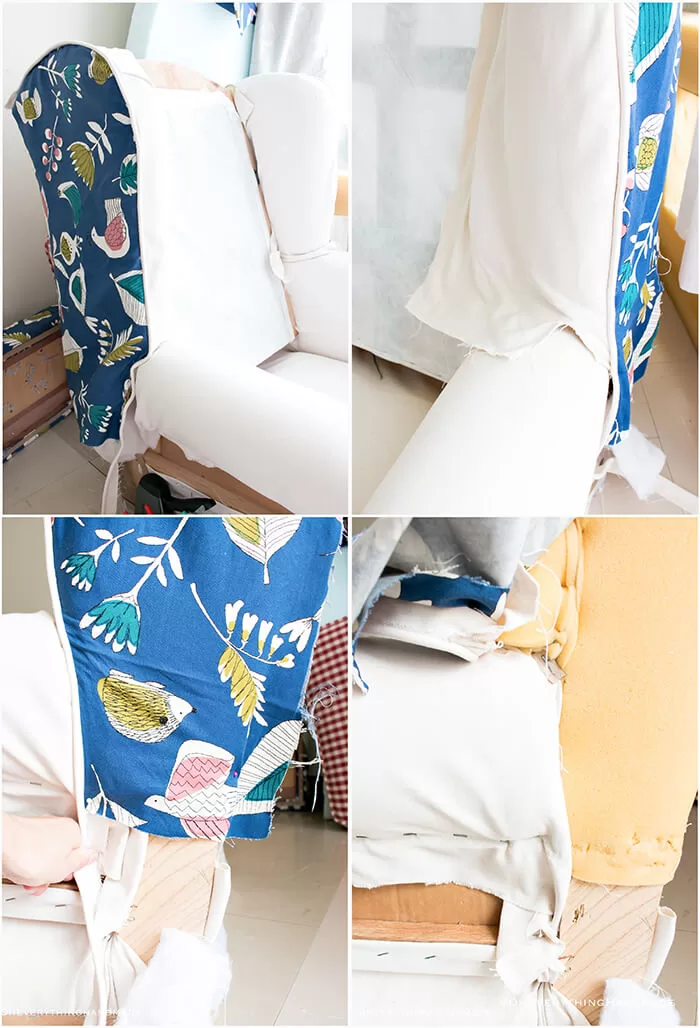
Attach the side fabric
The side was a little harder to figure out since Mr. Johnson had taken most of the old fabric off for me. But after trying a few different ways, I got it all placed nicely. I stapled the headrest on first and the bottom piece overlapping it. Tack strips helped to achieve a crisp line.
[do_widget id=text-101]
As you can see, plenty of boards underneath the chair where all the fabric can be stapled to.
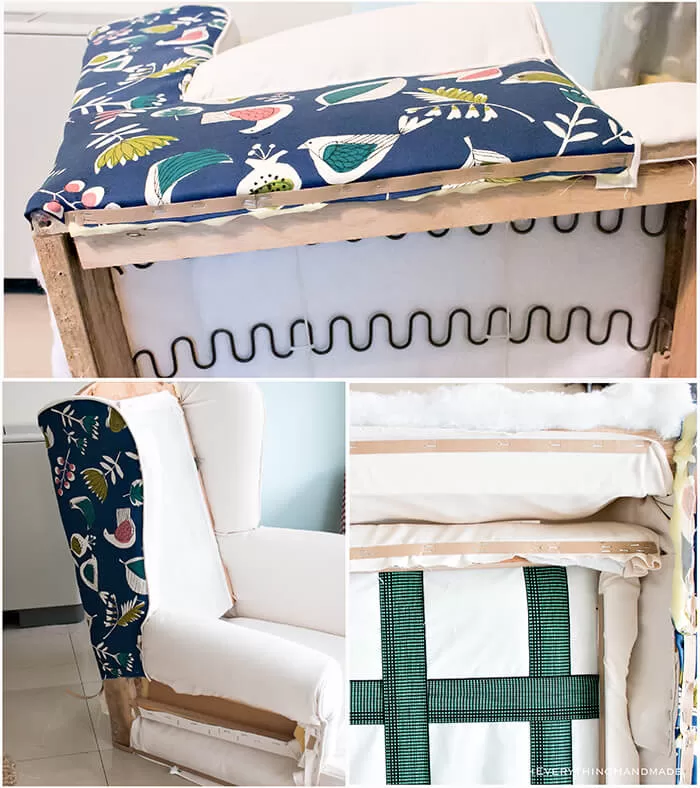
When I attached the side piece, I used an Upholstery Tacking Strip to keep everything stretched and in place.
The back cushion
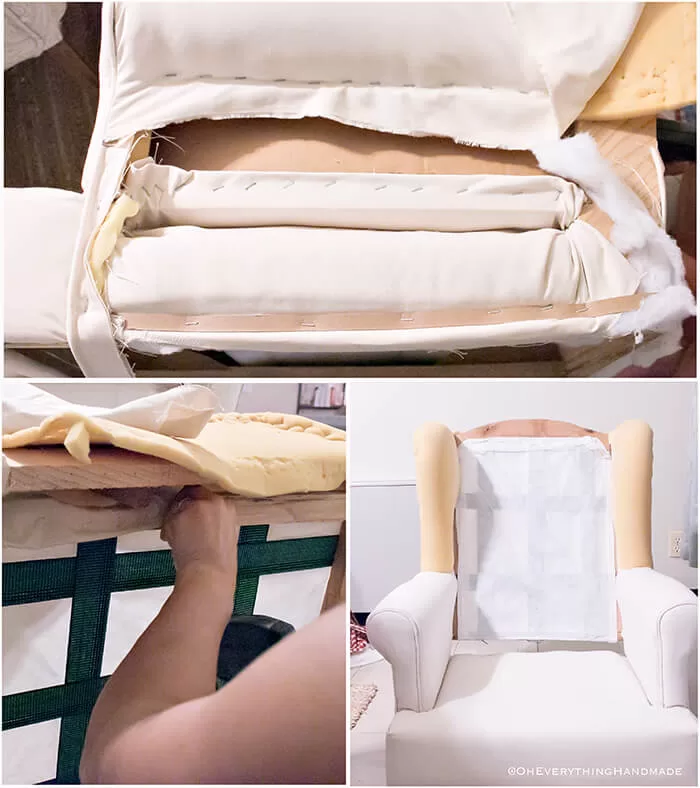
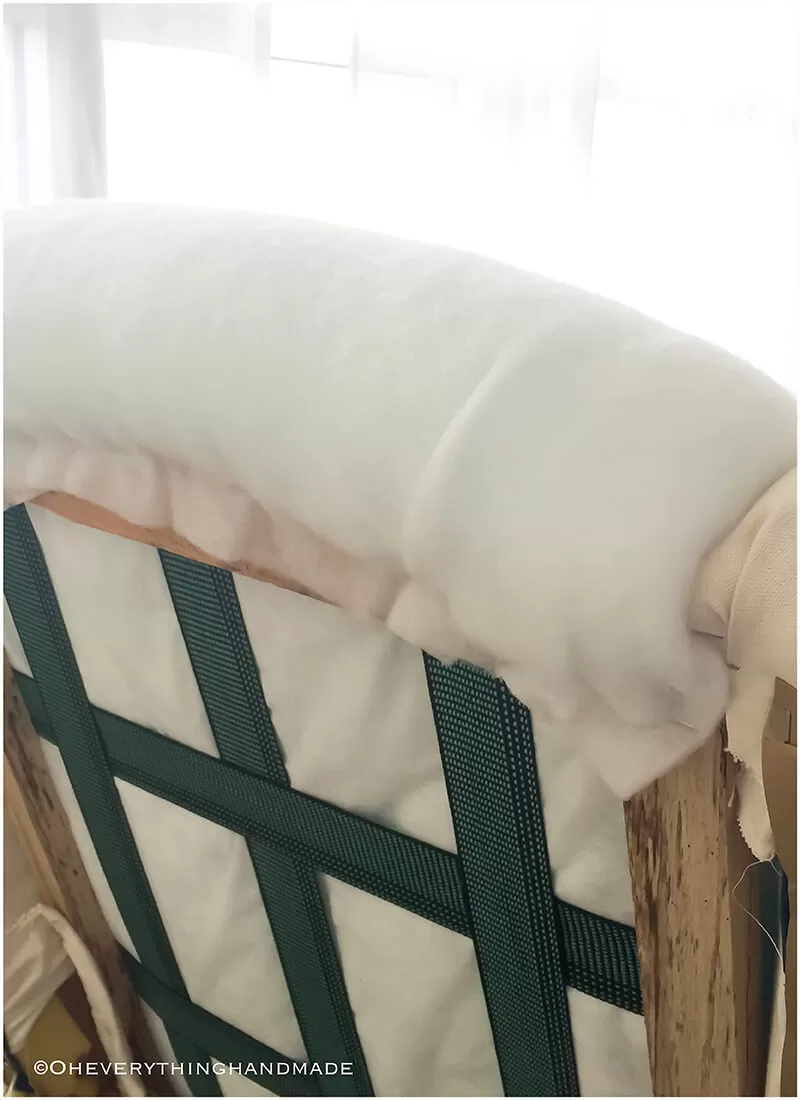
For the back cushion, I used a high-density foam which is durable and suitable for long-term use. However, because this foam is so dense, I had to shave off 45˚ along each edge, in order to be able to fold the foam over the backboard, on the bottom, and the sides. I used a thin fleece-like batting to cover the back and a thicker batting to cover the front.
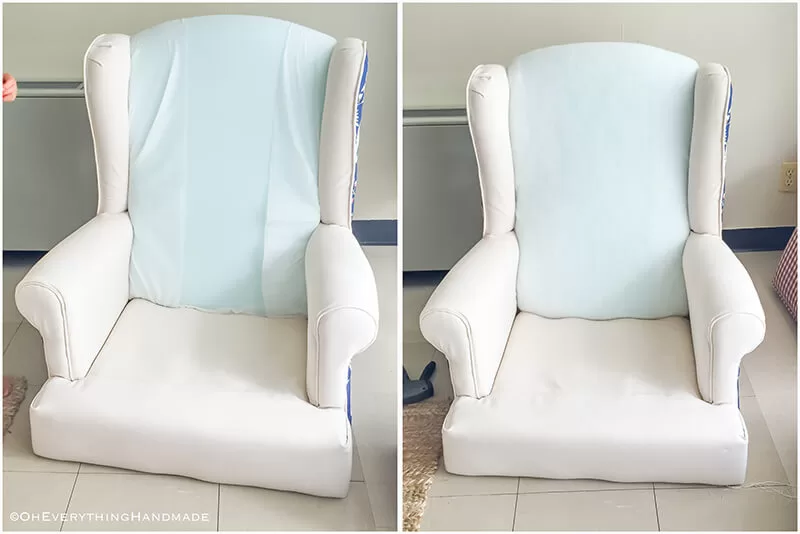
Attach the back cushion
Folding the foam over and attaching it to the backside of the chair was tricky, but cutting off 45˚ along the edges from the backside of the foam helped.
Once the foam was stapled in place, I flipped the fabric over, folded the fabric in three places, and stapled it with a cardboard tack strip to the back.
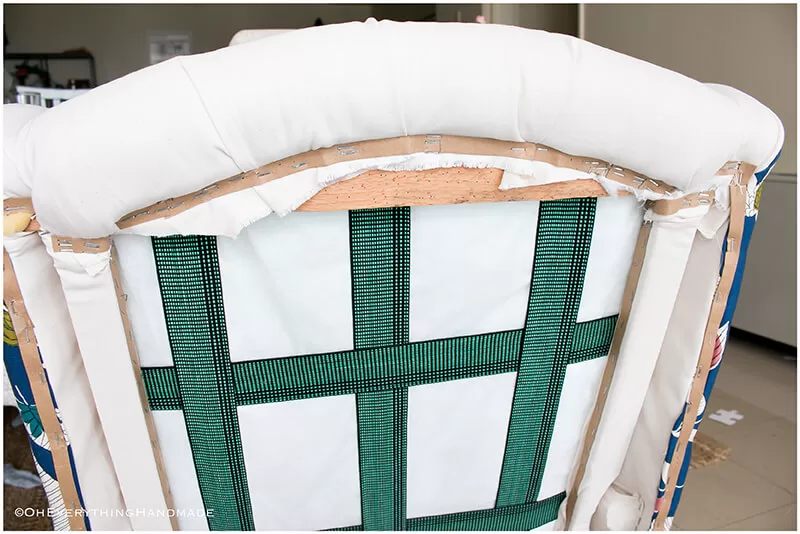
Tuft the back cushion
Tufting the back cushion is simple, even without a piece of wood to staple the twine onto. I have done it before with my Ikea Karlstad Sofa Cushions Hack.
You need to make the double amount of buttons since you need buttons for the front and the back. Use this Dritz kit to make them at home with leftover fabric.
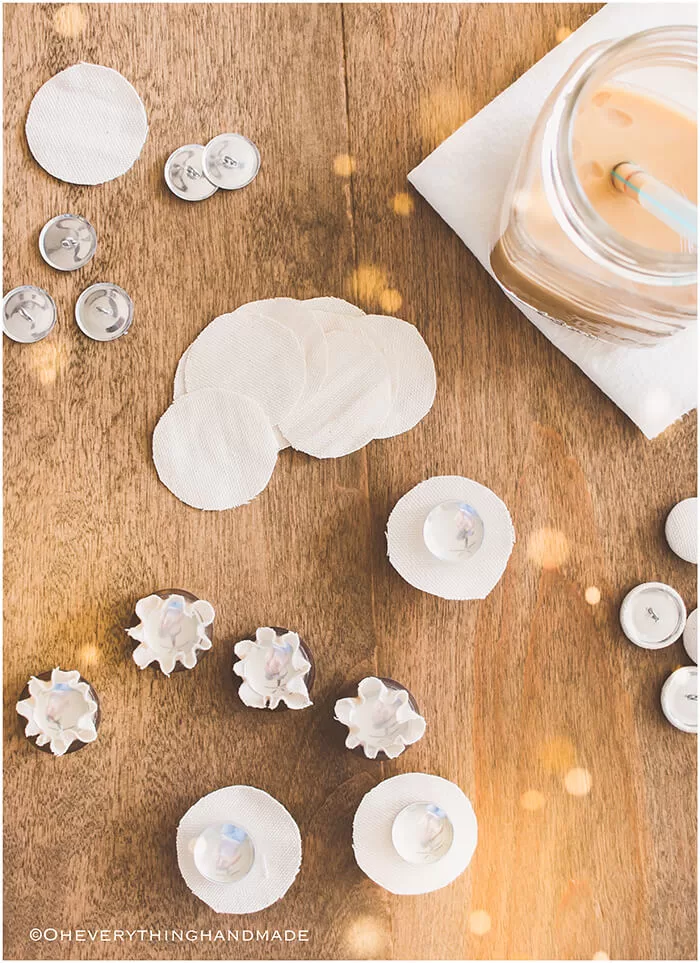
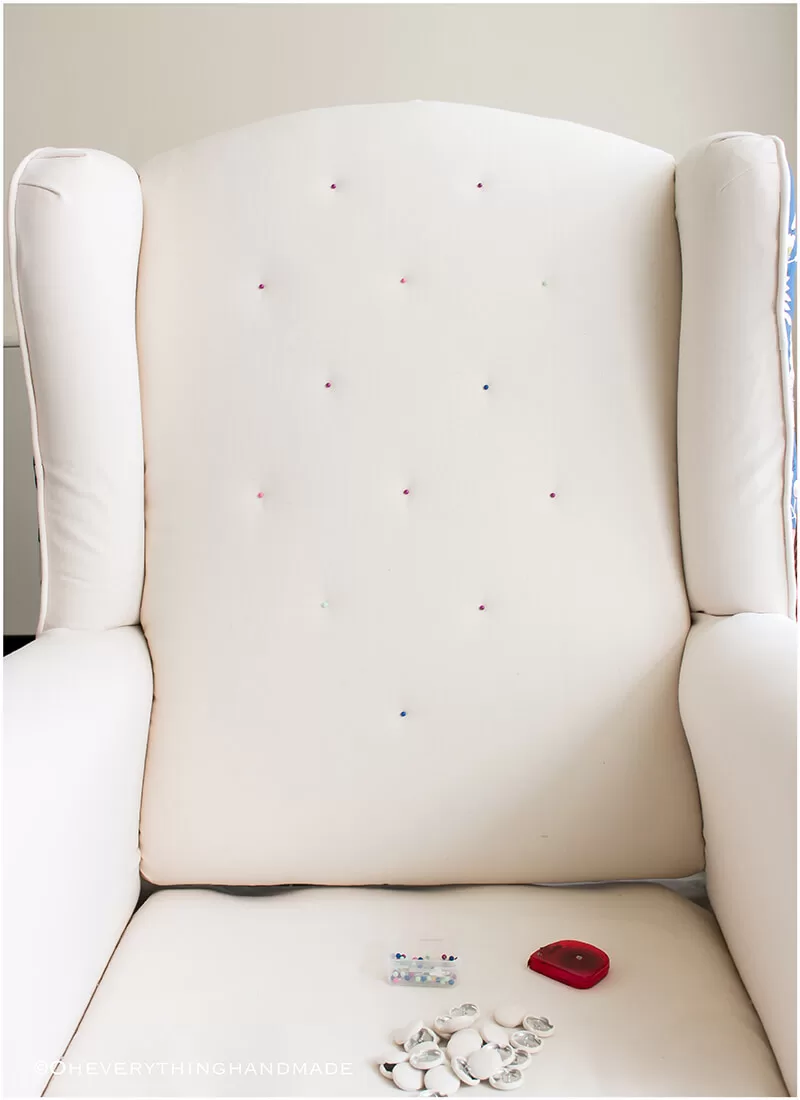
First, measure the front cushion and find the center, once the center is marked with a pin, you can work with measurement tape and pin as you go or cut a cardboard triangle in the size you need the buttons to be apart from each other. Lay the cardboard onto the cushion and pin each corner; repeat until you have your desired tufted look.
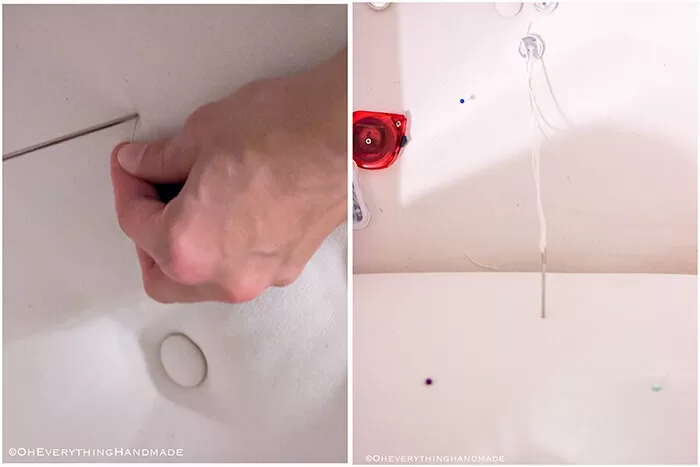
To apply the buttons, I used a relatively long piece of twine (about 30″, you can try less or more) and an 8″ or 10″ upholstery needle. Slip the twine on the needle, and the button and the other end of the twine go through as well. I made a knot underneath the button’s metal loop to keep the button in place without tying the ends.
From the front, pull a pin out and insert the upholstery needle with twine and button attached. Push the needle through the cushion, go to the back of the chair and pull the needle out. Pull two of the four strings; you should be able to pull the ends out. Take the needle off and add another button (see the image below).
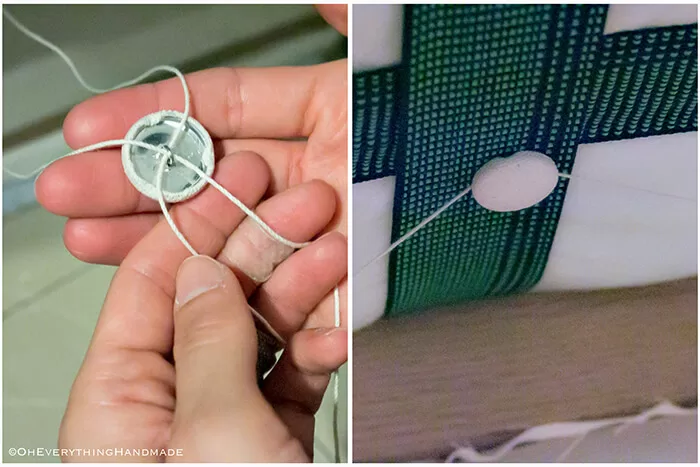
Slip the button onto the twine in a cross pattern, this way the button won’t slip off as easy before you tie the knots. Have a helping hand push the front button in; this way, you will achieve that tufted look. I also recommend 3-4 knots per button once done!
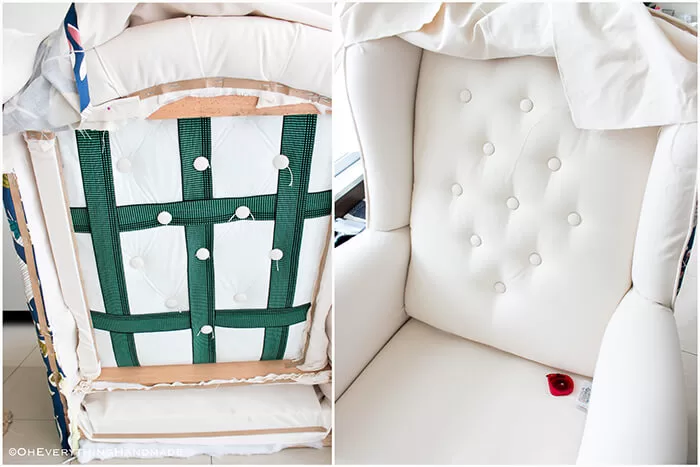
Cover the backside of the chair
When I cut the fabric for the chair’s backside, I didn’t incorporate enough fabric to arc from one side to the other. So, after I pinned the fabric on, I realized the only way to make it fit would be to sew two extra pieces onto the fabric to cover all parts of my chair. This little design mistake happened because the foam was so thick that I had a little gap on each end.
I stapled the cording in place first, folded the edges, and sewed them together. Then I pinned the fabric on the following and added decorative nail heads. I did fold the fabric in again to hide the seam and enforce the fabric.
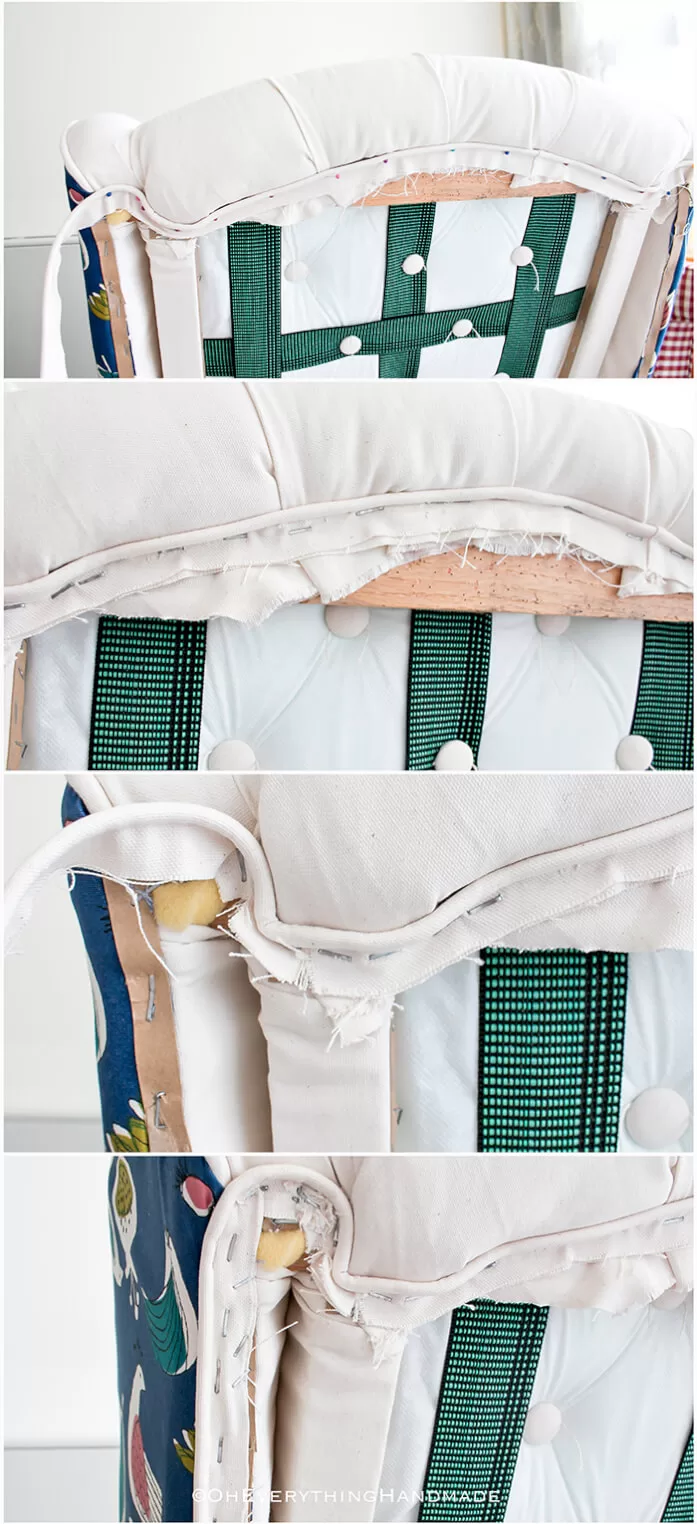
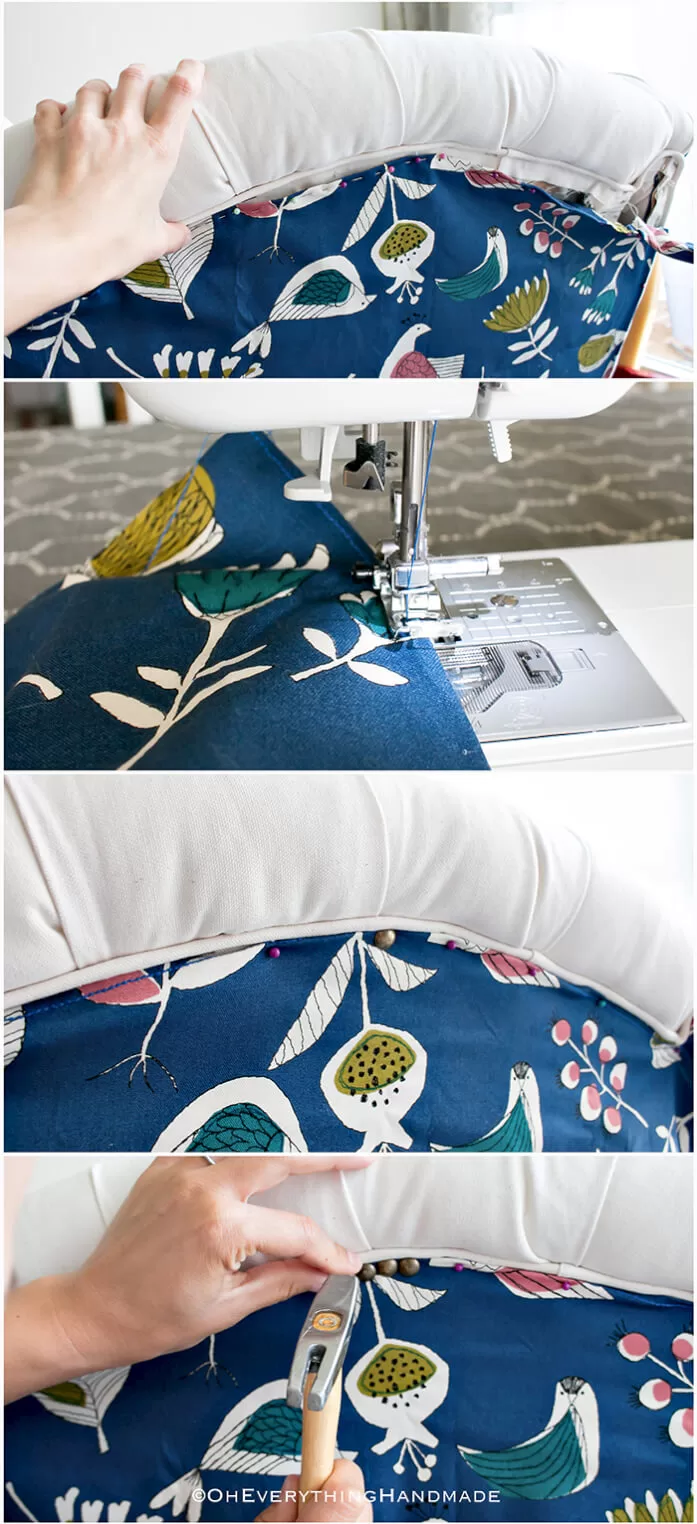
Add decorative nail head trim
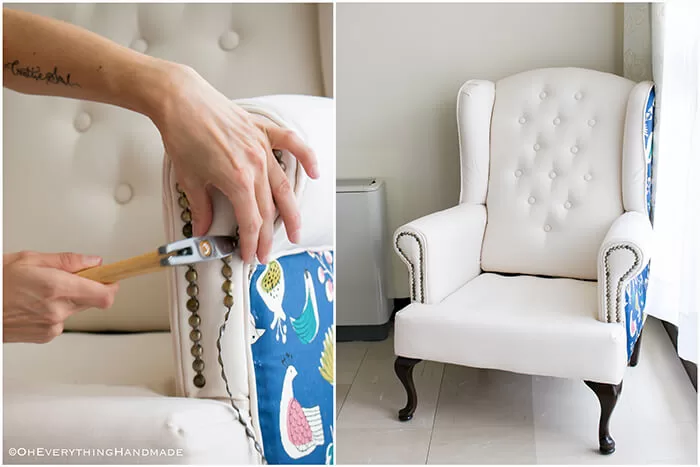
I initially wanted to use the upholstery tack strip to attach the back, but with not have enough wiggle room to attach the fabric. I ended up using the decorative nailhead trim. Once we got to the bottom, we just secured the fabric with cardboard tack strips.
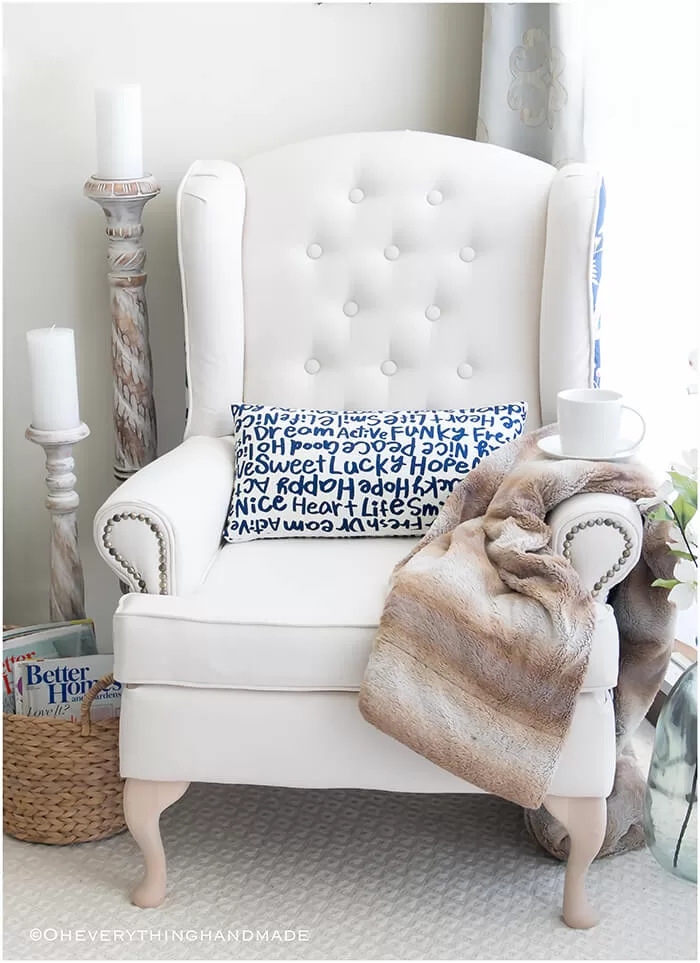
I also added nailhead trim to the front of the armrests, giving the chair a great finish.
Change out the Chair legs
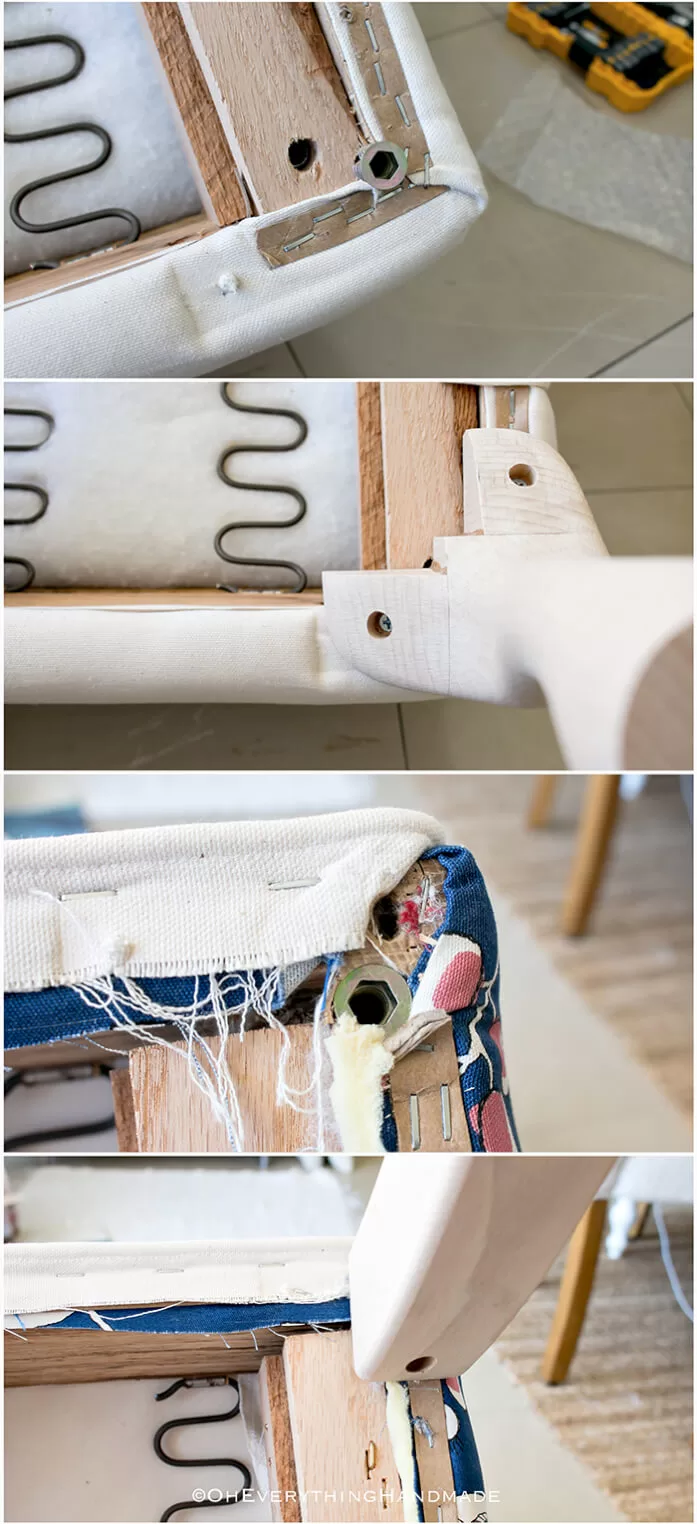
Changing the legs is not hard since all chairs have legs and predrilled holes. However, you may have to adjust since not all legs are identical.
I ordered 4x FURNITURE FEET QUEEN ANN LEGS on eBay and screamed aloud when Mr. Johnson entered the house with the box in his hands. They came quickly and had everything you need for attachment (except the screws).
But since the legs were a little smaller, I had to reposition them and drill new holes. I also use the T- NUTS Screw Cups that came with the package.
Make a seating cushion
I used the same high-density foam on the back cushion for the seating. I measured the seating area on the chair and transferred the measurements to the foam. With a sharp knife, I cut the foam and covered it in a fleece fabric (you can also use the old cushion as a template).
I used yarn and needles to sew the seams shut.
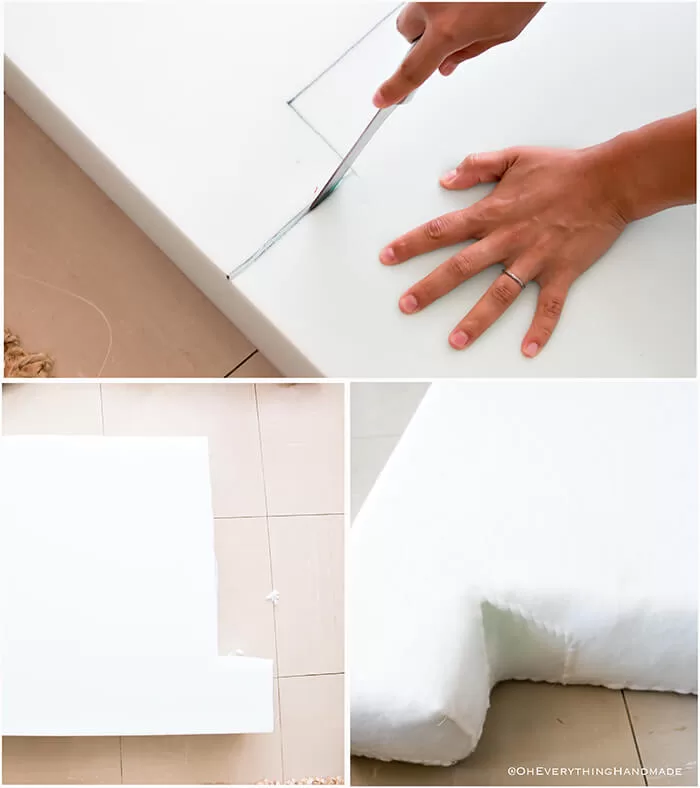
When I made the cushion, this video helped me to complete it in only one day!
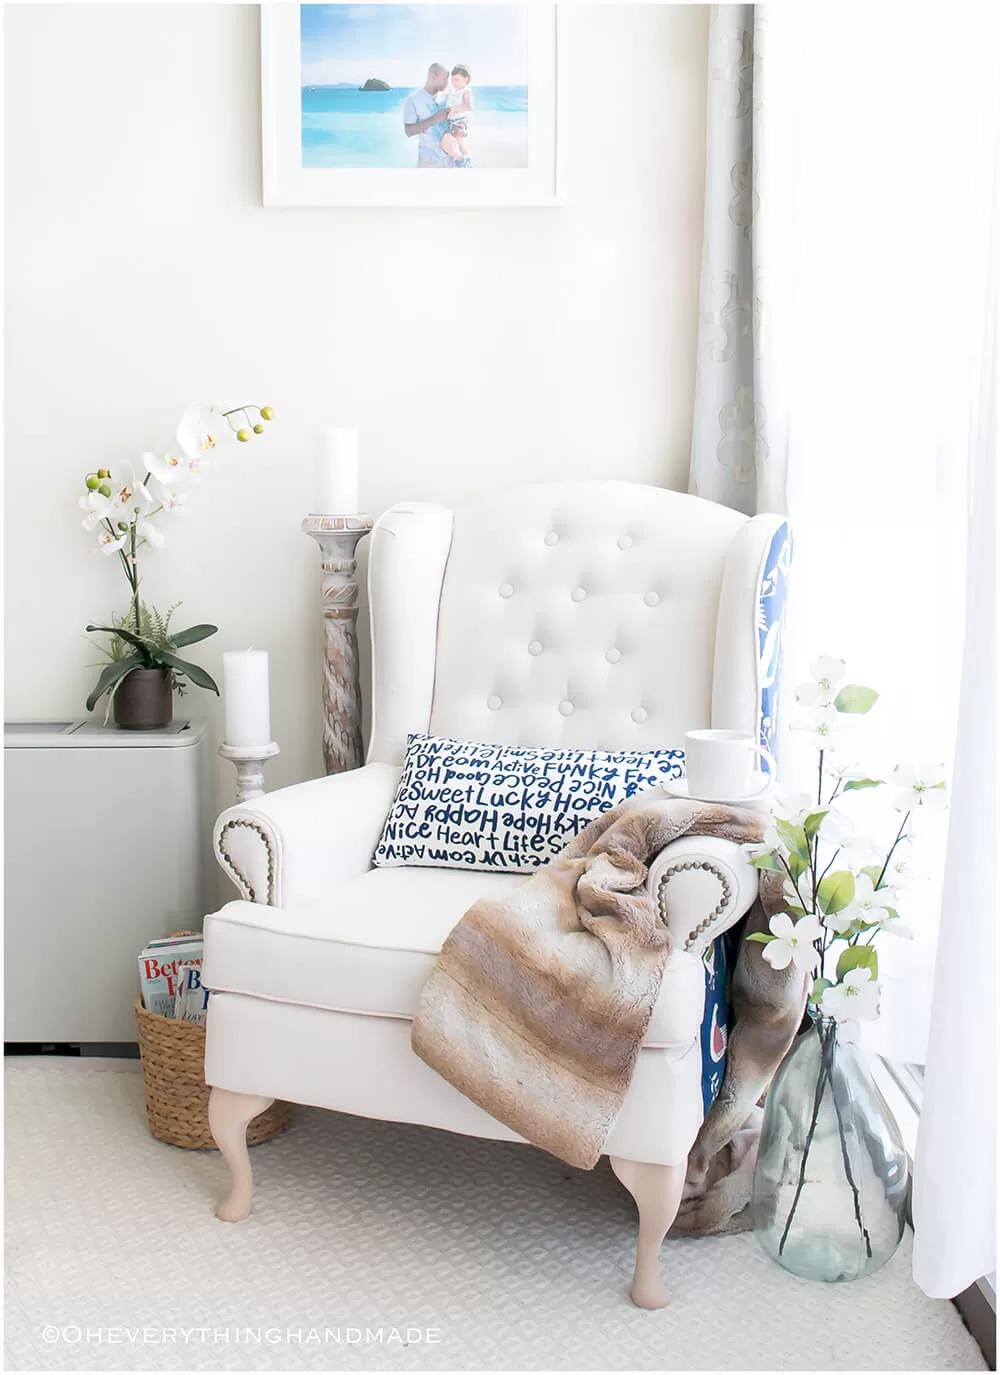
I hope you enjoyed the tutorial, and please feel free to comment below if you have any questions regarding Farmhouse Style Wingback Chair Makeover or share the tutorial with a friend if you think it will help. Thanks a lot for stopping by!
// PIN IT //





what a change! it’s beautiful!
Thanks, Cassie! It’s been fun to work on it. So glad you stopped by!
Amazing!!!! You make me try to find an old chair and do a makeover on it
ha ha, its vicious isn’t it? Happens to me all the time, whenever I find something on the web that I really like. Chances are pretty high that I jump in the car on the hunt for something similar.
How long did this take you? It looks amazing!
Oh it took longer to start it! But once I had taken the old fabric off, it took me about 3-4week till complete.
Glad you like it!
Wow, this turned out beautifully!
Thank you Shauna! One of my favorite pieces in the house.
Hi Bettina!! Thank you so much for this amazing post! I just got a pair of wingback chairs that need a huge facelift and this is what I needed! I tried to calculate the estimated cost of everything with the list you provided but could you tell me approx how much fabric you used? Thank you again. Love your work!
Hi Eunice, so glad you stopped by. And to answer your question, I used about 6-7 yards of fabric for my chair.
This is such a beautiful transformation! My husband and I are buying a house this fall and I was worried I was going to have to continue living with ugly old furniture! You have inspired me! 🙂
Danielle, I am so glad this post inspired you. I think at one point I was looking purposefully for ugly furniture just so I could give them new life. Good luck with the house buying and all the makeovers ahead.xo Betty
Hello!
Love your work. Can you give me more details about the screws you used for the legs? Such as what type of screws you used, their measurements, and where you ordered them from?
Thank you,
Hi Valentina, Thank you so much for stopping by. The screws for the legs are 2″ long screws that can hold 50kg. Home Depot or Lowes should have them if you live in the states. Look for strong screws that don’t have that free space at the top, and go for at least 2-3″ long screws.
Hope this helps?!
xo Betty