Animal Coat Hanger
Hi there, glad to be back. Today I have a quick Animal Coat Hanger for you which would be a great family project.
I initially saw this DIY on the Martha Stewart’s site, but with different animals. It inspired me to create my personal animal version and make it even a step easier (WOW yes I said it, Martha!!!)
Here we go.
Animal Coat Hanger
Material needed:
- Crafts Foam Pouncers
- Crafts Gesso Primer
- Adhesive Stencil Paper
- Cricut Air
- 1-2 Paint brushes in different sizes
- 2 Foam brushes
- Acrylic colors
- Wood board 6″x20″
- 4 hook hangers
- 2 picture hangers
- Plastic cups
- 220 sand paper
- Templates: Cricut template | Printer template
SHOP THE MATERIAL
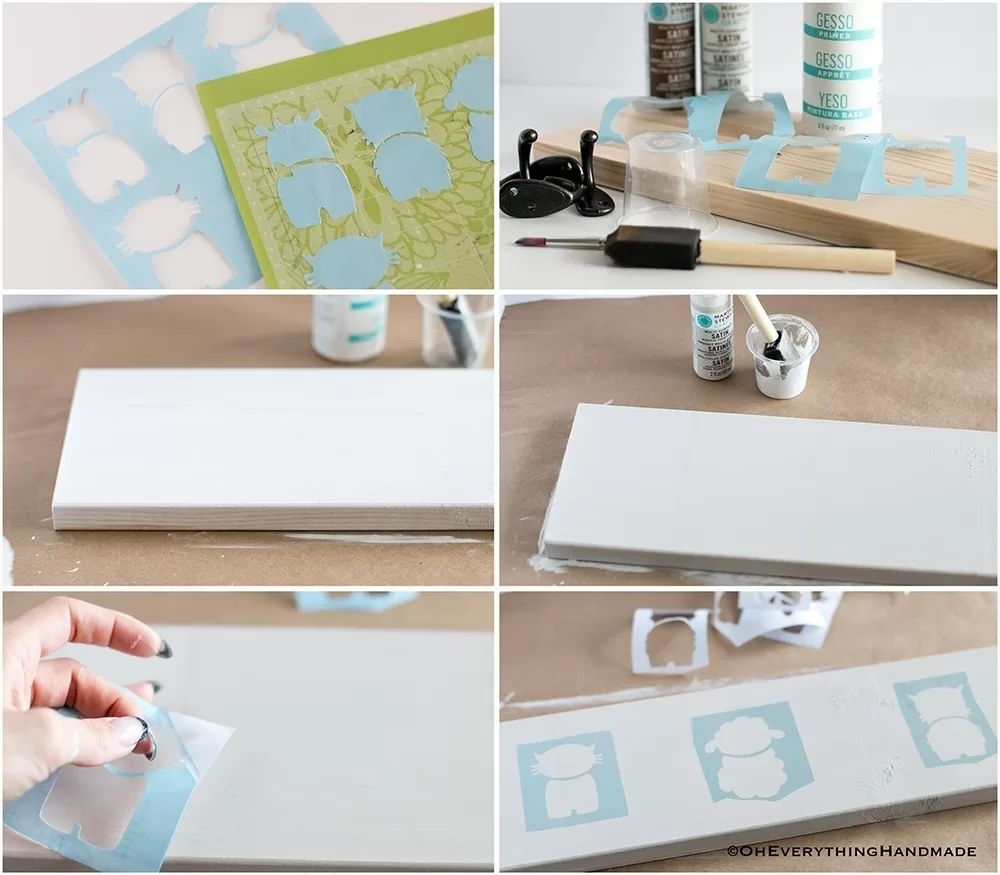
Instructions:
Prep the board
Prep the board by sanding it lightly with a 220 grit sand paper, once finished dust it off with a damp cloth.
Apply one thin coat of Gesso primer, let it thoroughly dry (15-20min.) before continuing with the preferred background color for the board. Use two thin coats of the background color, let dry in between coats.
Cut out the stencil
You can hand cut the stencil (with a craft knife and cutting board) or use a Cricut to cut everything out for you. I used my Cricut to save some time and to be accurate with the details on the templates.
Once the stencils are cut out, place them carefully onto the dried board. Press the stencil in place and remove all air bubbles with your thumb.
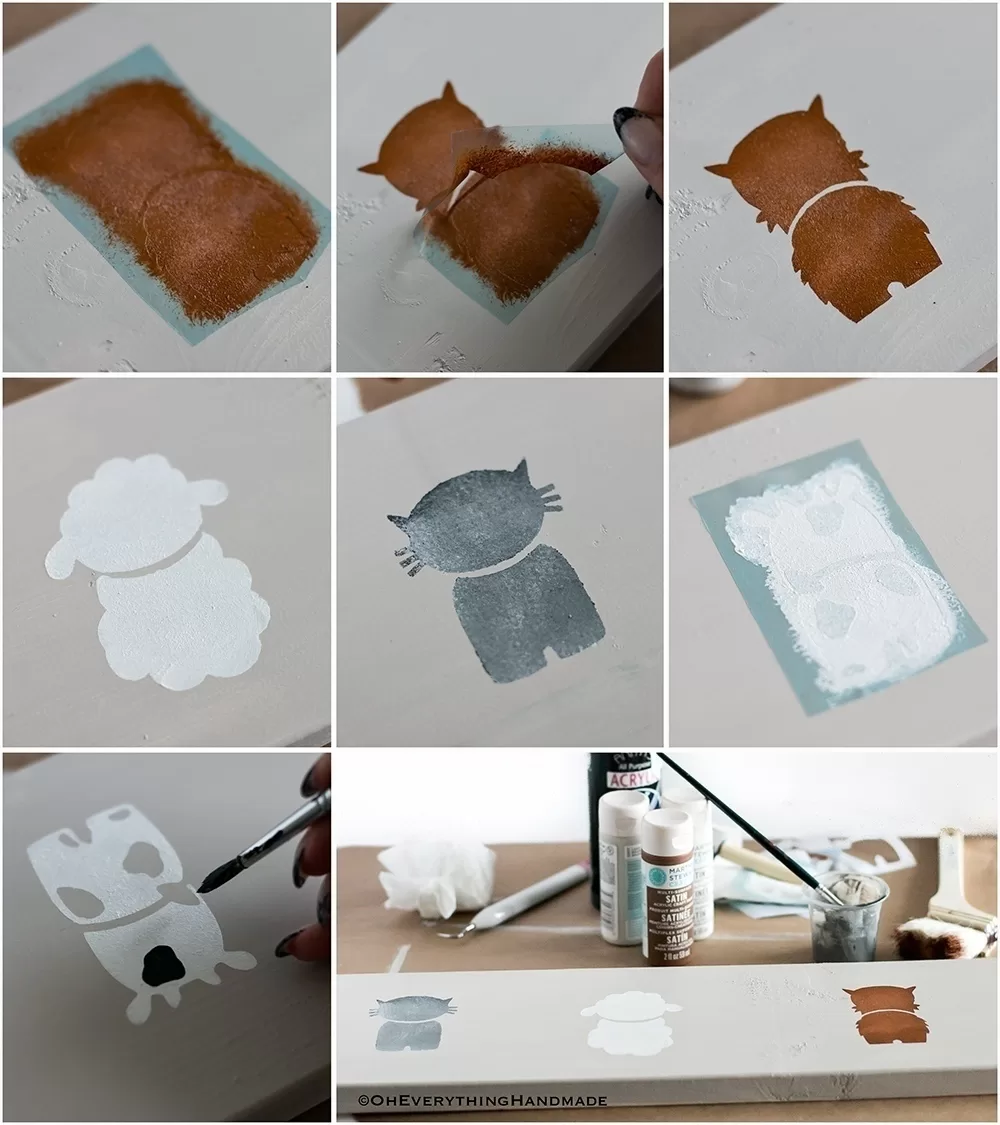
Stencil the animals onto the board
This next step is up to your imagination, color the animals any color you like. The easiest way to do so is by using Foam Pouncers with only a little bit of color, apply multiple coats of color to reach the desired shade.
While the paint is still well, peel off the adhesive stencil paper to avoid any tears in the color and shape.
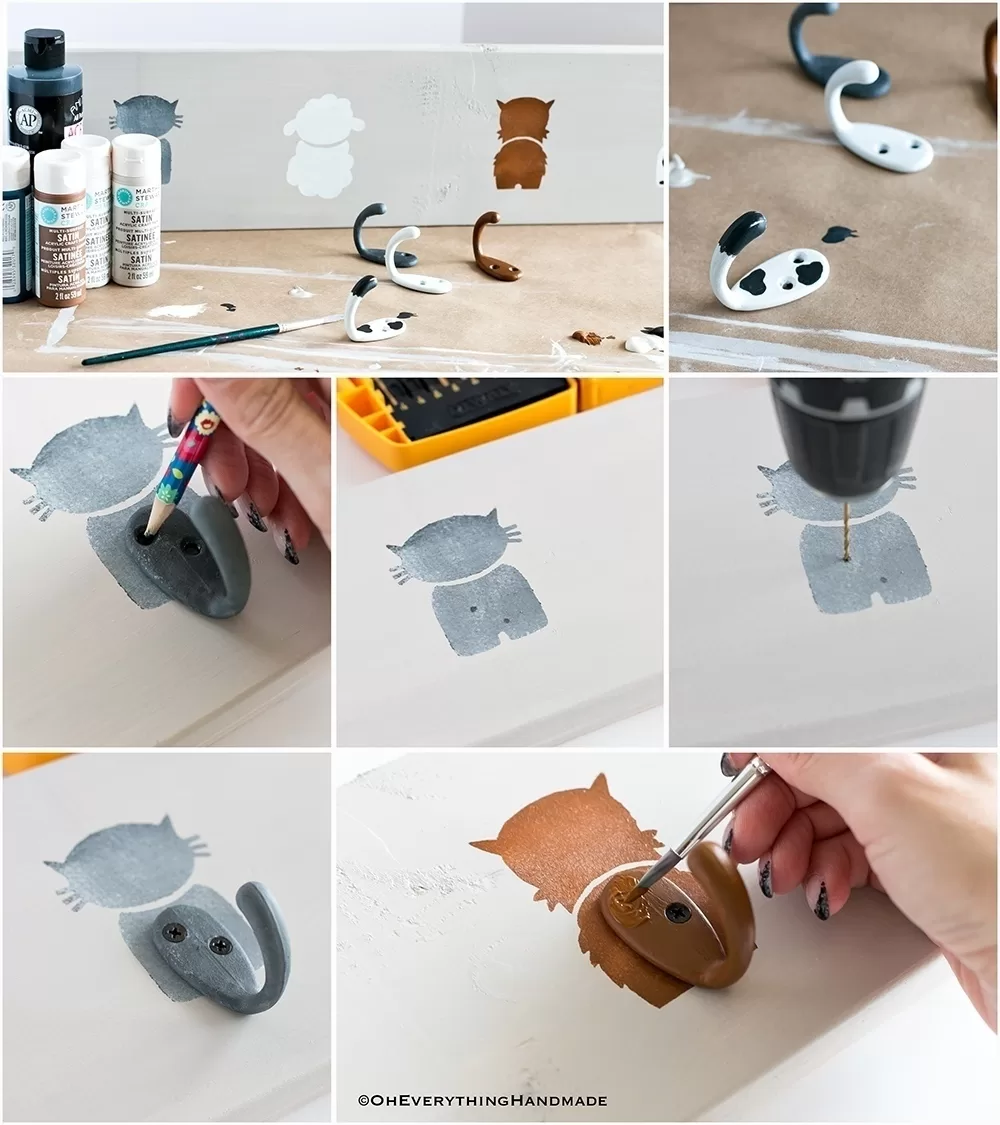
Prep the Hooks
While the animals are drying, prep the hooks by applying two coats of Gesso Primer with a small brush. To speed up the drying process, use a heating gun.
Apply the final color of each animal to the hooks or customize it to your liking. Let the hook dry before continuing with the next step.
Place all hooks on each animal and mark where the screws go with a marker or pencil. Predrill the holes and carefully attach the hooks to the board.
To cover the screws, use a small amount of paint and brush each cap. Let it dry one again!
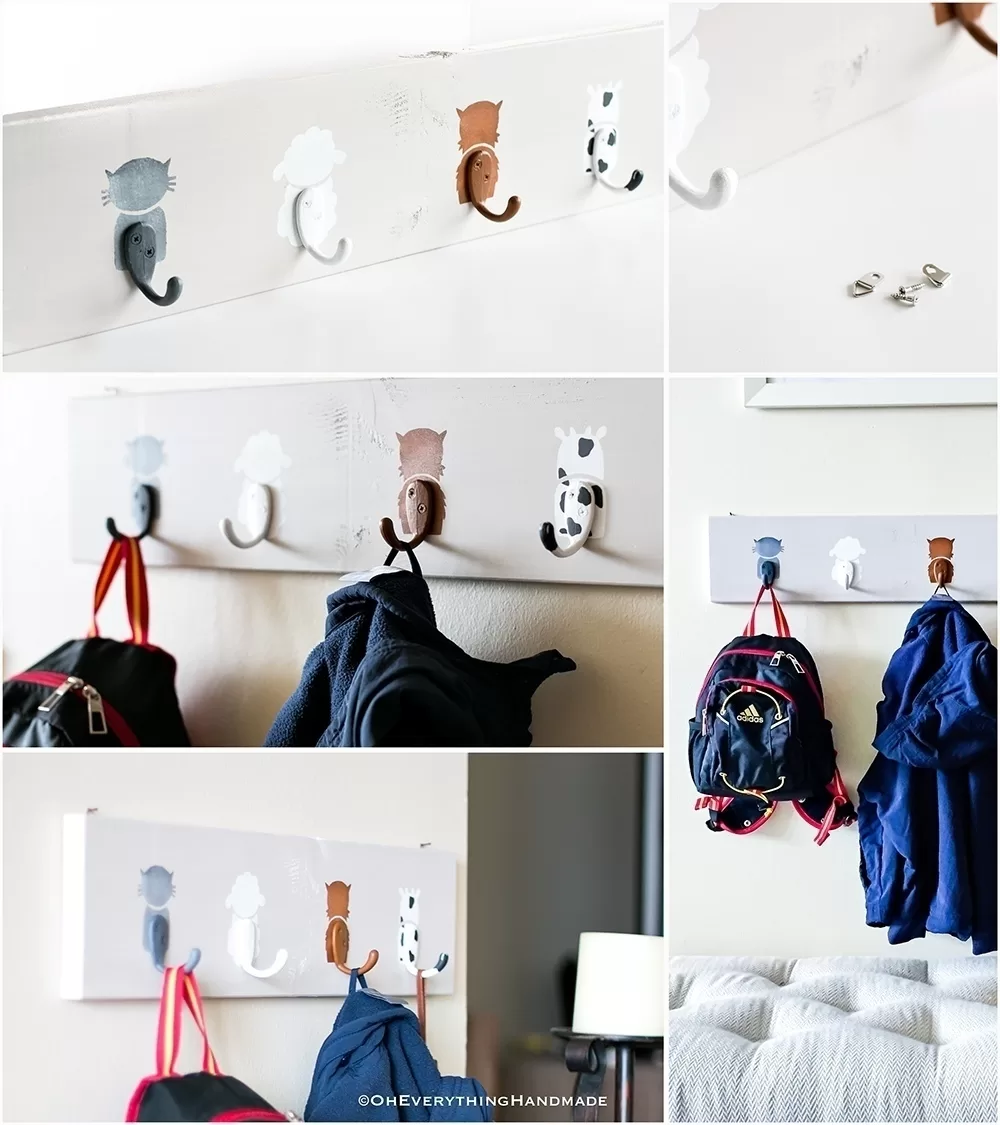
Complete the project
Add picture frame hooks to the back of the board and hang it up! I recommend at least a 5kg picture frame hook, so your animal coat hanger won’t make a dive once it’s loaded with jackets and backpacks like ours.
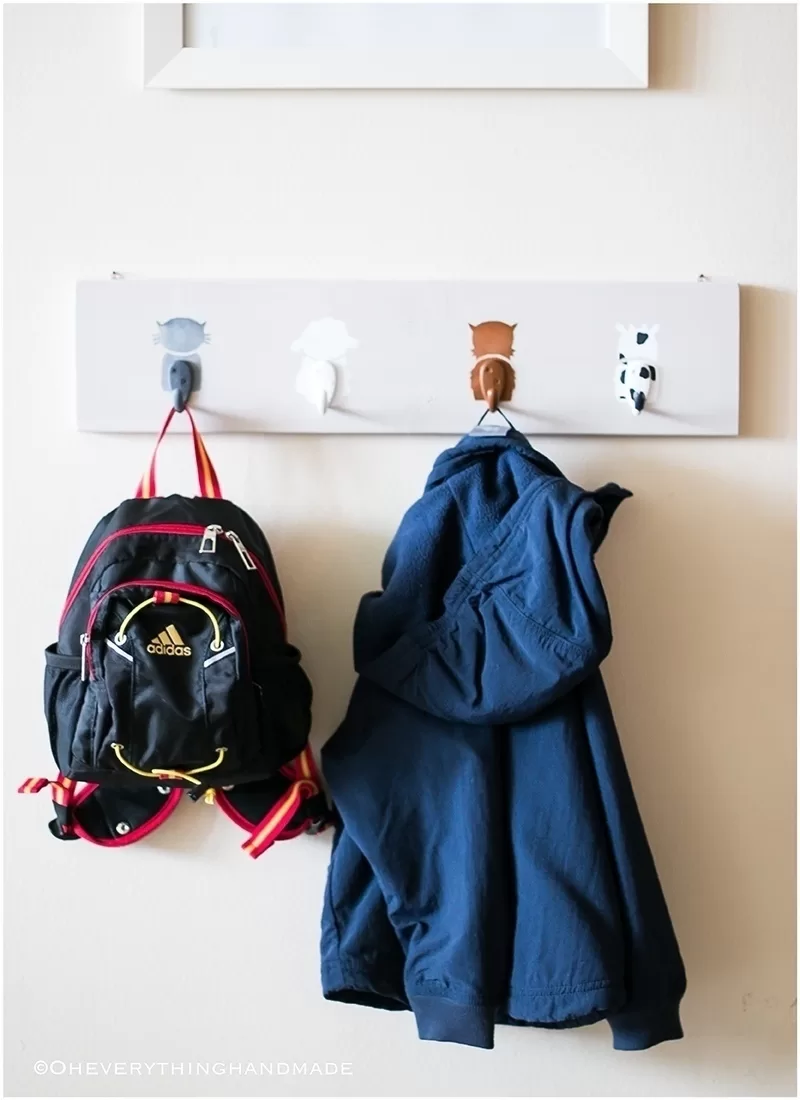
Hope you enjoyed this quick tutorial and will give it a try.


![How to Create a Beautiful Cluster Bead Bracelet [Tutorial]](https://oheverythinghandmade.com/wp-content/uploads/2014/06/Final-Cluster-of-abuandance-bracelet-by-Oyindoubara1.jpg)
