
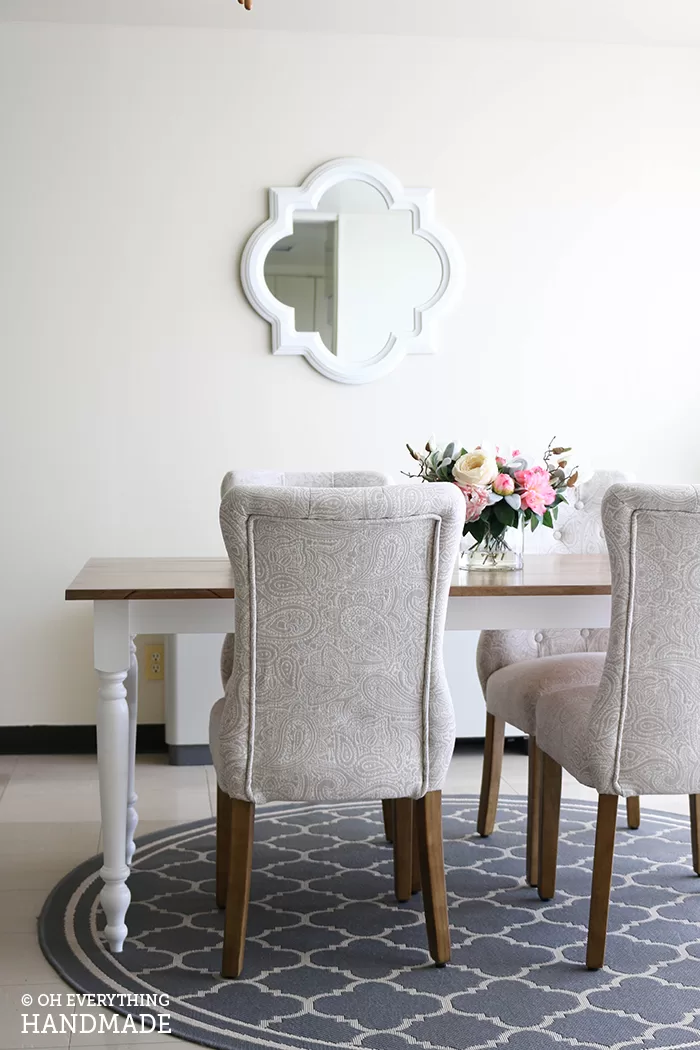
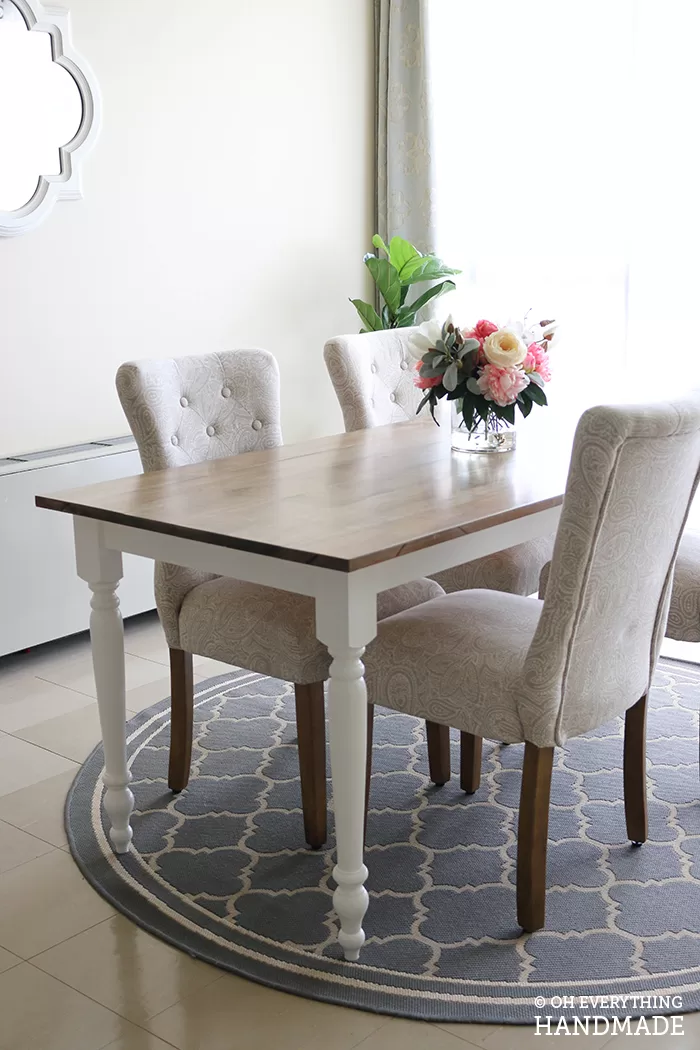
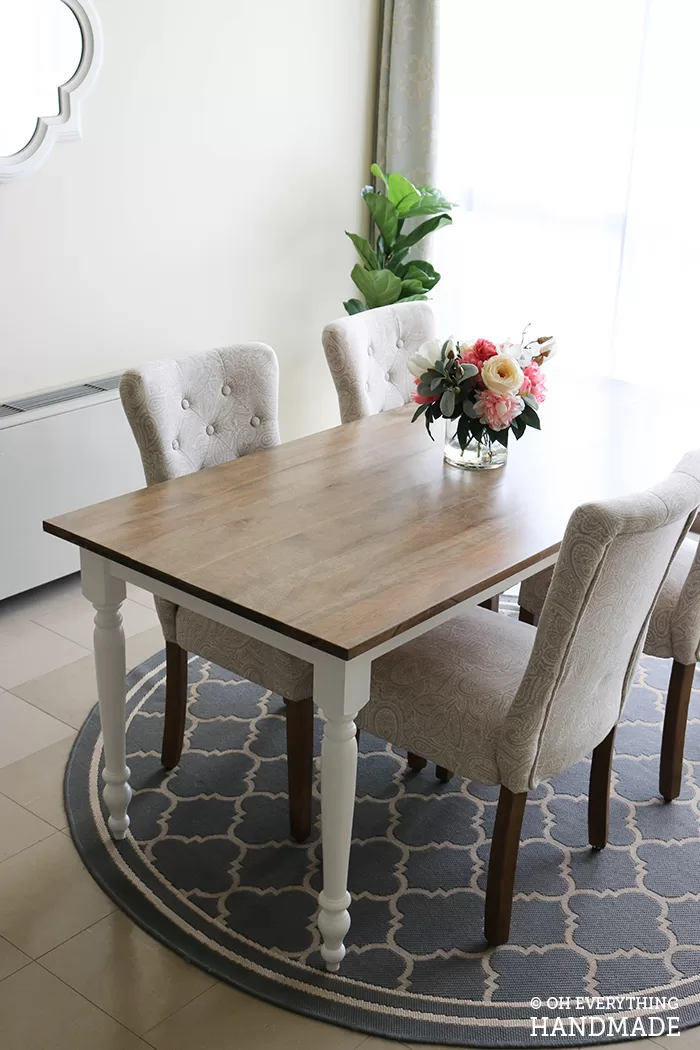
FarmHouse Table with Apron & Corner Brackets

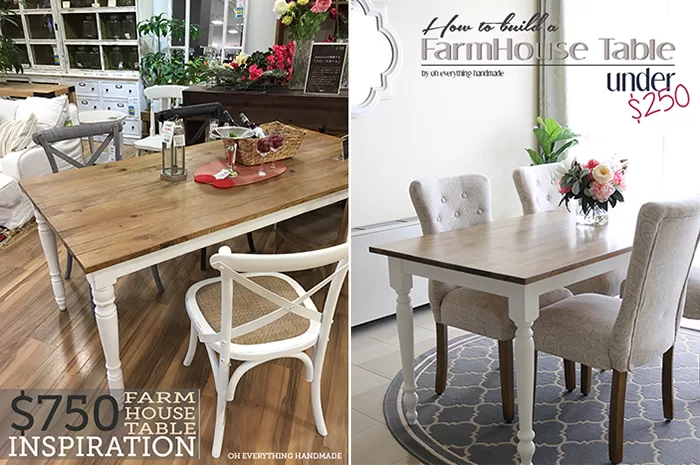
Hope you all had a great 4th of July weekend! And because its Monday – I wanted to finally share “How I build a FarmHouse Table under $250”. A FarmHouse Table with Apron & Corner Brackets was always something I wanted to build or own. I had previously build a dining table, but the new house owners requested to add the table to the contract.
So, we left the states without a table… the first week after we moved into our Japan housing, we ate from the kitchen counters (of course from our plates), while sitting on the floor or we went to restaurants. I got tired of it really fast, but I didn’t want to have government furniture — that’s when we went to a furniture store to look for some chairs and a table.
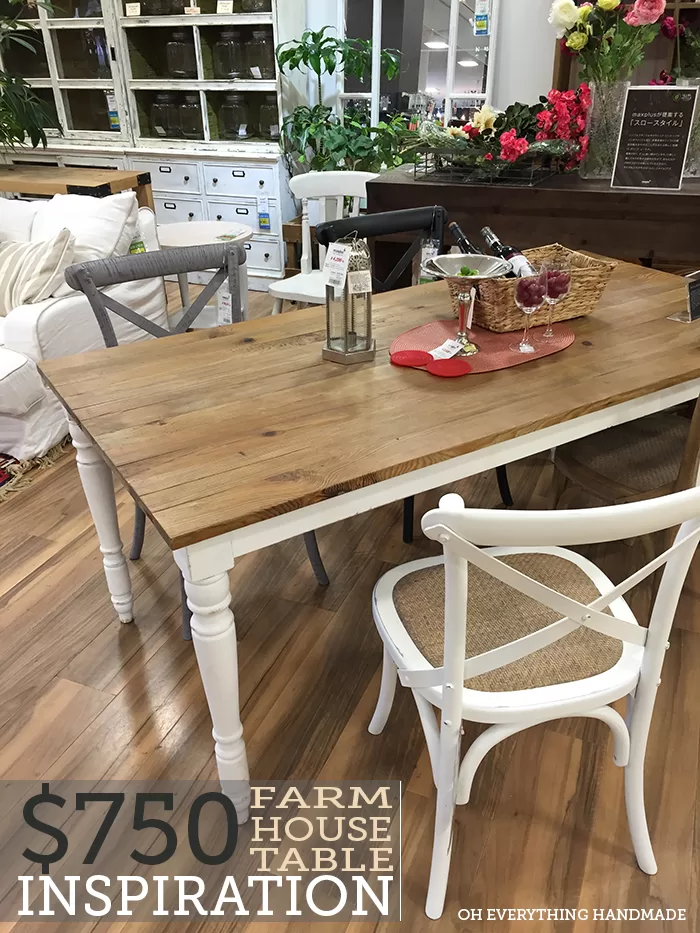
Little I knew that Japanese furniture can come with a hefty price tag, this FarmHouse Table was beautiful but the price tag literally made me choke. $750+ tax, and that did not even include the chairs. I almost bought the table, but something told me not to. The next day, I had the brilliant idea to pay the woodshop facility a visit. Next thing I knew, I was picking out wood for the table.
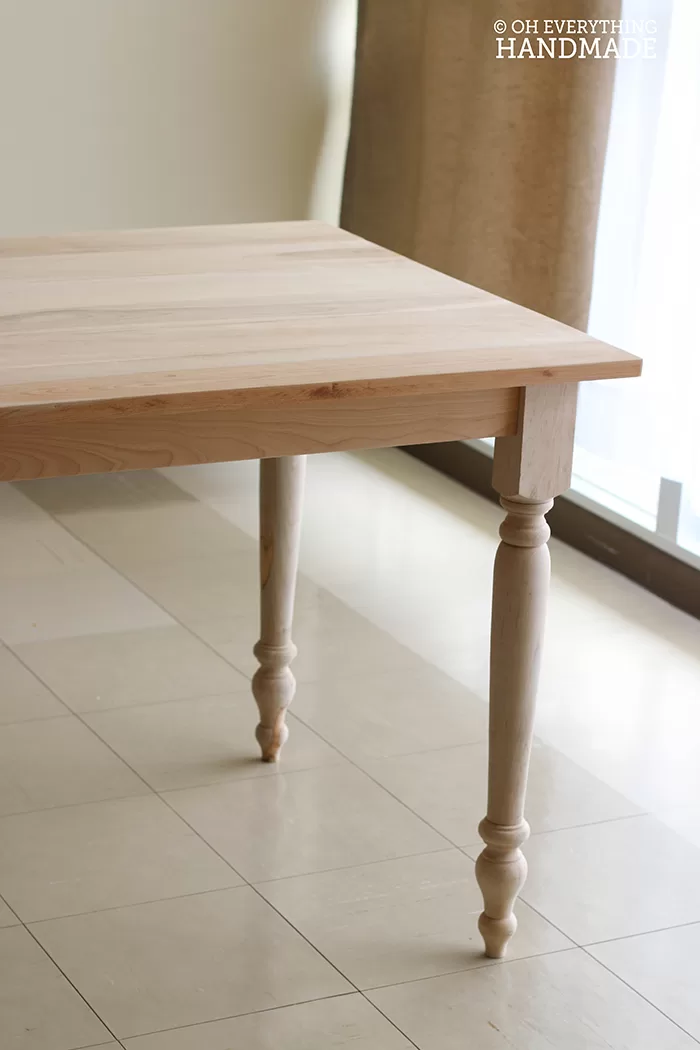
I decided to make a smaller table this time, it ended up measuring 72″x32 with 29″ table legs.
Material you need:
- 6 – 72″x 5.33″ (that’s the size they had at the woodshop, but you can go with any width as long as you reach 32″ at the end)
- 6 – 8 Clamps is recommended
- Apron boards: 2 – 3″x63″ and 2- 3″x23″
- 4- 29″x 3″diameter Table legs
- Corner Brackets: 4 – 3″x4.5″ on the inside
- Miter saw
- Screws
- 8 – 8mm Threaded rods
- 8 – 8mm Threaded Inserts
- Kreg jig
- Wood glue
- Sander, Sandpaper
- Measurement tape
- Pencil
- Stain, Sealer and MilkPaint
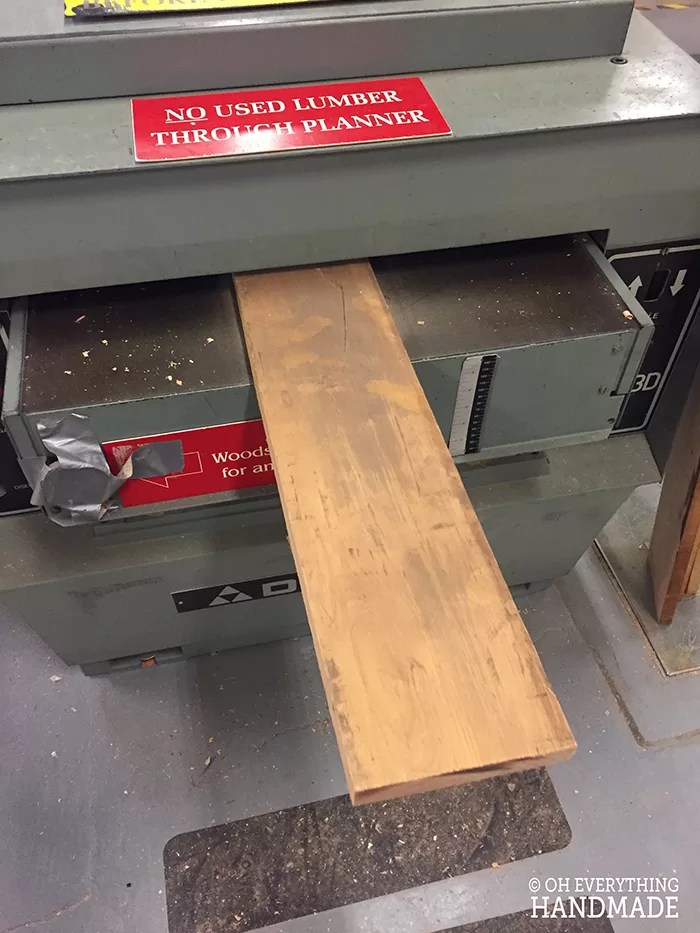
Since the woodshop had only enough birch left for me to make a table with, that’s what I went with! My first day at the shop was super fun, and I got to work on so many new machines, like this planner.
After all boards went trough the planner I laid them out on a glue station, and rearranged the boards until I liked the look.
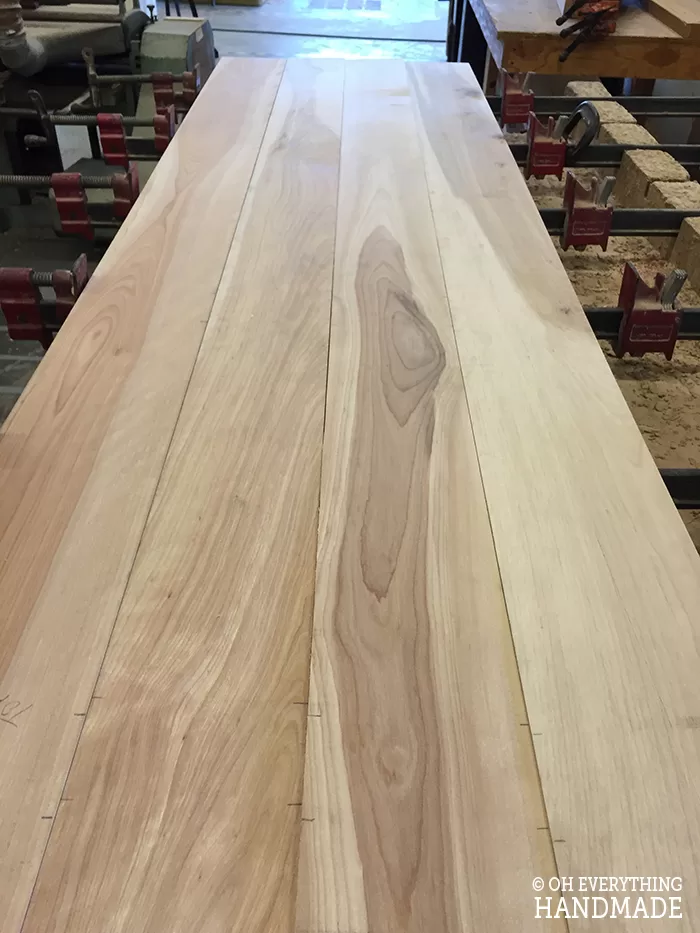
If you look closely, you can see some pencil marks. They are there because I was going to use chips to connect each board. But the woodshop workers told me it would be better not to do that. Because each board will slightly buckle even after it goes through a planner, the chances are slim to get them aligned 100%.
Instead we glued each side, and laid the boards next to each other on the glue station. Clamps are a must for this project! I was told that if I start clamping in the middle first, I can adjust the boards clamp by clamp.
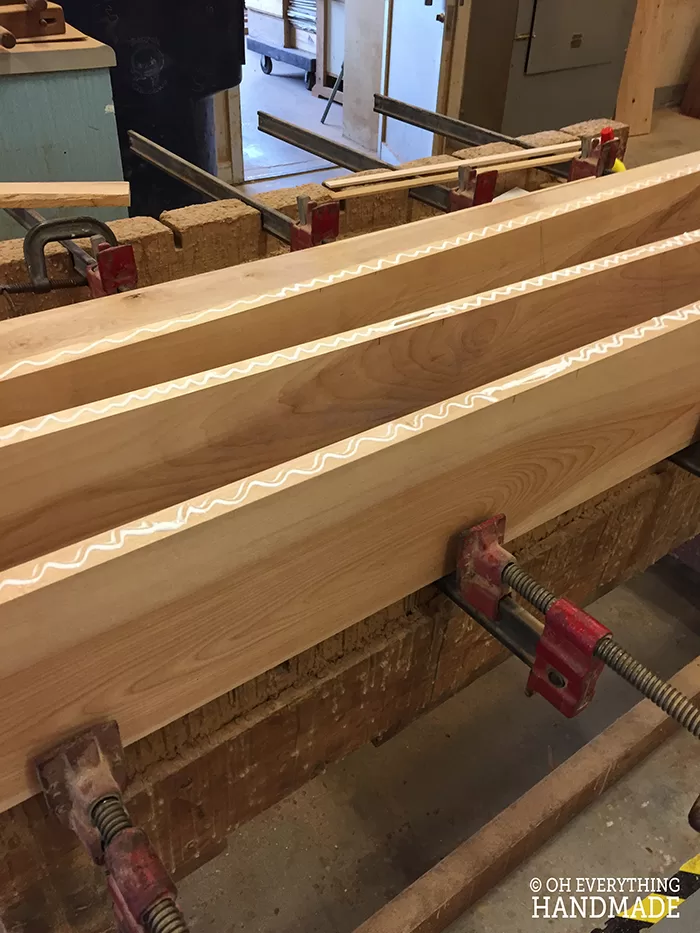

I used 10 clamps in total, 3 along the top so the table won’t buckle, 5 along the bottom, and 2 on the side since I had some boards bend down on the outside.
Once the table is glued, you need to let it dry for at least 24 h before you sand the top!
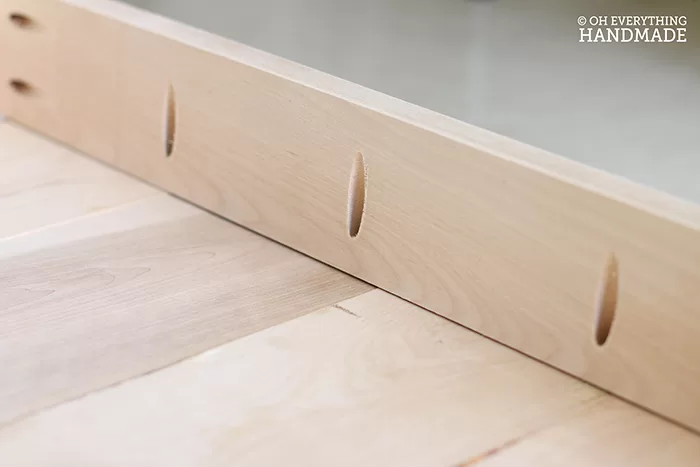
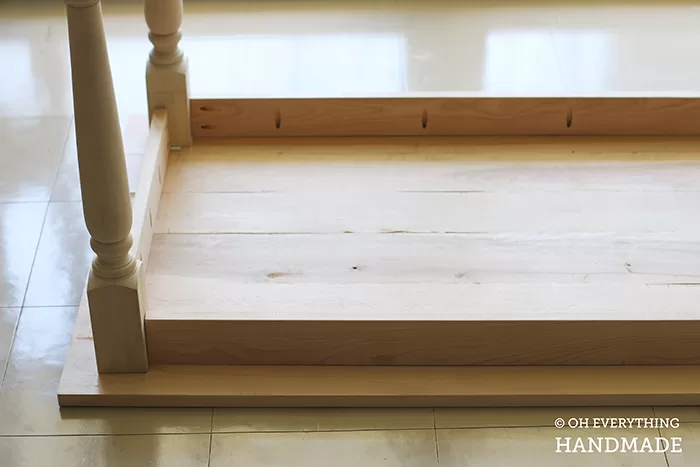
My next step was to cut the apron boards (see measurements above), and the corner brackets. They measured 4.5″ in length on the inside and were 3″ tall. I also used a kreg jig on them.
I used a miter saw to cut each bracket at a 45 degree angle.
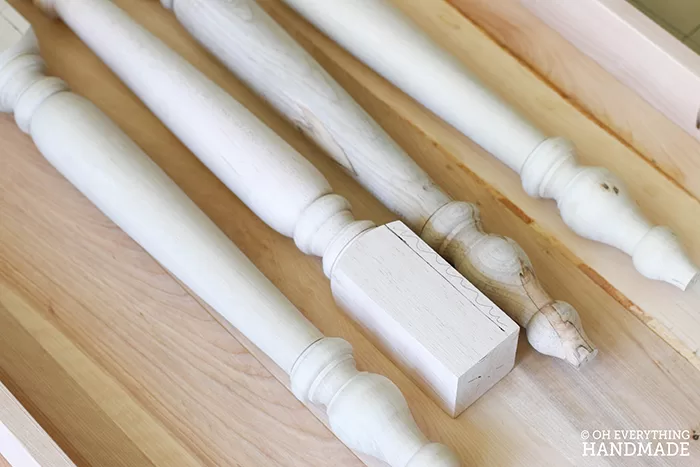
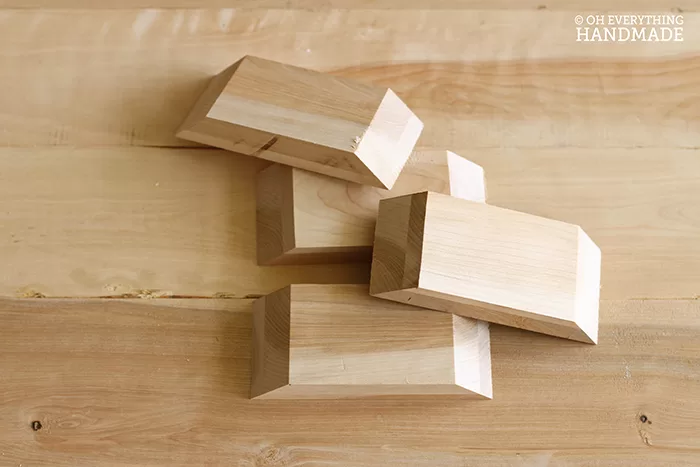
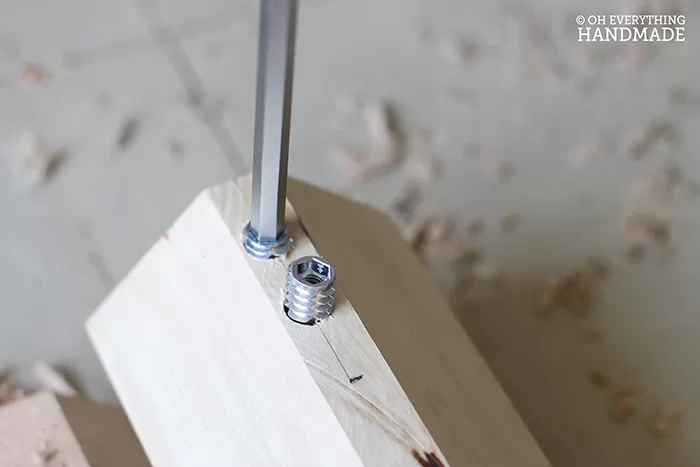
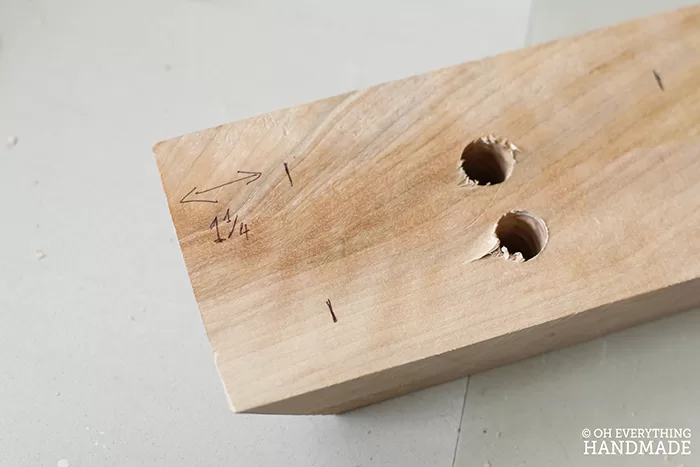
Table legs are next, since I wanted to use threaded inserts for the leg attachment, I had to shave the corner off that was pointing to the inside.
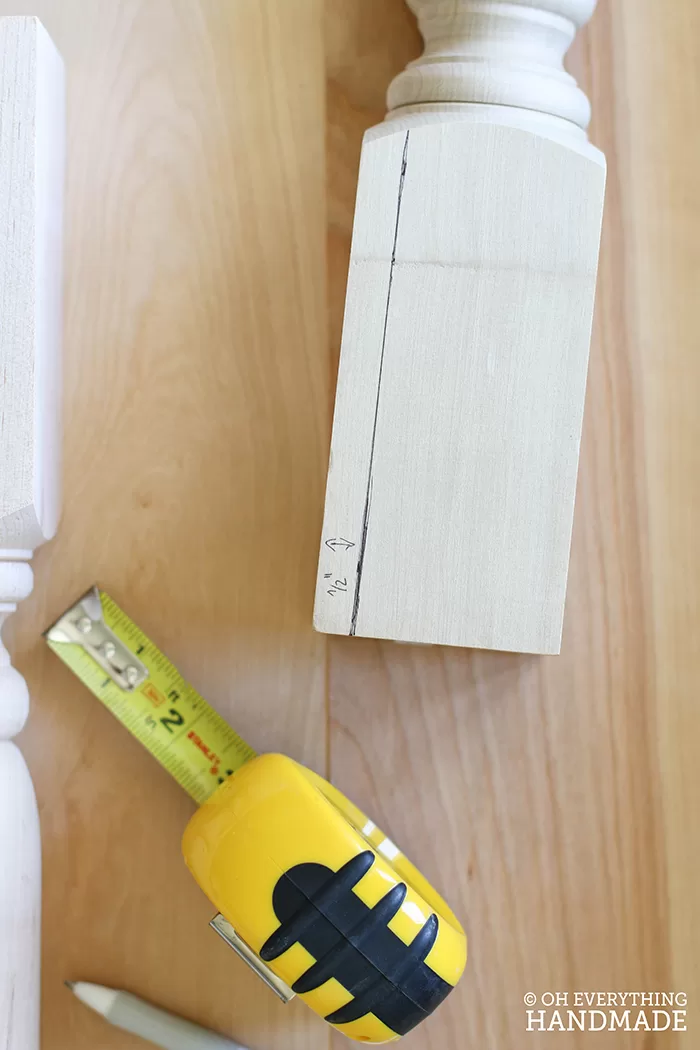
1/2″ was cut off with a table saw, which I set to a 45 degree angle.
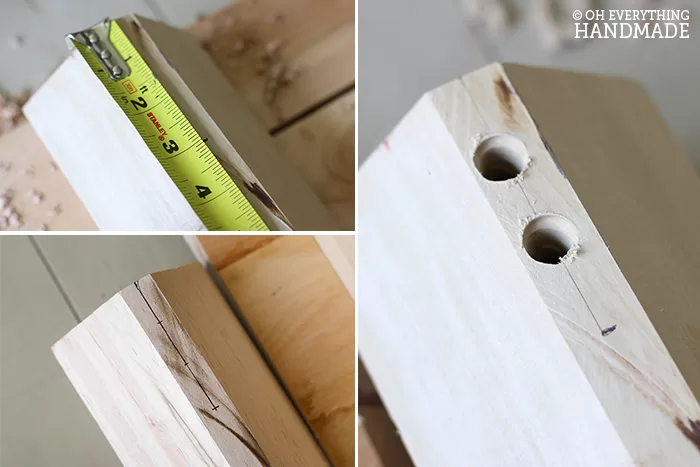
I measured 3″ from the bottom up and divided the line in 3 (do not worry about the last line), I only needed the two marks which are marked at 1″ and 2″.
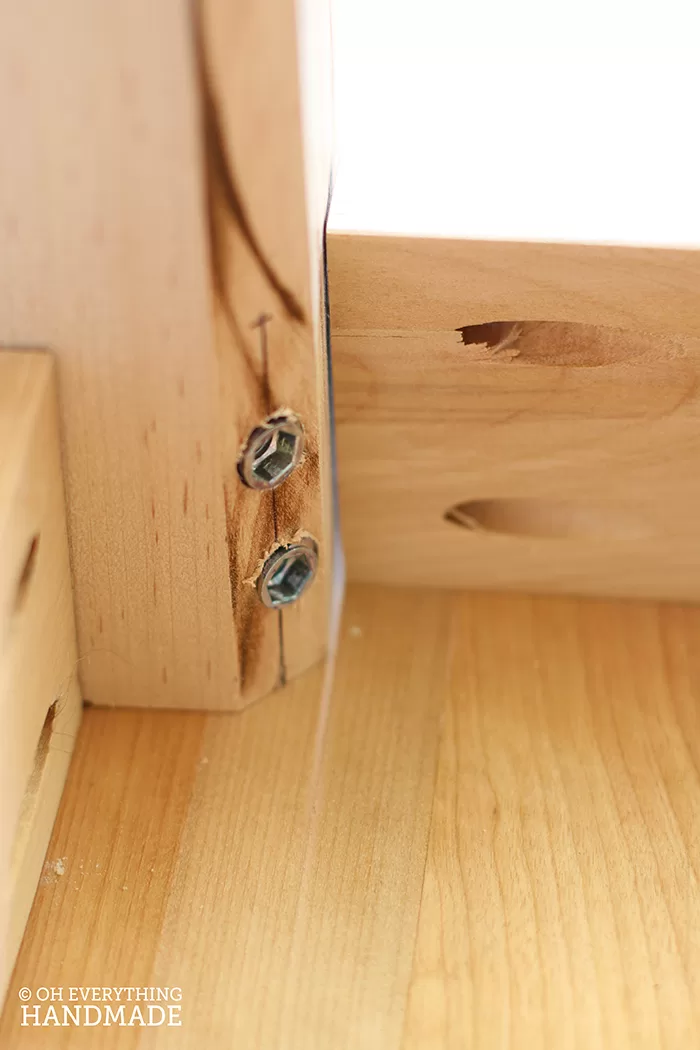
After the legs were ready, I measured out the alignments and placed the apron boards down for attachment. To sew the boards in I clamped the boards down with a clamp before drilling in the screw.
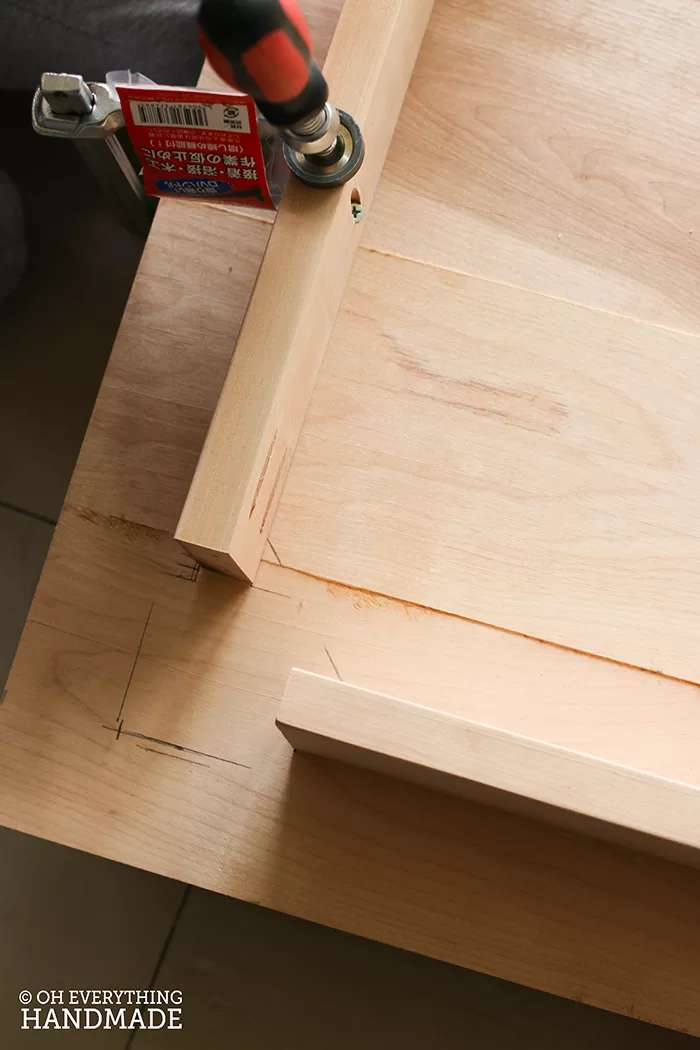

This next step was to drill in holes for the threaded rods and the side screws. Make sure you always pre-drill your wood, otherwise it may crack and you have to make another piece.
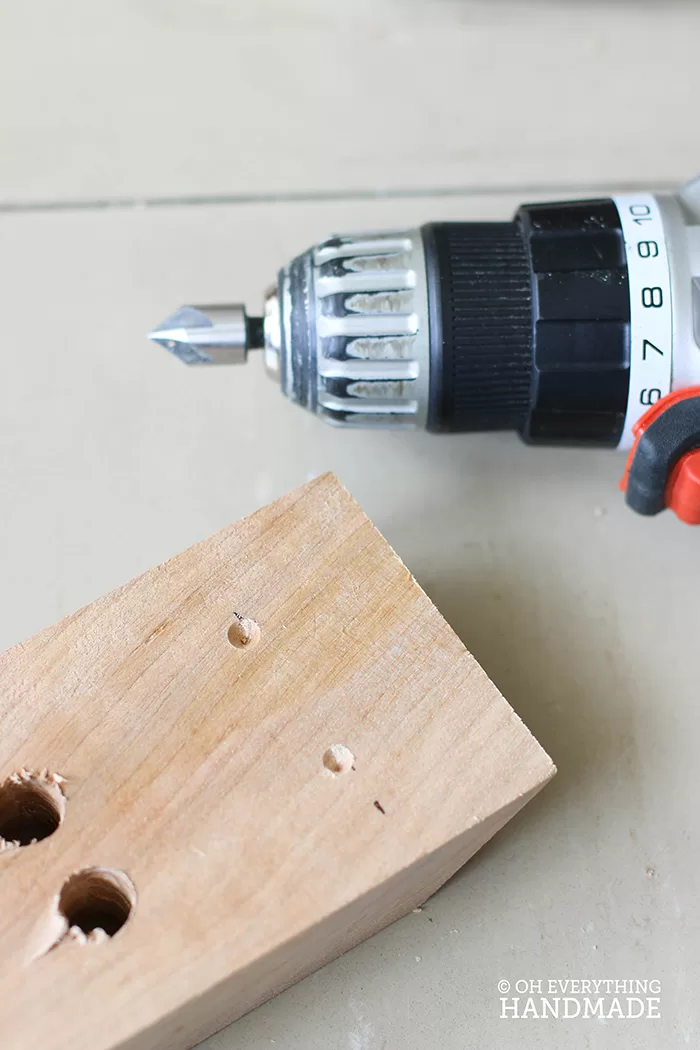
In order for me to be able to drill in at a 45 degree angle I had to pre-drill a small hole so my drill bit was staying in place. I used the Kreg jig drill bit, which made the perfect holes for my screws (do not drill all the way through, only about half way).


The holes may not fit exactly for your rods, but if you use a bigger drill bit you will have a bit more space to wiggle them through.
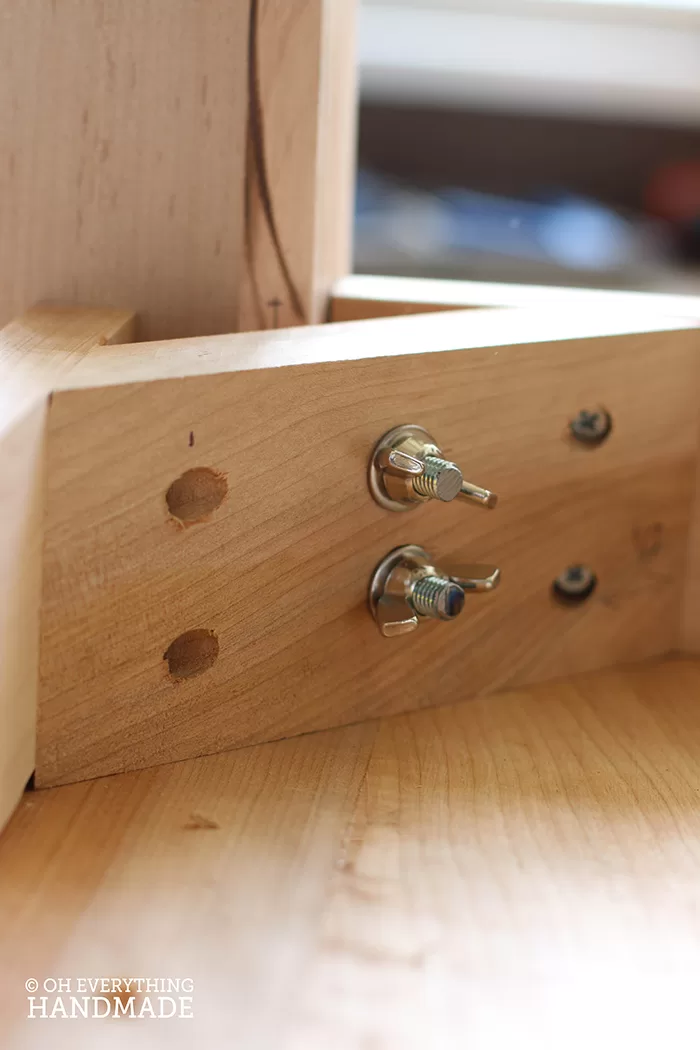
Once attached this is what it looks like! I used butterfly knots because they are easier to handle.
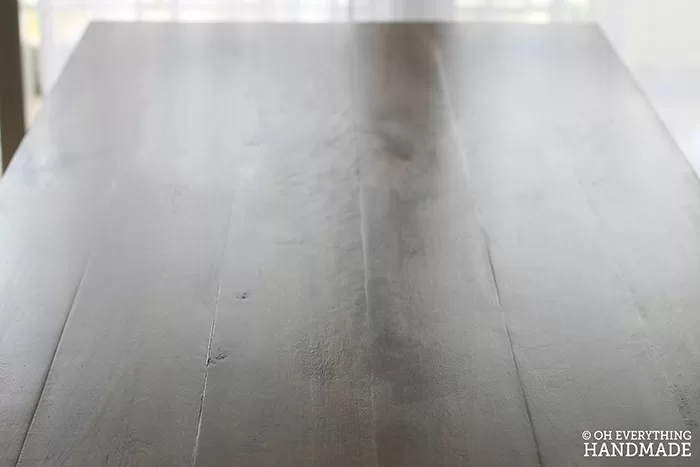
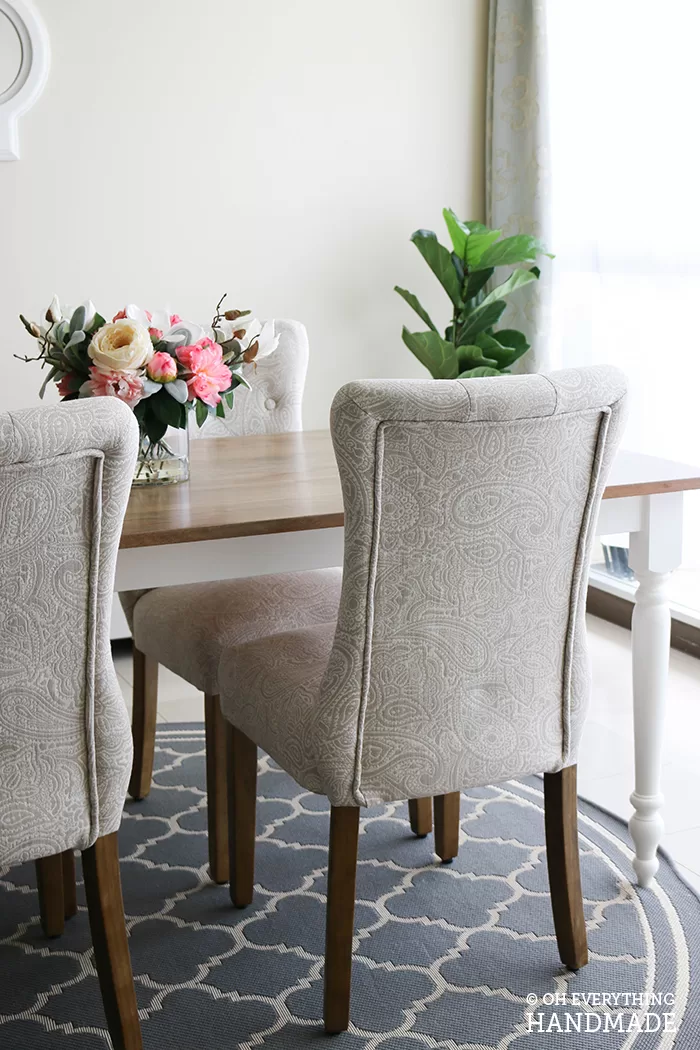
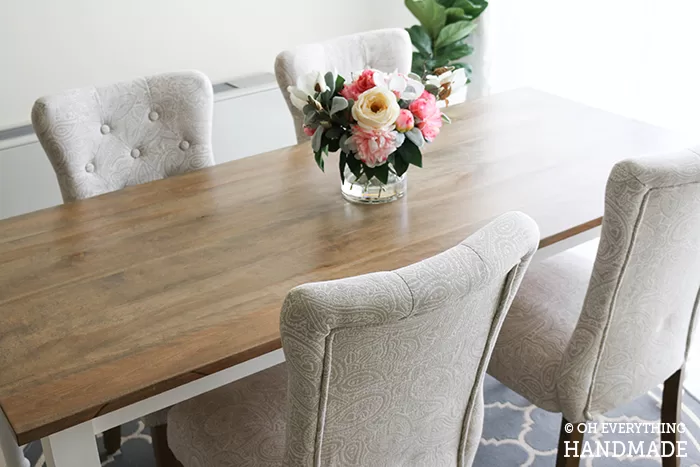
Then we turned the table right side up, and I started applying the stain to the top and white Milk paint to the Apron and the legs.
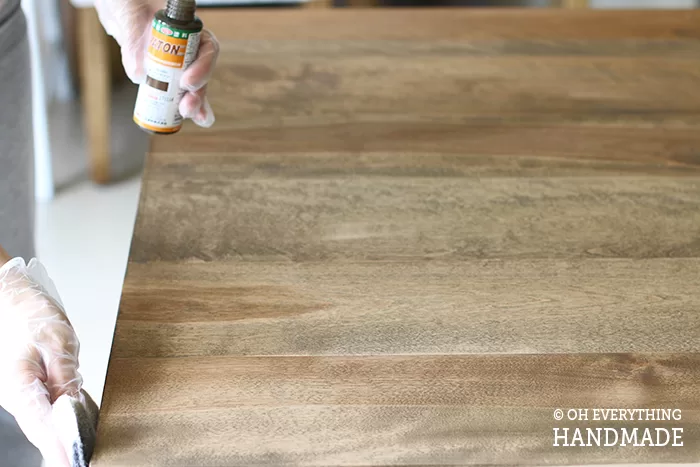
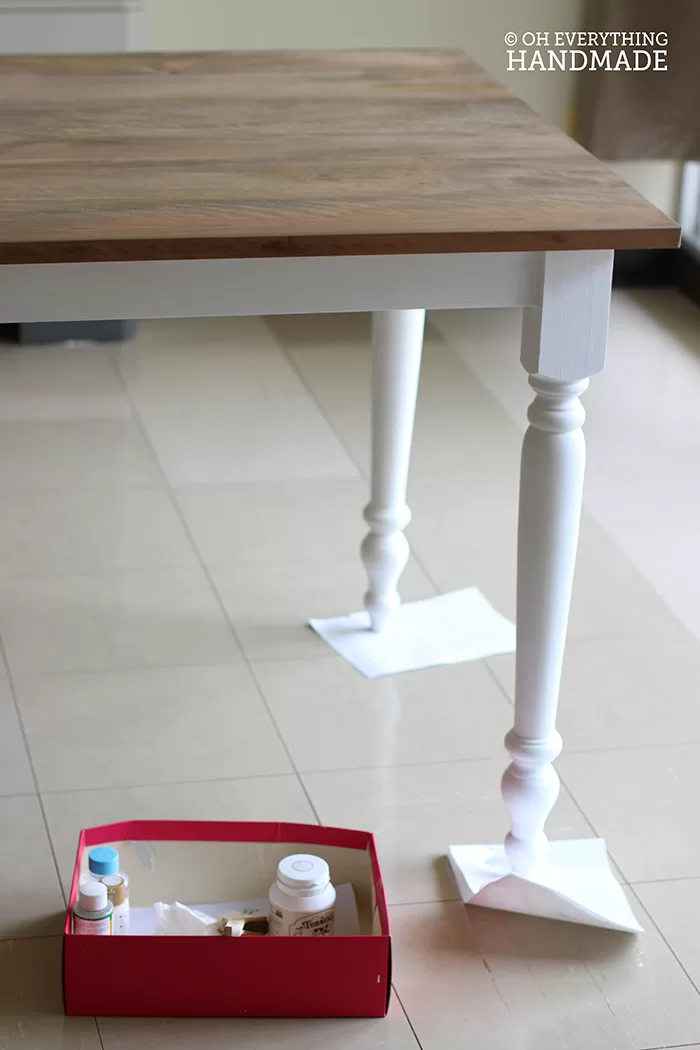
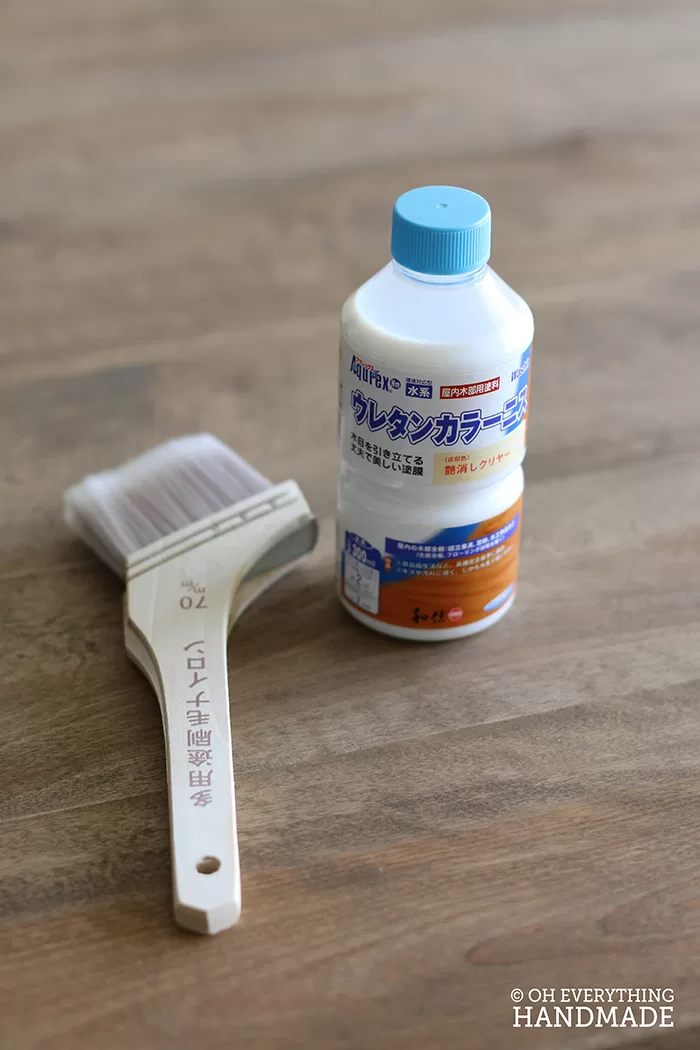
After about 2-3hours of dry time, I applied the sealer which was a Japanese brand (matte, water based). So was the stain, which was great because the house didn’t smell at all.
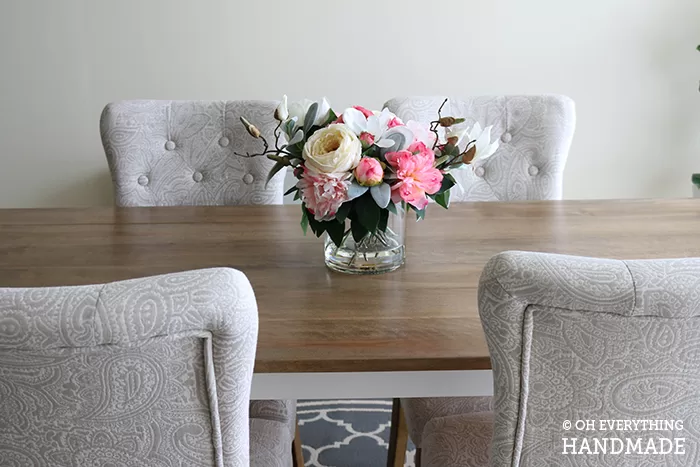
FarmHouse Table with Apron & Corner Brackets Finished Project

Wow, if you are still here, thank you for staying until the end. This was longer then I anticipated, but I wanted leave a detailed tutorial. Hope you enjoyed the post, and please share this tutorial on pinterest and facebook.
Have a wonderful Monday.


Hi,
You should be so proud of your table!!! It’s gorgeous.
Just curious, did you make the chairs, too?
Judy
Judy, thank you so much for stopping by. Yes, I am very happy how the table turned out.
The chairs are not made by me, but I could imagine this being a fun DIY project as well.
Have a nice day
At first I was afraid you were going to use dimensional lumber. Birch is a great choice given your location. American Birch is typically used for paint grade plywood and doesn’t often show up in lumber stacks. So you’ll have a unique look and feel compared to the typical butcher block birch typically found in the states.
I would suggest to you that if you haven’t already that you seal the underside of the table with paint or preferably the same final sealer you used on the top. It evens out the amount of seasonal moisture the wood absorbs between the top and bottom.
I had a question, you said you marked out the top for “chips” which I assume is another way to say biscuits or plate joining?
And were talked out of it.
In my experience and many other furniture makers biscuits, dowels, splines, and tennons provide alignment and additional structural strength to pieces. If the boards were face jointed dead flat on one side the opposite side should be parallel. Especially with a standing machine like to one you used. You might have been talked out of a really good idea; although modern glues will let you edge glue without issue.
I really liked your final product it looks excellent.
Auston, thanks for your comment.
I wanted a unique look for this table and actually had planned on using Mahogany, but the woodshop was out of it at that time.
So my next option was Birch, which I am glad to have used it for this project.
I haven’t sealed the underside, but will do that as soon as I can. Thank you for that suggestion.
You named the exact reason why I wanted to use the biscuits, extra strength and alignment. Nor sure why I listened to the woodshop employee? Anyway, the planner (sanding machine) did a pretty decent job straightening out each board for me, so aligning and glueing was very simple and I was able to let everything dry/set for more than 24h.
Glad you stopped by, and liked my finished product.
Betty
Hi Bettina,
Your table is *lovely*, and I’m super impressed that you made it for $250.
Can you tell me more about this “woodshop facility?” Was it free to use (and learn how to use) the planner, joiner, etc., since you bought your wood there?
Are you a member of a woodworking co-op or something?
Or was it really so simple as looking up “woodshop” in the yellow pages and calling one up?
Thanks!
Annabelle
Hi Annabelle,
You have to request a member card at the woodshop, then they will have you read the guidelines and they will show you around and explain/show how each machine works. There are up to two workers always there that can help you make your wooden project a success.
The fee is not high, you can choose to pay a daily fee or an hourly fee. I think per day it was $10 and per hour it was $2.
Best is to call them before heading to the woodshop, they have a max capacity which is 5 or 6 workers at a time! Good luck.
Wow! Where are you that you have such a woodshop? I’ve been calling everywhere around that might be the sort of place you’re talking about, and everyone acts like they’ve never heard of such a situation — and I live in a hippie, let’s-all-make-things-happen, university town!
Annabelle, I am overseas in Japan. The woodshop is on a military facility. Sorry that you can’t find a woodshop near you.
You did that!!! Just wonderful! I too am building a table not only because of cost but also because the size table in the style I want is very difficult to find. You certainly have inspired me to keep going and I can only hope my project turns out half as good as yours did. Great job!
Hi Lisa,
Thank you for your lovely comment. Yes, I did and you can too.
I never build a table like this one before, but I did watch a lot of Youtube videos before I started this project.
Also, a handy woodshop/workshop with all the tools helped me tremendously.
Good luck, and once you are finished please share your project on my FB page.
xo Betty.
I love your table it’s so beautiful! You did such a great job really professional. You’re so talented! I’m in the process of transitioning my decor into farmhouse and have been wanting to make a farmhouse table since they’re so expensive, you’ve given me the inspiration i need to build it . I recently found you online and signed up for your emails, I look forward to checking out your blog and seeing all of your other creations. Thank you so much for sharing
Hi Debi, so glad you found my site, and I hope you’ll be inspired and start building.
The table looks really good! I’ve seen a lot of people attach table tops like that with the pocket screws directly attached and a lot of people say it doesn’t allow for enough wood movement.
Have you had any problem with wood movement with your method?
Hi Chris, sorry for the delayed reply. We had this table ever since I build it and it has not given us any problems. We even moved once without any issues. I also like to mention that we live in a high-humid area and like I said before no issues with the table at all.