
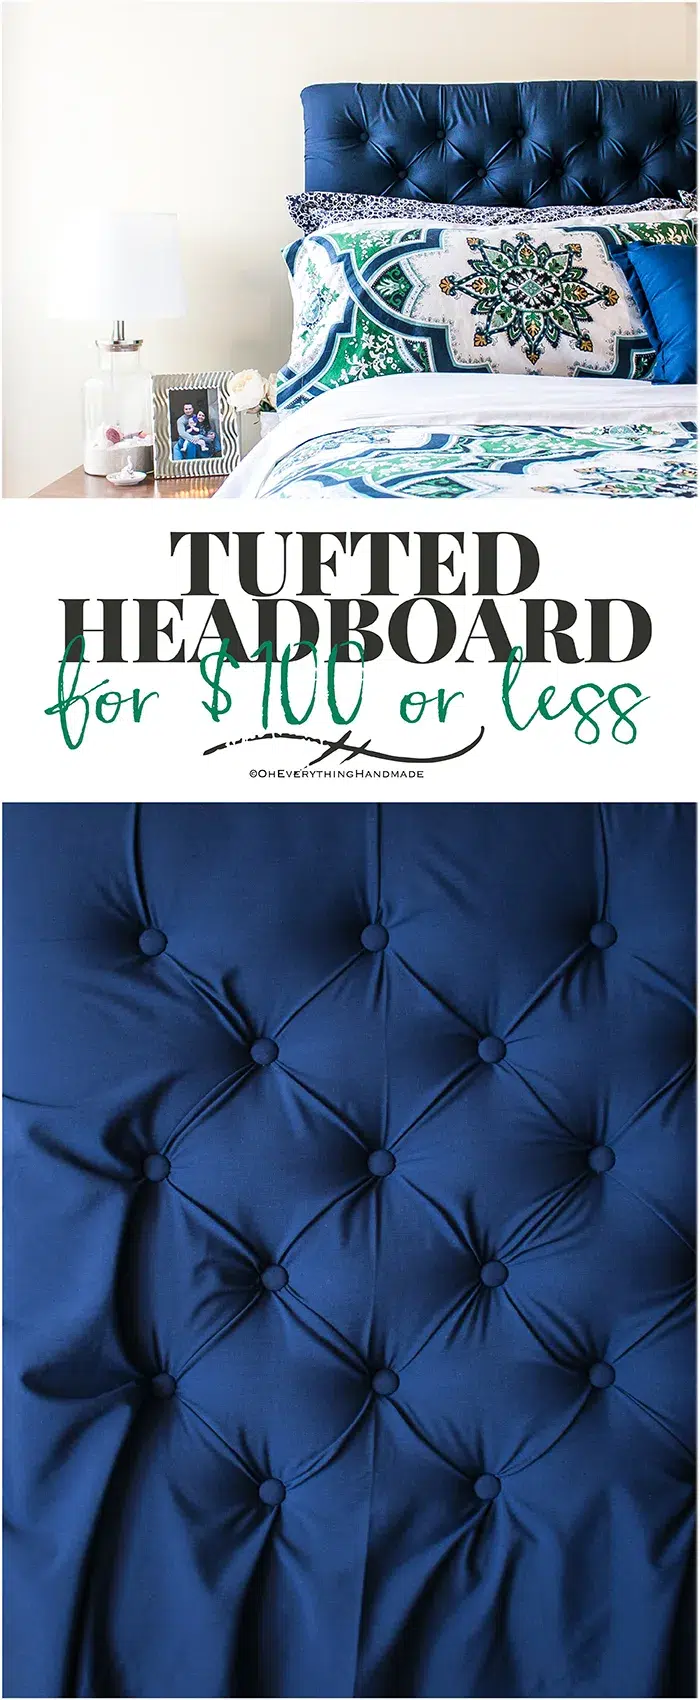
How To Make A Tufted Headboard For Under $100
This custom tufted headboard for under $100 will save you money and create a beautiful statement piece in your bedroom. Tufted Headboard For Under $100
Two of my girlfriends requested building not one, but two tufted headboards. However, none of us had built a headboard before, but they thought I was the mastermind for this project and signed me up.
Furniture pieces are very hard to come by when you live overseas on a military base where shopping for specific items is almost non-existent. On top of that issue, we have to shop smart & stay on budget because who knows if we can take that piece with us to the next duty station. All I am saying is “weight restrictions”.
Let’s Build A Custom Headboard From Scratch
If you like to build these amazing headboards, please consider that we live overseas and some of the prices are different. I did my best to choose the most affordable option online for you, so you can simply order them if you don’t have a local hardware store. (affiliated links present)
– Supplies needed: –
Project 1 (square tufting)
|
Project 2 (diamond tufting)
|

– Tools needed: –
|
|
– Instructions –
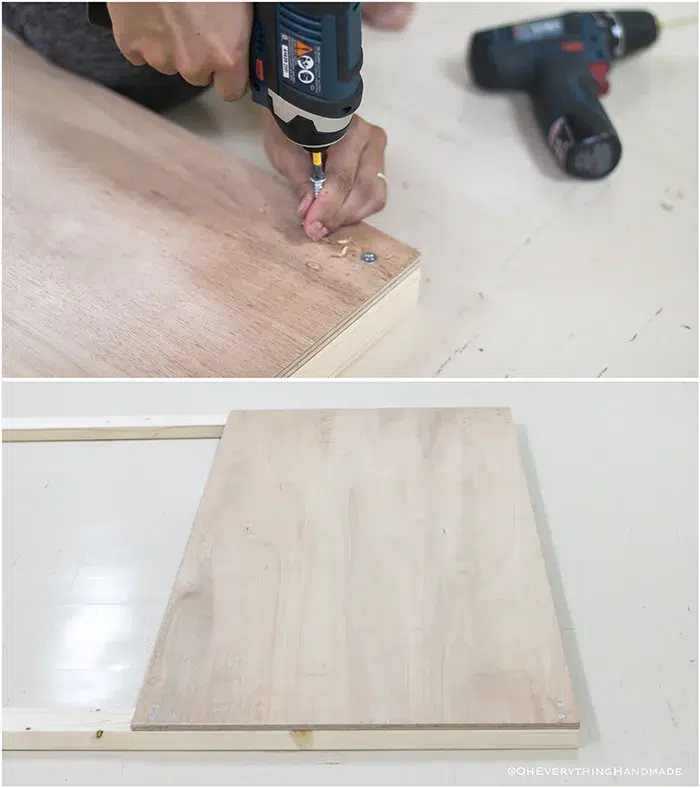
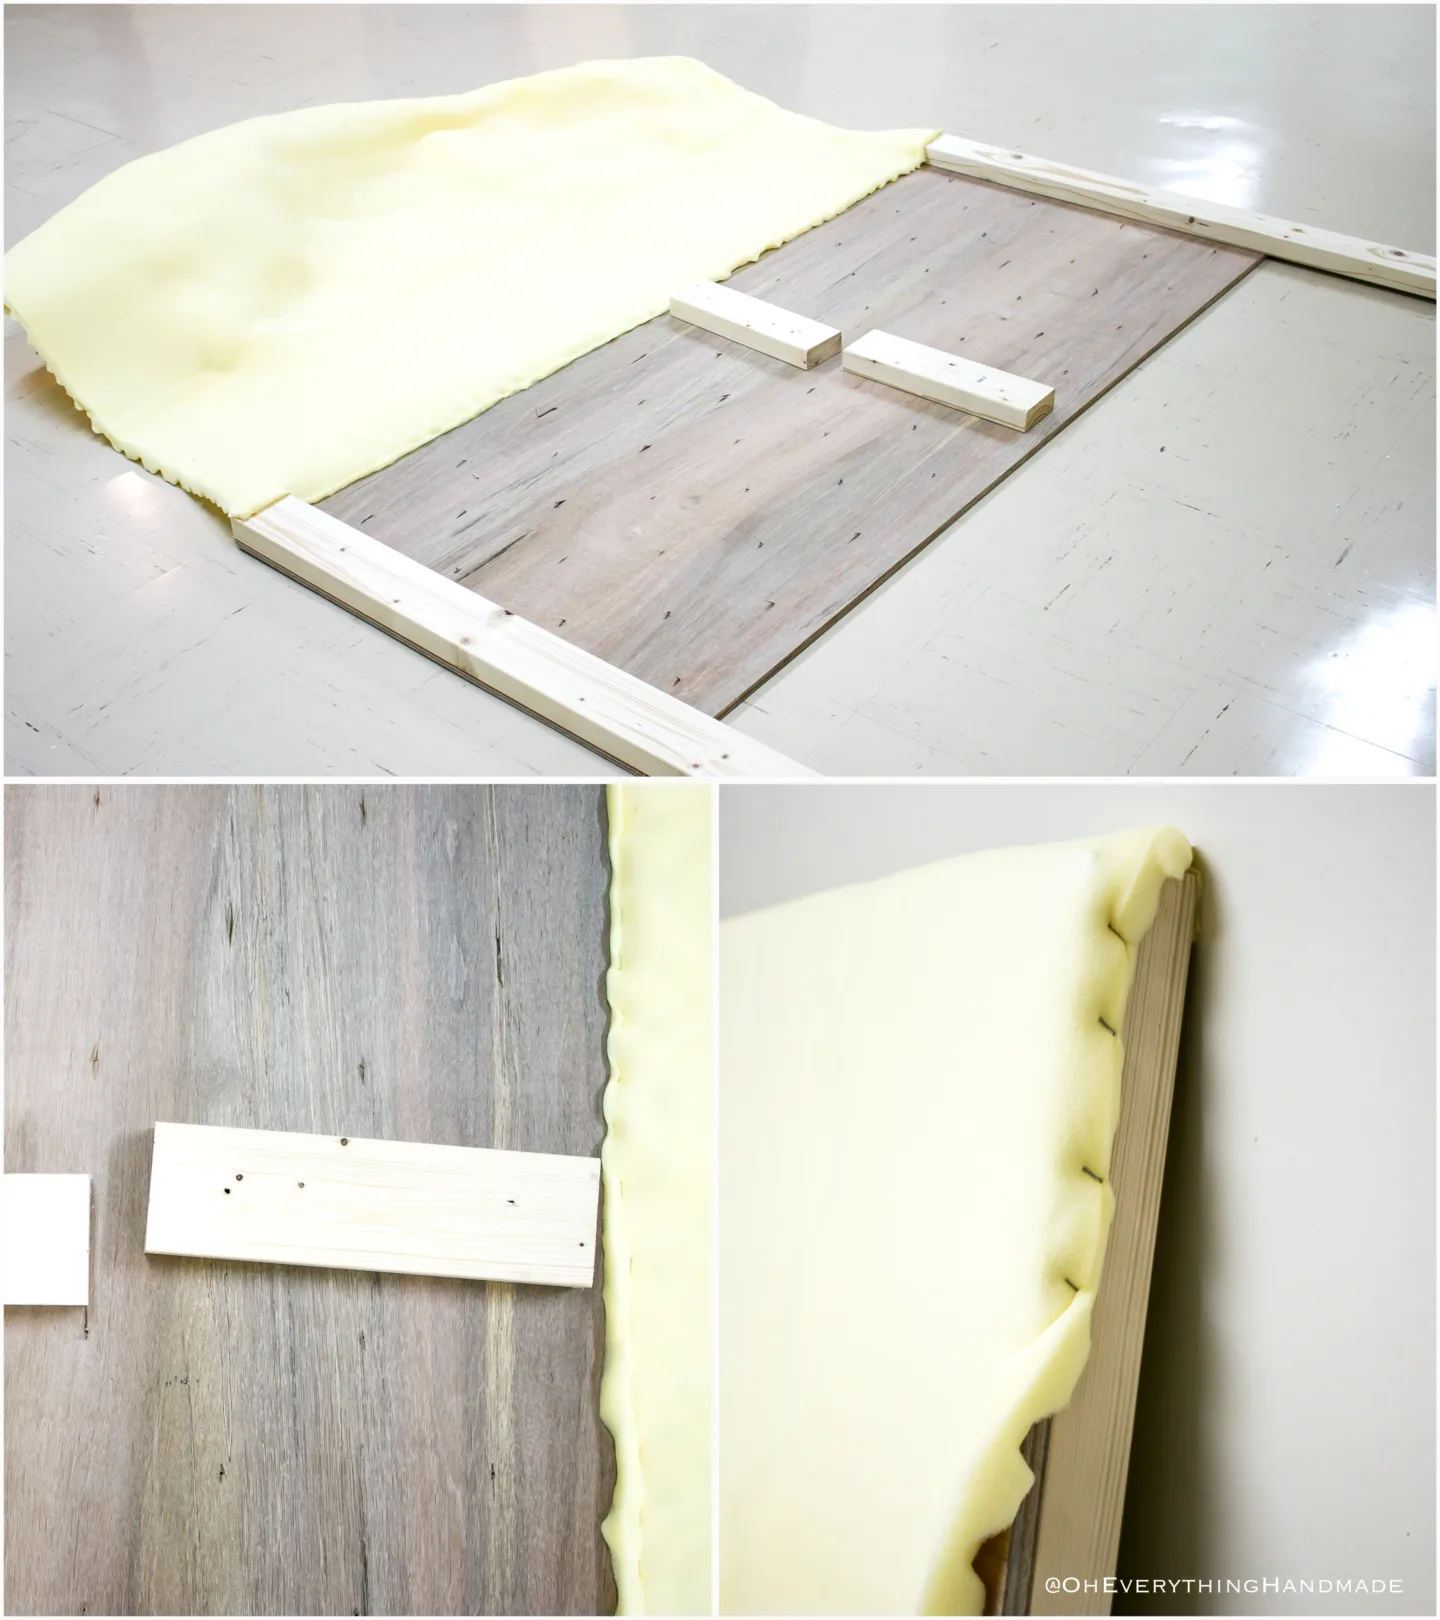
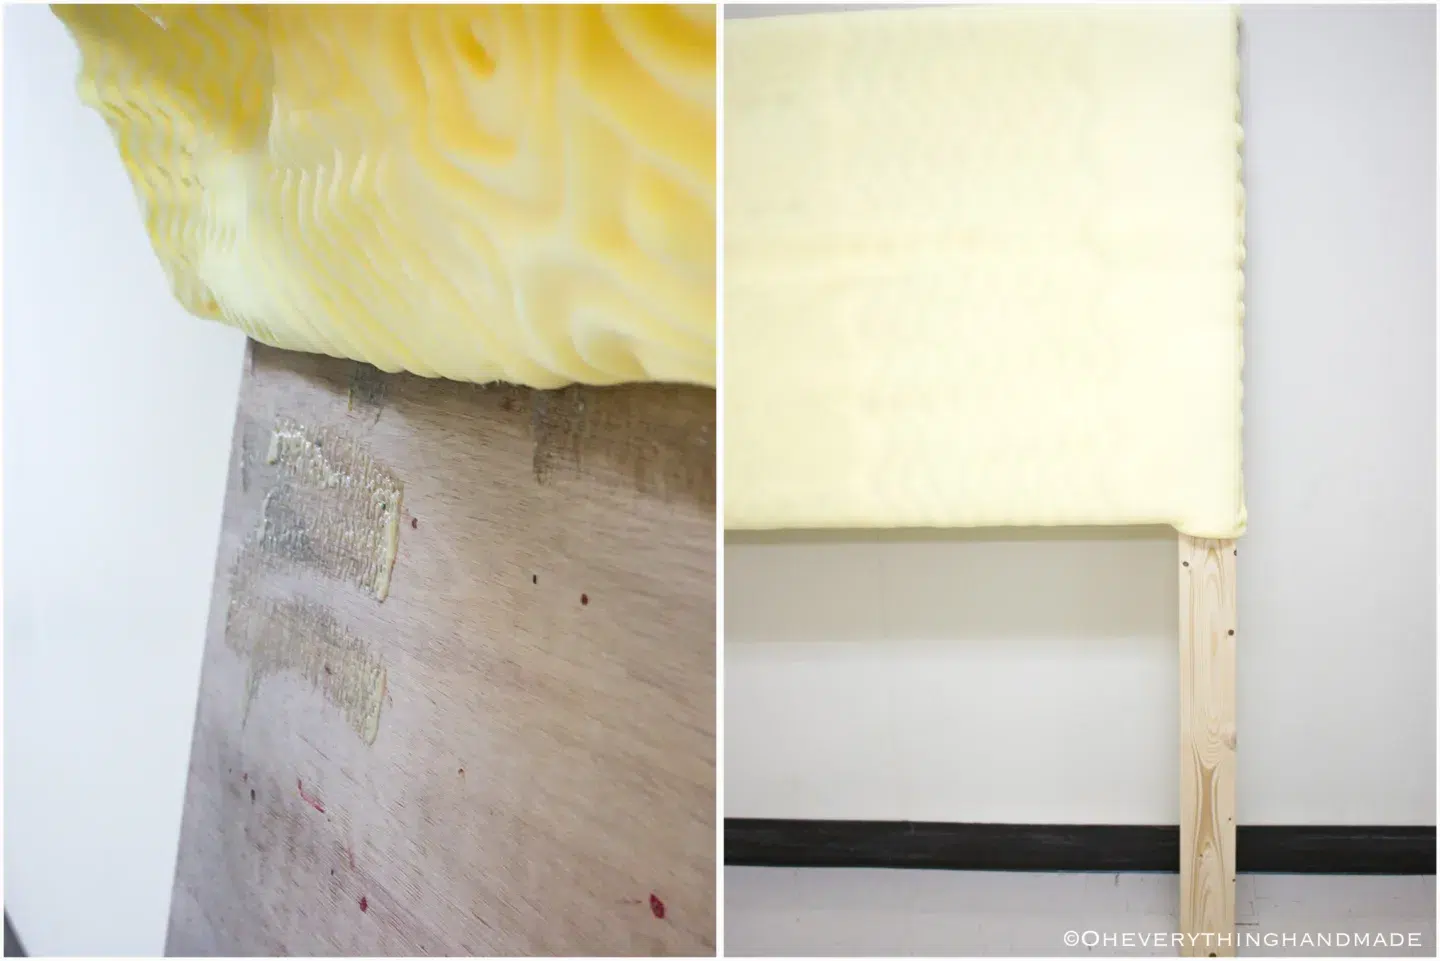
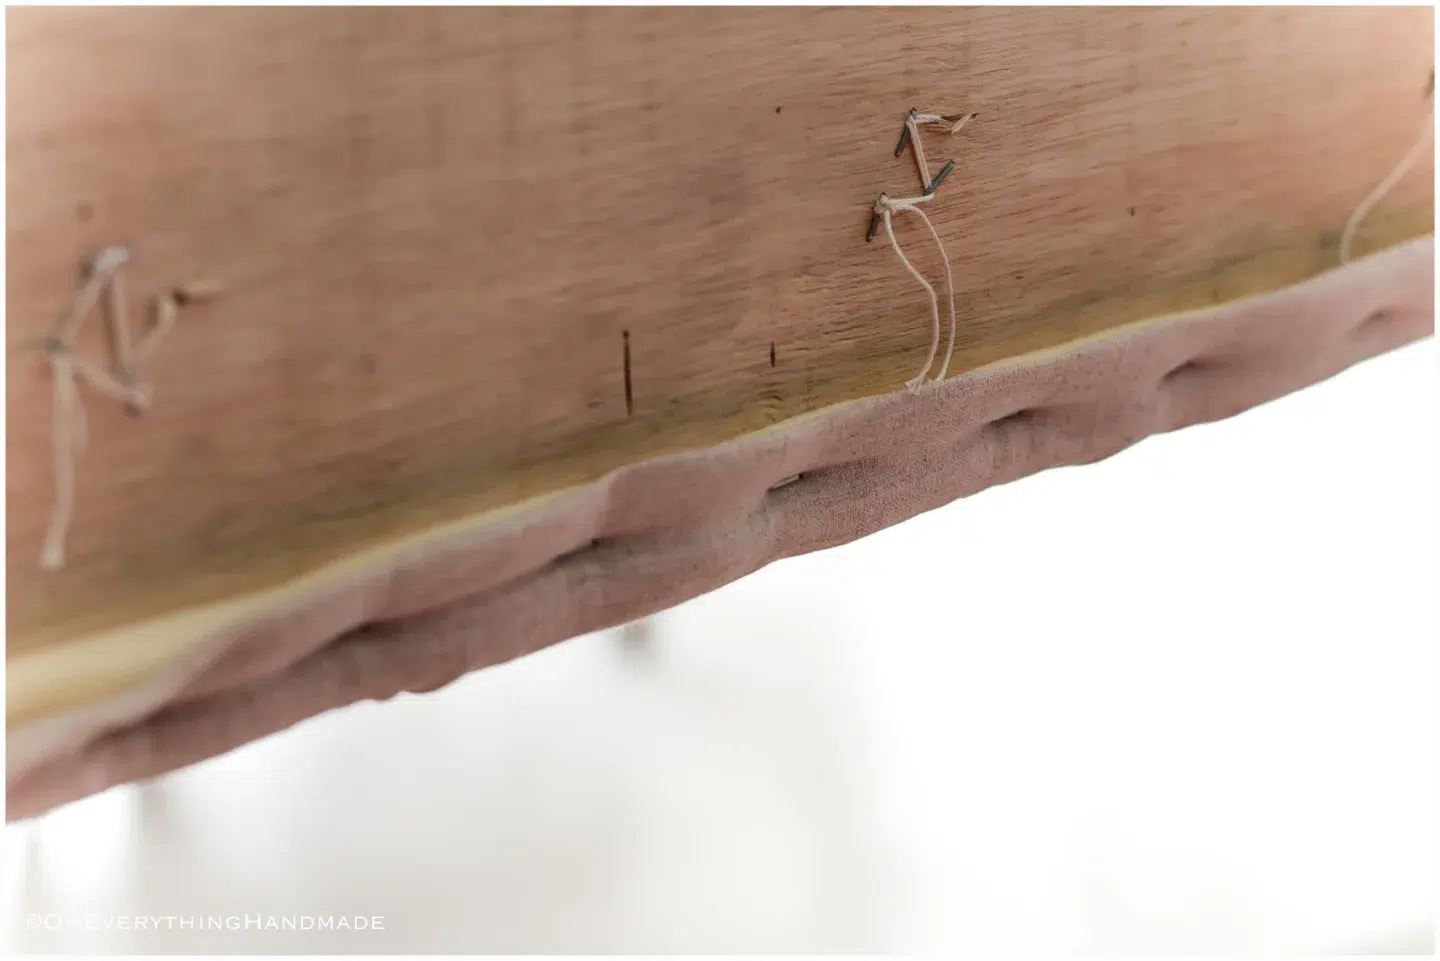
Step 1.Measure your bed frame width and the height of your bed including mattress. Cut the plywood to the length or your bed frame and the preferred height you want your headboard to be. We went with 30″. Step 2.Cut the 2×4’s to the height of your headboard. Example: If your bed is 29″ high and the headboard is 30″, your 2×4’s will be 59″ long. Note: You want the headboard to be slightly lower 2-3″ behind the mattress. Step 3.Place the 2×4’s underneath the plywood right at the edge, hold them in place and pre-drill 4 holes for the screws, two at the top and two at the bottom. We also used the scrap pieces from the 2×4’s to support the middle, so the headboard won’t bend when leaning against it. |
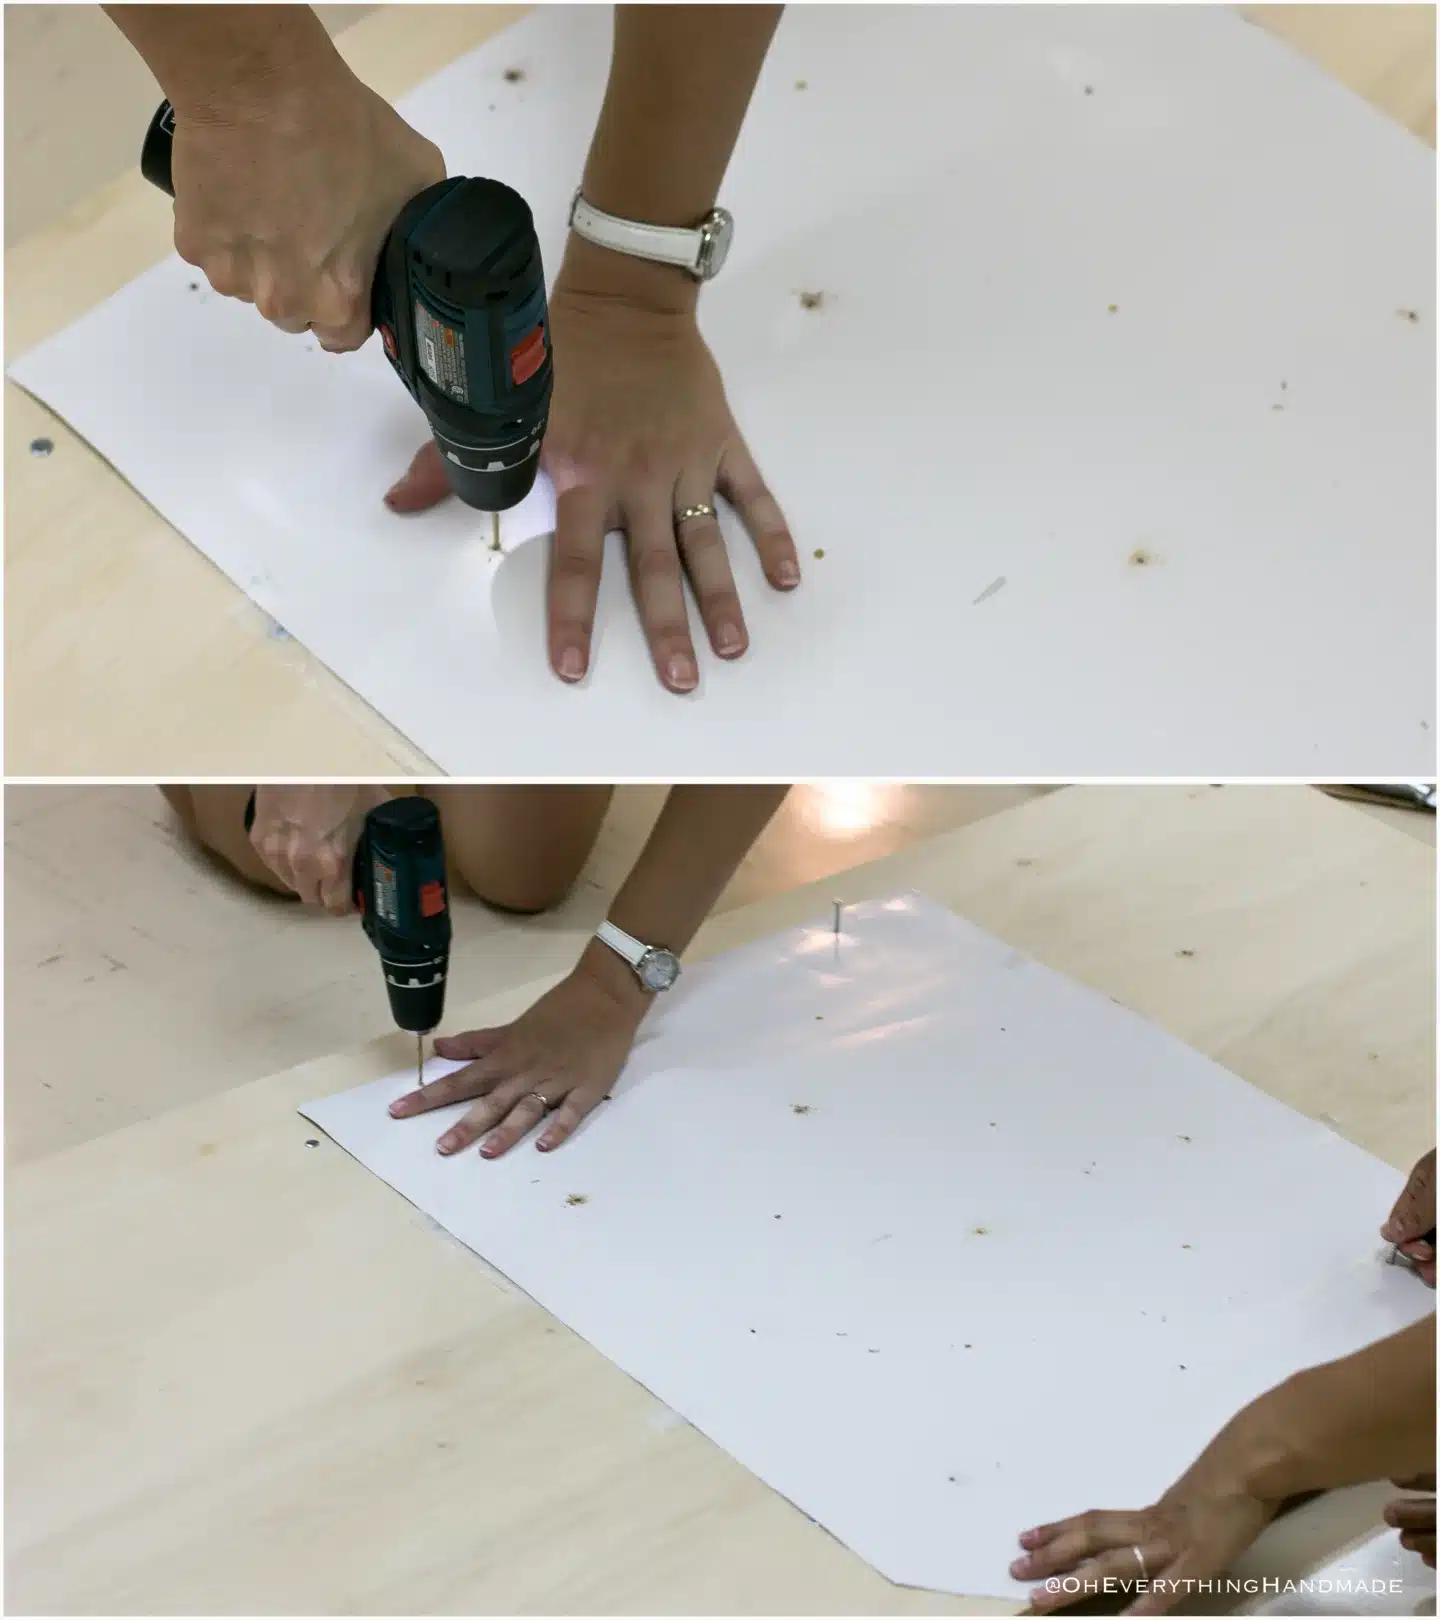
Step 4.Mark the headboard for the buttons. We used a grit paper to mark the wood, a pegboard will work just fine for this too. Start by measuring the center of the headboard and work your way out. Use a 1/4″ drill bit to drill through the board so you can attach the buttons later. You can add as many squares or diamonds as you like to the headboard. |
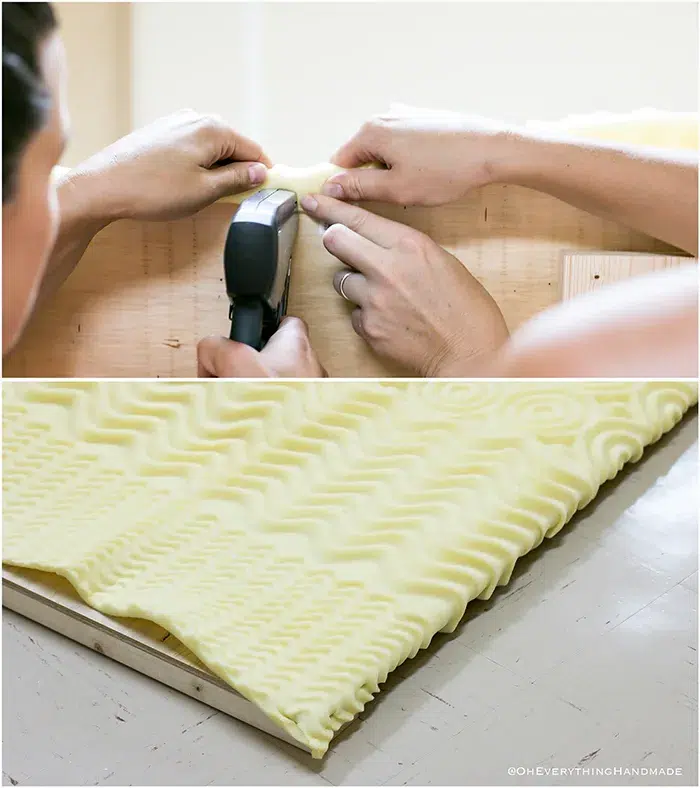
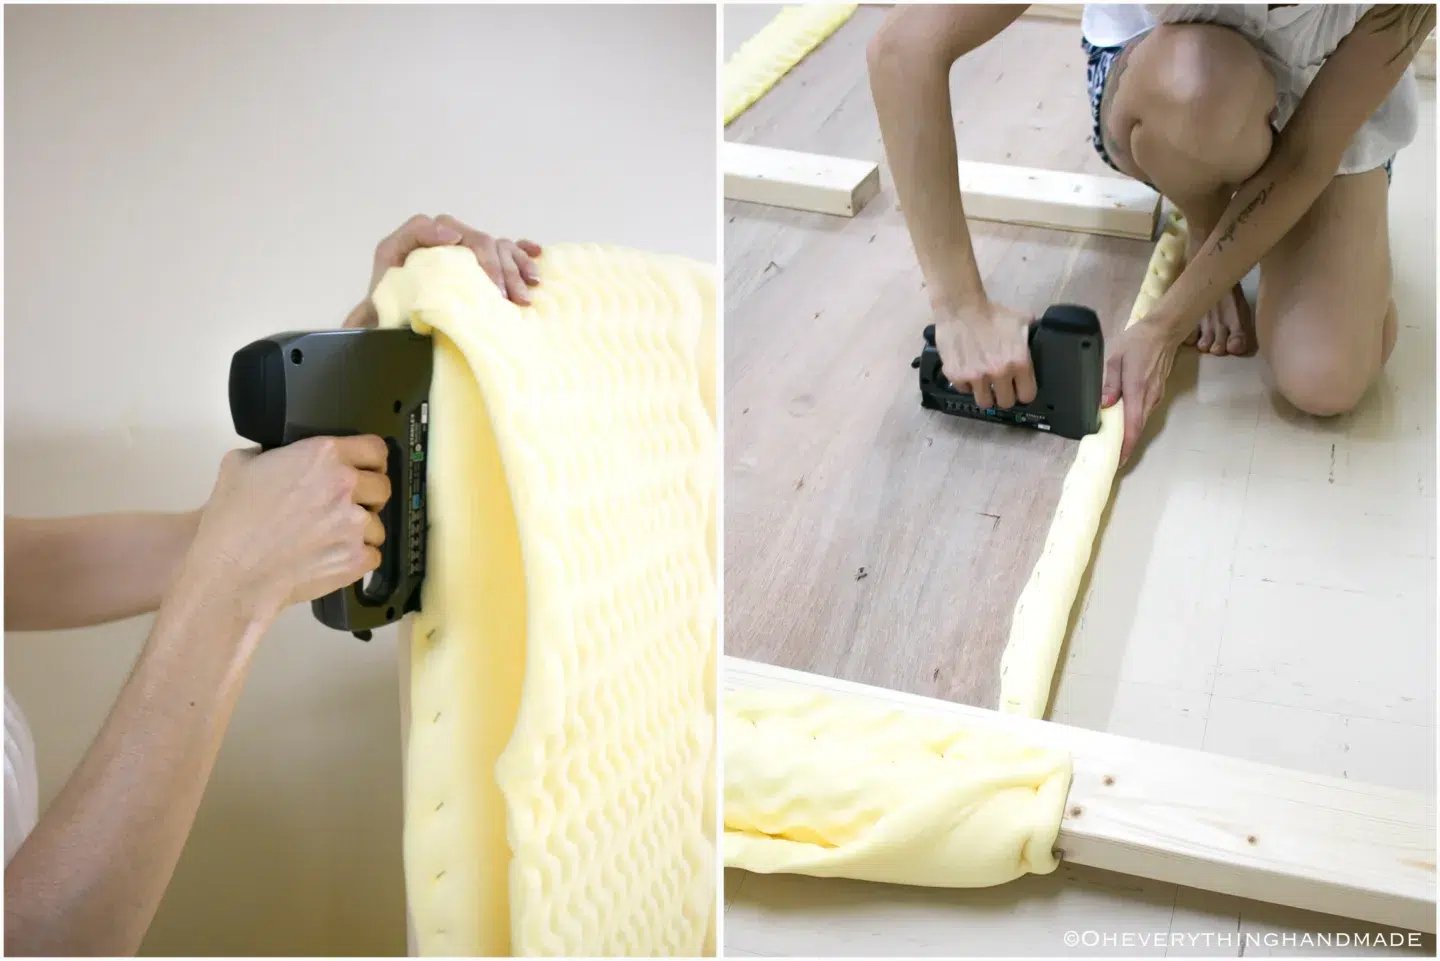
Step 5.Place the mattress topper on the edge and staple one side to the back of the headboard. You want the smooth side facing the plywood if you use one king topper and fold it in half. Note: We used 3 layers of foam topper on the second project with the navy blue fabric. The first foam we laid ridges down and the second and third layer of foam we laid so the ridges faced each other. The picture below is project 1 with only 2 layers of foam topper. |
Project 2 with 3 layers of mattress foam topper Tufted Headboard For Under $100
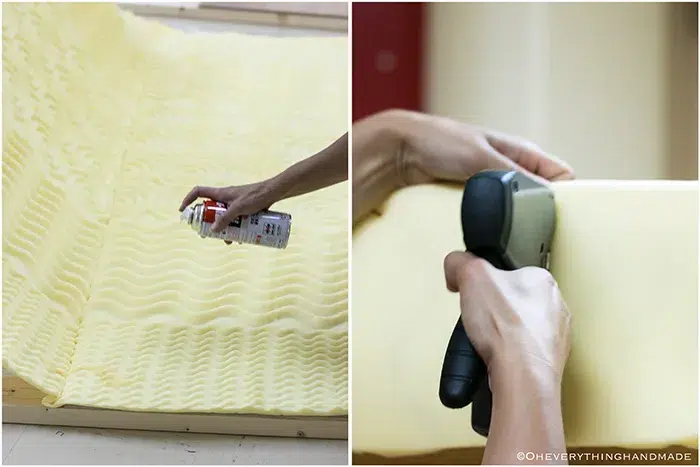
Step 6.Once the top is stapled to the back of the board, lift the topper and spray glue in sections onto the plywood. Stretch the foam slightly and press it down to adhere. Staple the bottom to the back of the headboard and spray glue between the foam. Stretch and press down to adhere. |
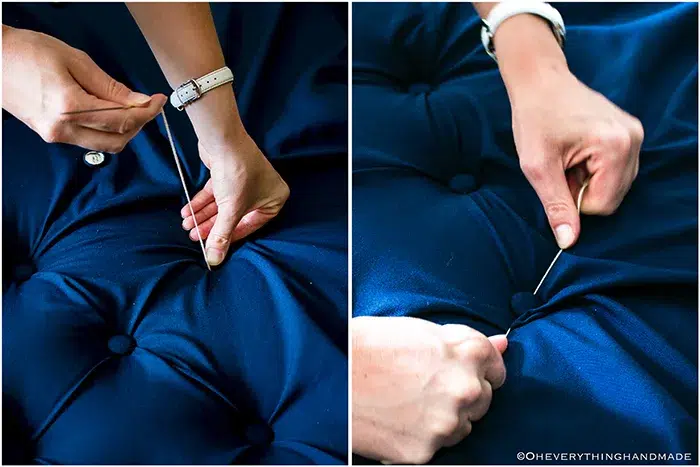
– Project 1 – Square tuftingLay the fabric on top of the foam and start working from the top center outwards. The easiest way while tufting is to lean the headboard again the wall or use two chairs and lay the headboard on top of the cushion or the armrests. |
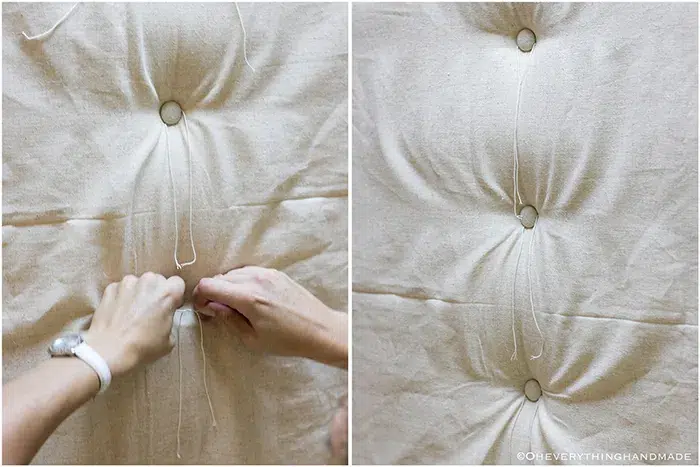
How to tuft
Note: If you do the tufting while the headboard is laying on chairs, have someone help to do the back part for you, while you do the front. Tufted Headboard For Under $100 Thread the button in the front
|
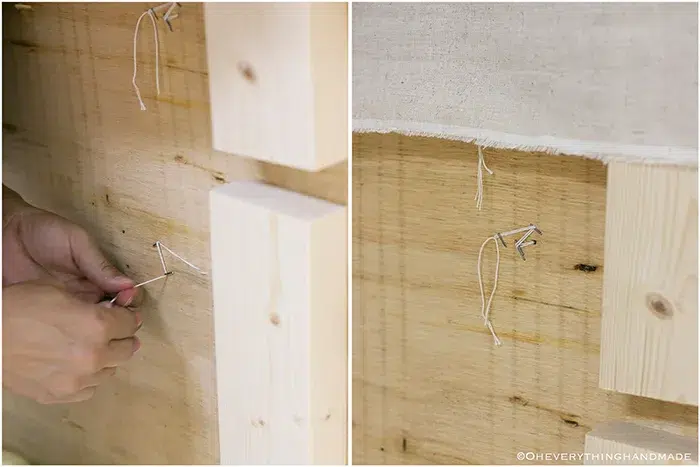
Tuck the fabric
|
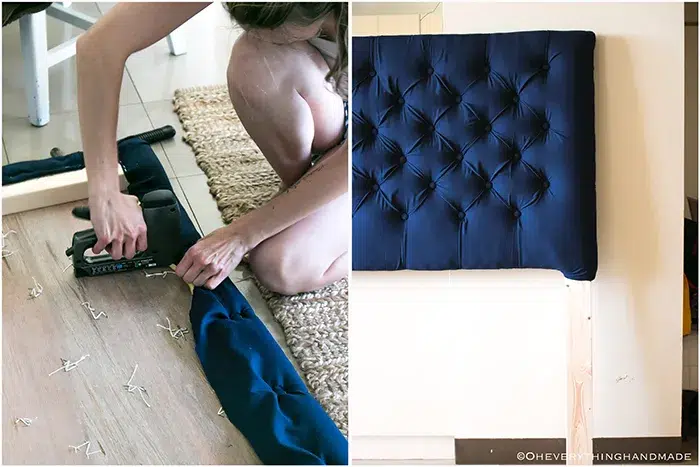
Finish up the headboard
|
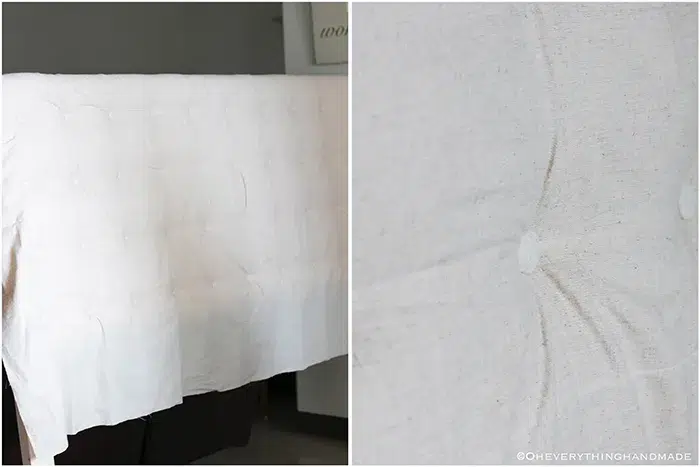
– Project 1 –The finished project for a square tufted headboard |
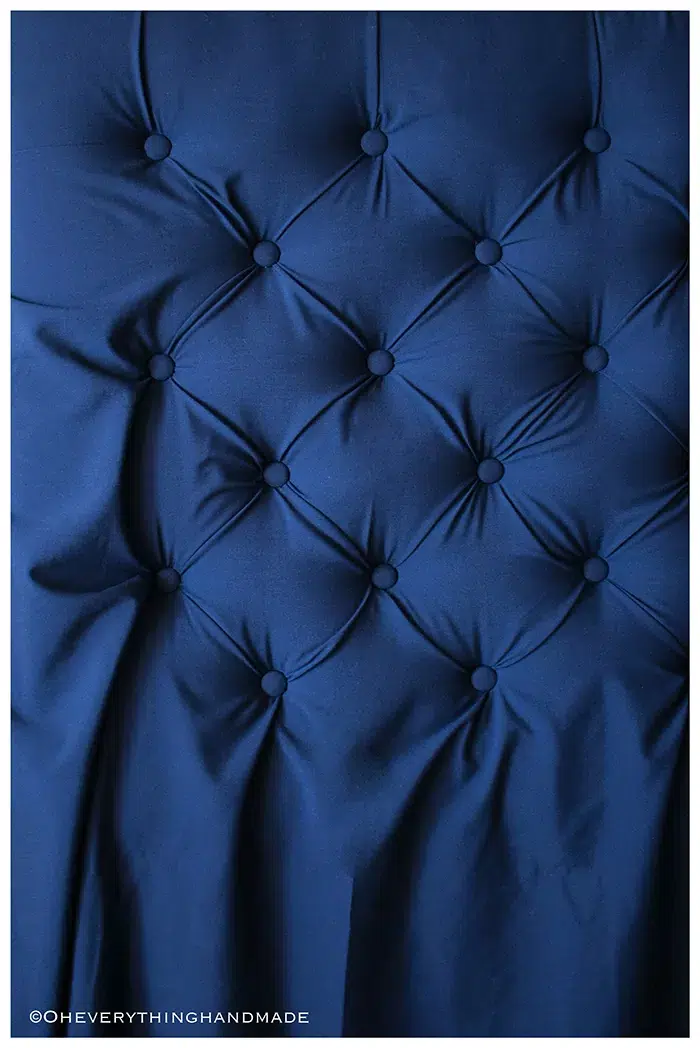
– Project 2 | Diamond tufting –This project was done almost the same way, but we added one extra layer of mattress foam topper, the buttons were placed in a diamond pattern and the fabric was a medium navy blue linen. Tufted Headboard For Under $100 |
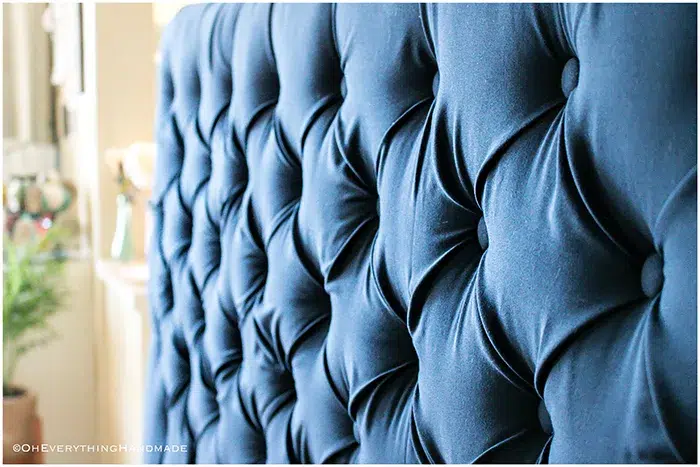
While we worked on the second headboard, we realized that it was much easier to complete although we did a few additional steps like; tuck pleating and more buttons. Tufted Headboard For Under $100
This was a great project you could make on your own if you are not in a rush, or if you plan on using it the same day, this can be completed in one day if your best friend or hubby is helping along.
// PIN FOR LATER //

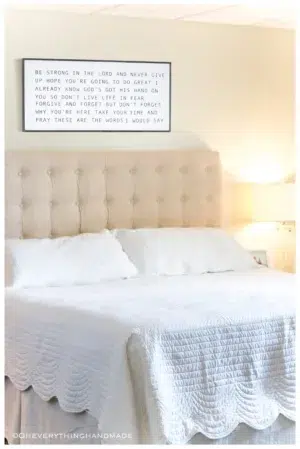
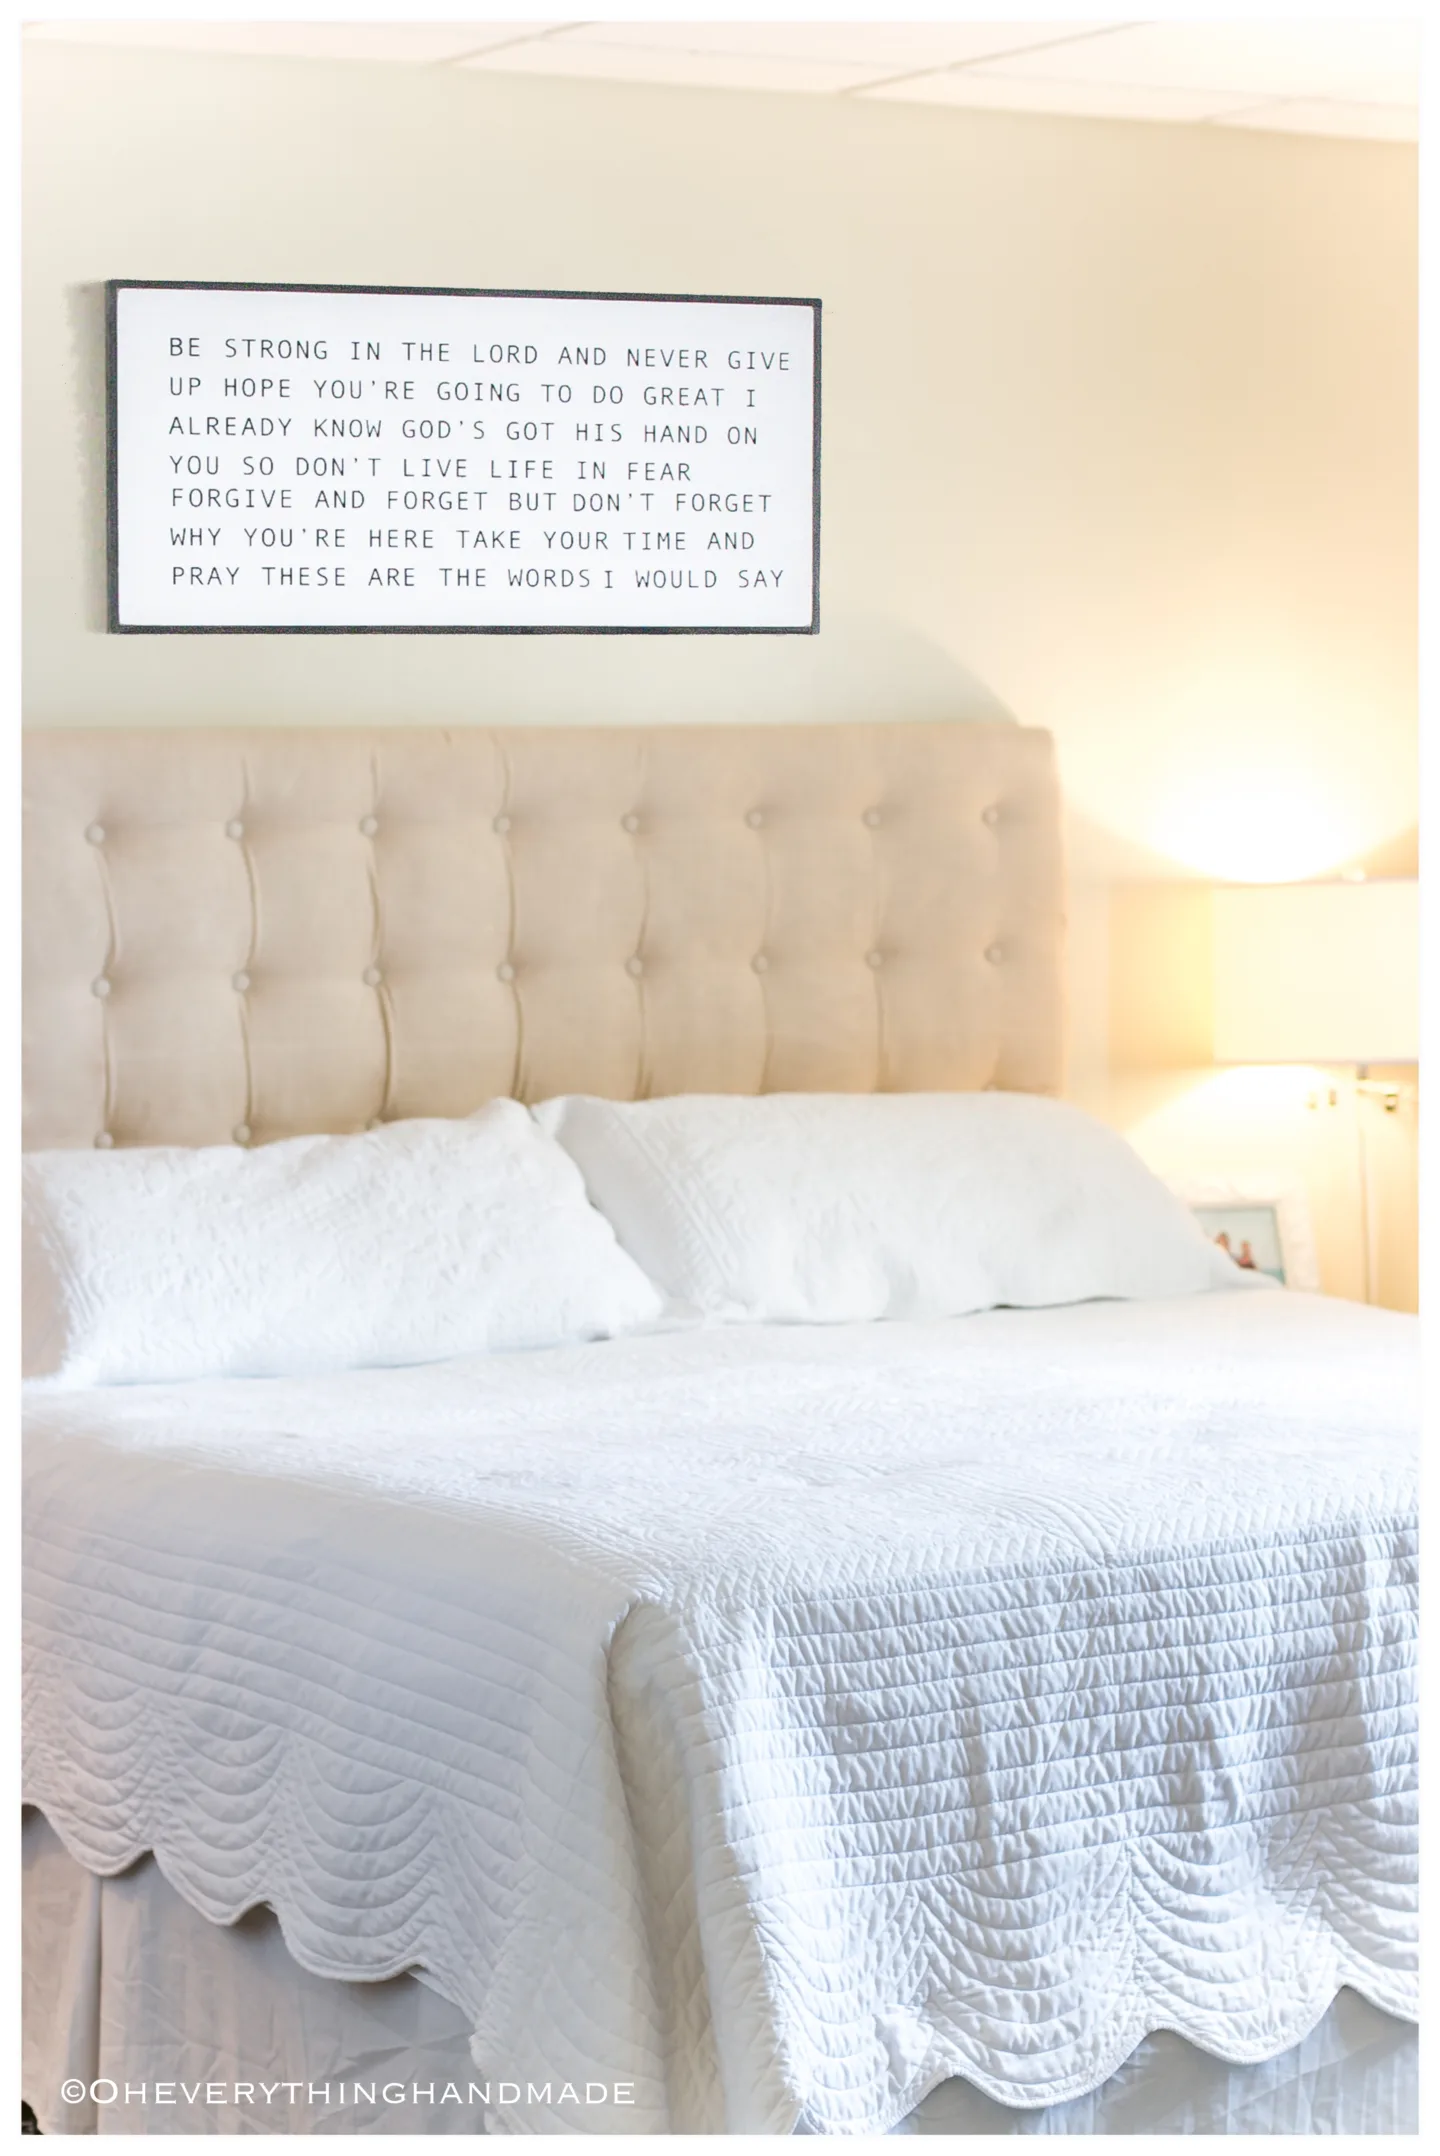
Love the navy headboard! Also love that bedding. Can you share where it is from?
Hi Sam, it’s from Potterybarn called Ashton.
You’ve done a fantastic job, love the choice of a vibrant blue too. Great tutorial as well.
Thank you Claire, so glad you stopped by!
Hi Bettina! I love you DIY pins and blog. I have always wanted to make one of these for our guest bedroom and I think I can now. I also loved your post on your family… You girls have grown! I was the one who taught you prenatal yoga in Oki:). Thanks for the inspiration!
OMG Faith! Yes, I remember. Can’t believe you found me through the blog. Thank you so much for stopping by and leaving a message. Are you still in Oki?