
DIY // Weathered Wood Ampersand Sign
Hi, hope you all had a great weekend! I was able to finish my Weathered Wood Ampersand Sign over the weekend, with the help of our awesome Instagram @oheverythinghandmade followers. I was not sure what finish to use for this sign, so I asked you guys on Instagram, all the answers have been very helpful, Thank you!
After I’d tried a few different techniques of the gray weathered wood-wash, the easiest and fastest method will blow you away!
But, first I like to share the second method, which involves vinegar and stain (I also used white paint at the end to brighten the wood). The method is from; We Lived Happily Ever After, please head over and show her some love!
You may also like this wooden decor piece, which I made for my kitchen.
I will also share how I made the sign, ok let’s get started.
You need:
- 3/4″ thick 8.5×11 piece of wood (I used some of the scrap wood that I already had)
- a printer – download my free ampersand sign here, and print at a scale of 120%
- double sided tape
- Scroll saw (if you don’t have a scroll saw, you can find cutout signs on etsy or you can also take your wood to a local wood shop, they should be able to help you as well)
Weathered Wood Ampersand Sign Instructions
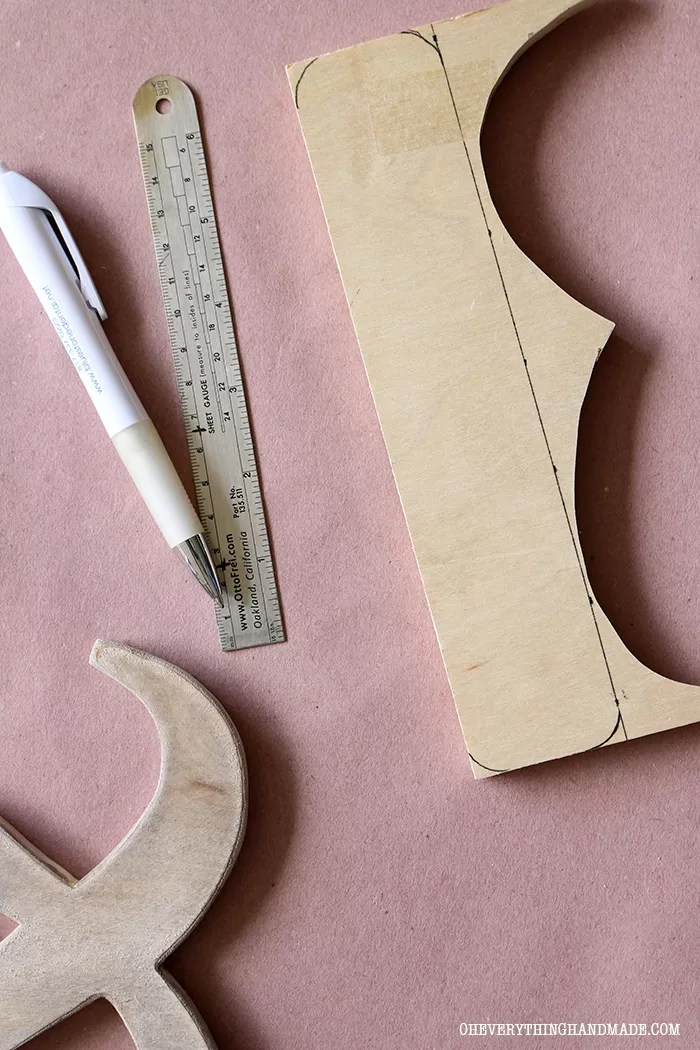
Step 1:
Step 2:
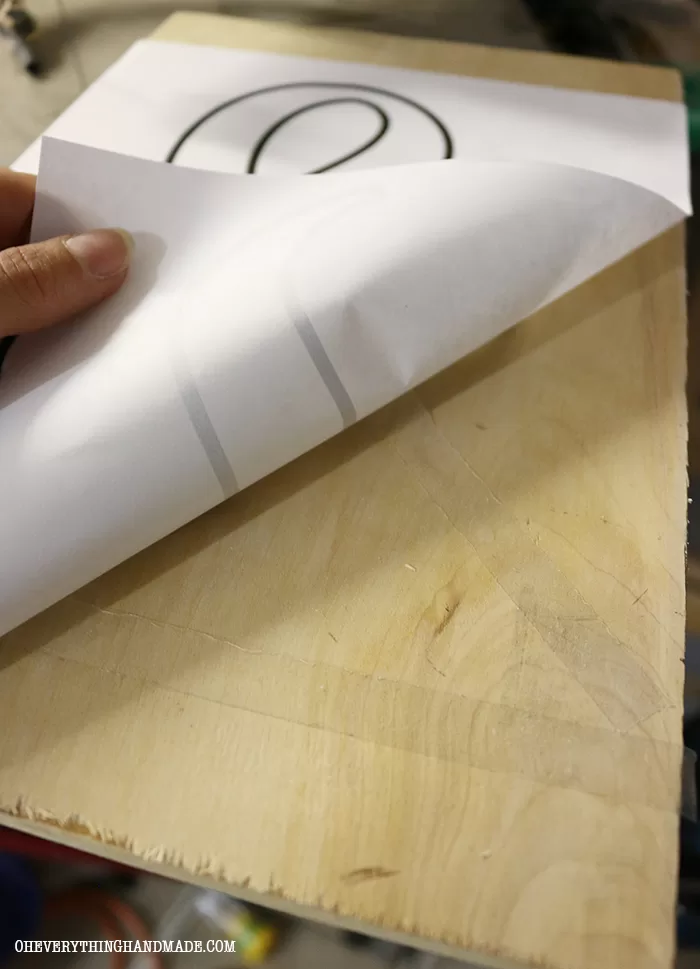
Add some double sided tape to your wood and stick the printed ampersand sign on top.
Step 3:
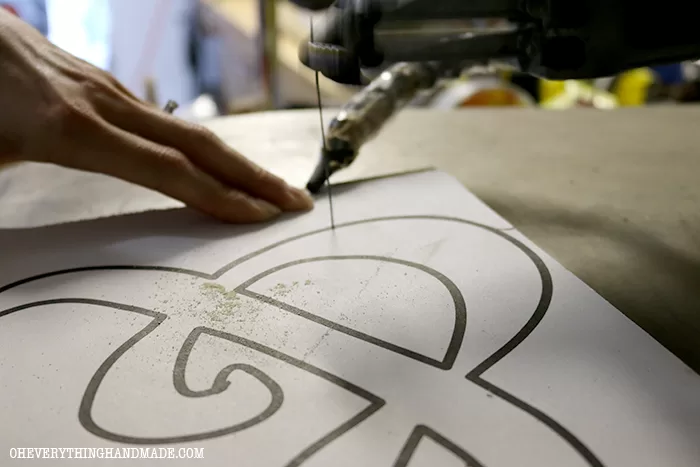
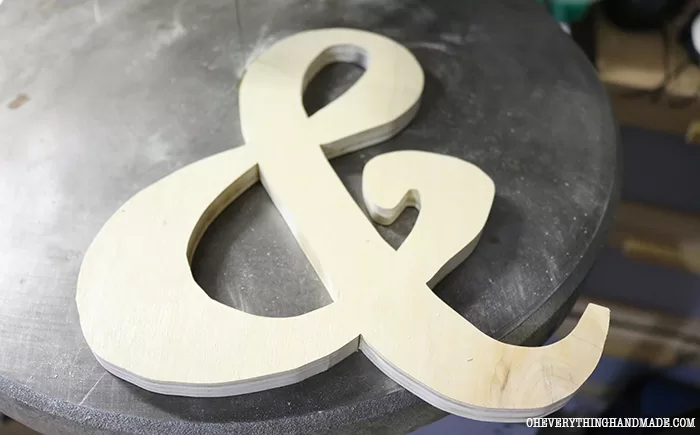
Start cutting your sign out!
Step 4:
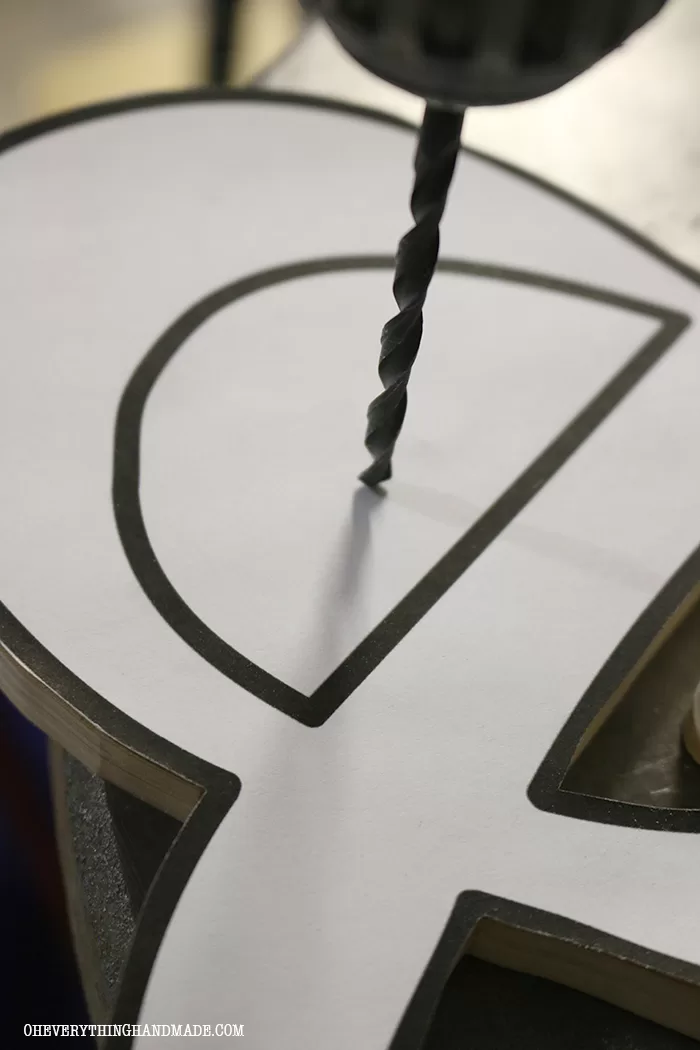
After I cut the sign out, I drilled holes for the inner cuts.
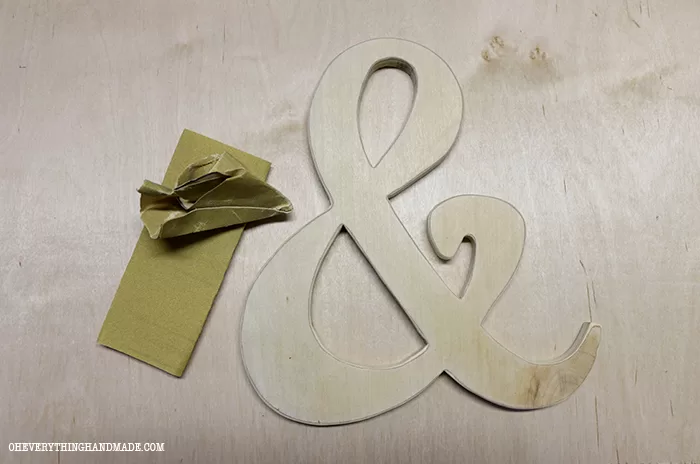
Step 5:
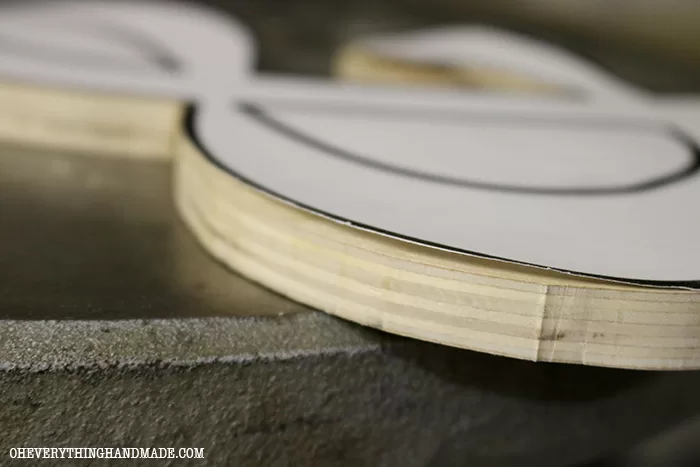
I haven’t used our scroll saw in years, can’t you tell? So, yea it’s time to sand the edges and give this sign a smooth finish. To do so, I used my Dremel, an electric sander and for areas, I couldn’t get to I used my own hands and sandpaper.
Step 6:
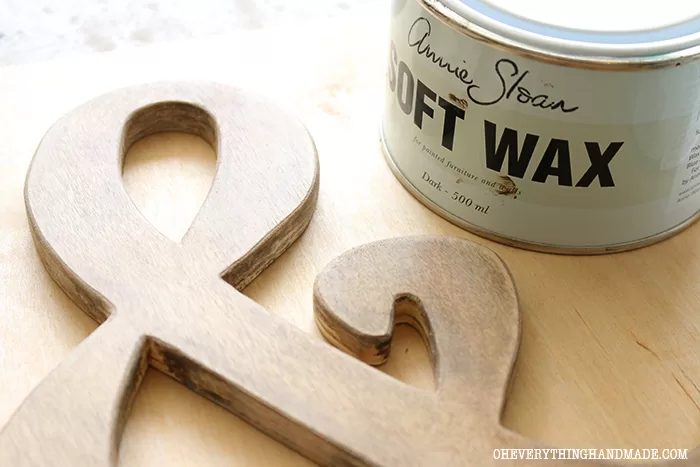
After the sign was smooth, I applied the weathered wood finish. Are you ready for this? You need an old rag, Annie Sloan dark wax, and white interior paint from Sherwin Williams. That’s it!
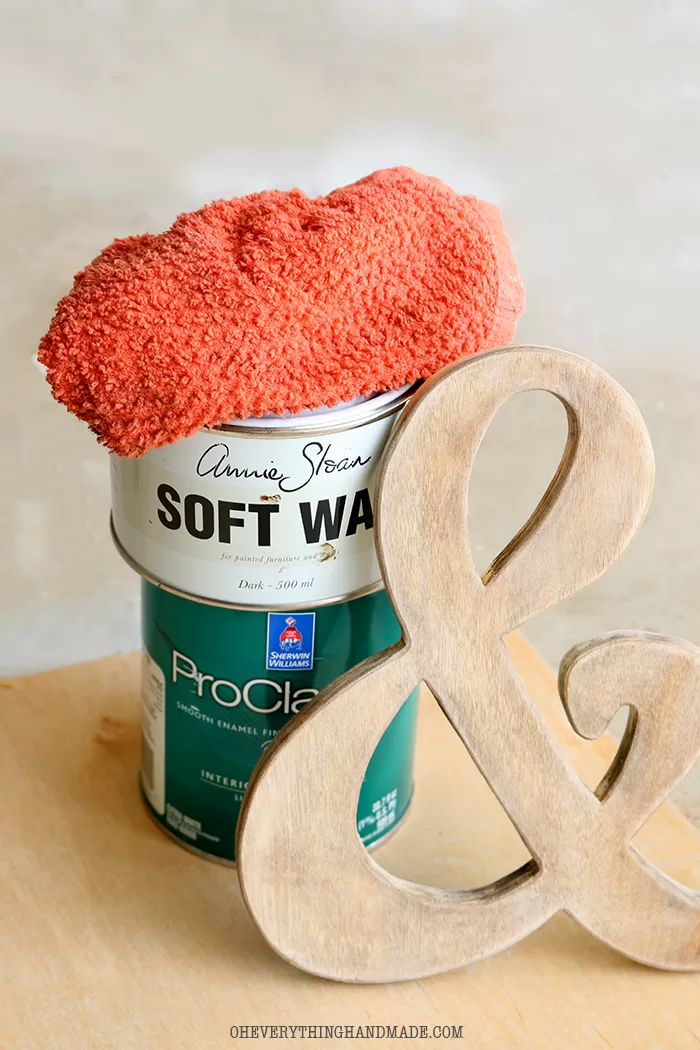
- Apply the dark wax over your entire sign, and wipe off all the excess wax (this wax will also seal your sign, isn’t that great!)
- Right after you’ve applied the wax, dip your rag into some white paint (I used the paint that was on my lid, it covered my entire sign), and wipe it lightly onto and off your sign until you’ve received your desired color.
- Let the sign dry (1-2 hours)
Step 8:
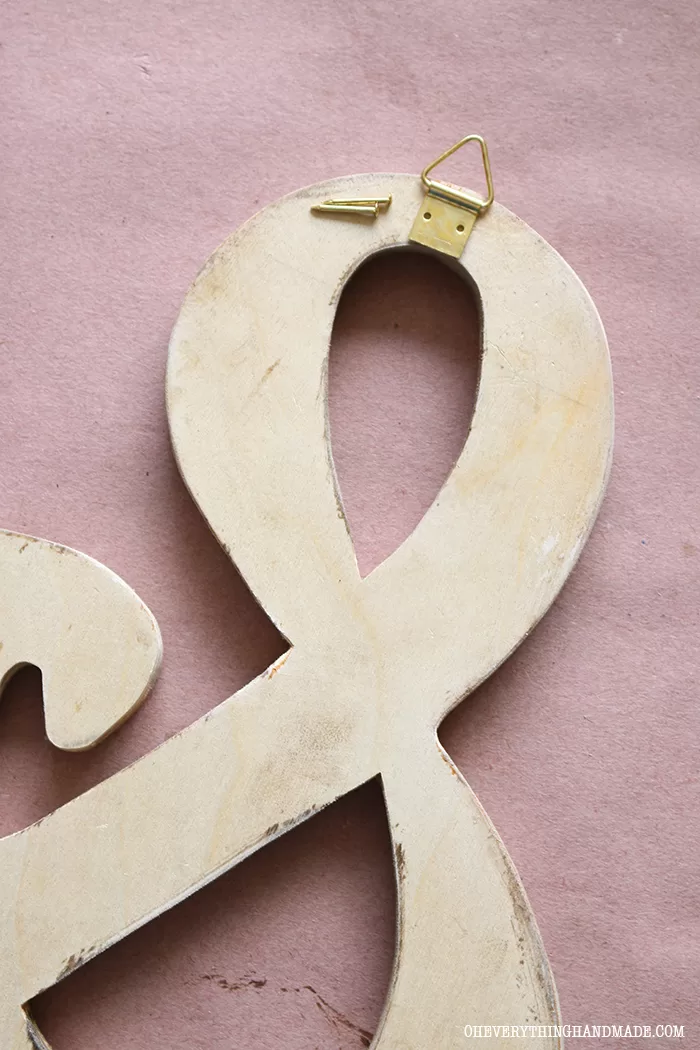
If you like to hang your sign, simply attach some hangers (you can find these at any craft store or Walmart)
Step 9:
Or, if you like to use your sign on a shelf as I did. You’ll need to cut out the base and finish it the same way you finished the ampersand sign.
I used two 1″ screws and pre-drilled holes into the base and the sign.

What’s your favorite wood-finishing method? And would you make a Weathered Wood Ampersand Sign?


Thanks for such detailed and useful instruction! I’ll try to create one, it looks really cool!
Glad you like it Polina, let me know if you should have any questions.
The article is very useful for me! Thank you)
Workshop is great! Thank you!